Strawberry Rhubarb Pie

Strawberry Rhubarb Pie with Ice Cream

I seem to be haunting Smitten Kitchen a lot these days, as this one is another of her recipes, updated and improved since she had the Strawberry Rhubarb Pie contest and didn’t come out so well.  Read the whole story on her blog–it’s in vintage Deb language, and I love reading it.  I was in the market, thinking about this pie, and luckily it was online, so I picked up the pound-and-a-half of rhubarb and the strawberries, then went home to make it.

Strawberries and Rhubarb

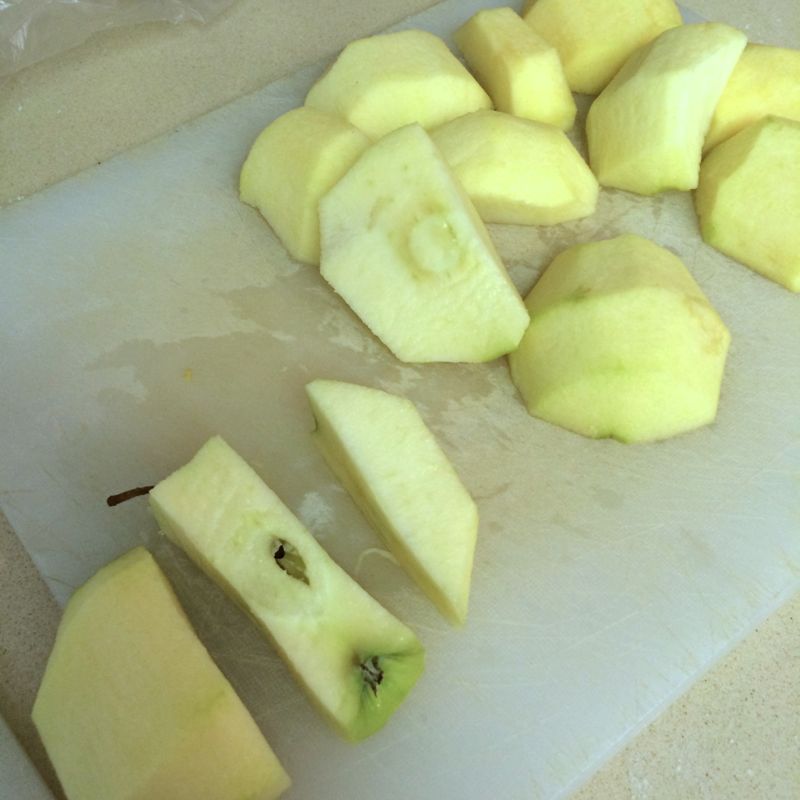
I’m sure hacking the rhubarb out of your own garden would be the Best Thing, but the local grocery store is the best I can manage, and it seems they only carry rhubarb for a very limited time, so I have to jump right on it, when it shows up.

Crust

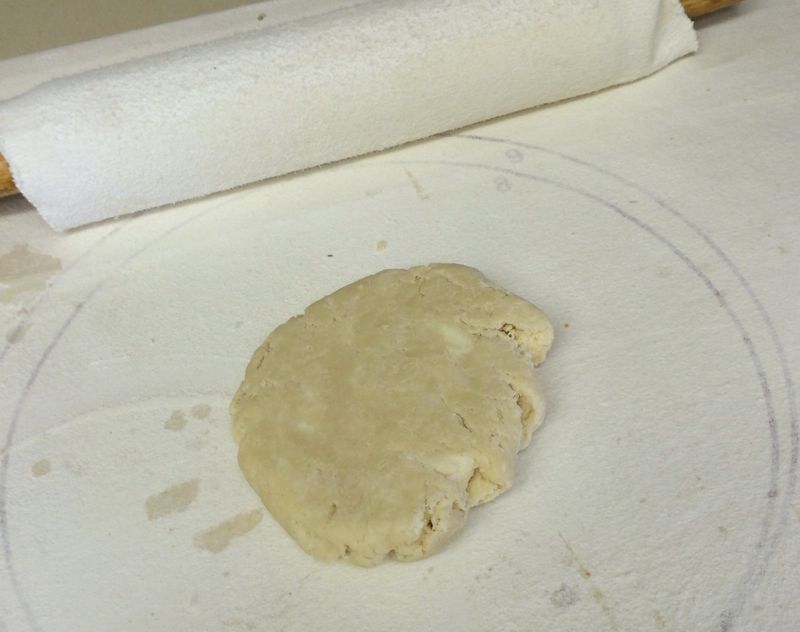
You’ll also need your favorite recipe for a two-crust pastry pie. Here’s my favorite: Quick and Easy Pie Crust.   AVOID those nasty pre-made pie crusts in the grocery store.  It’s quick and easy to make your own.

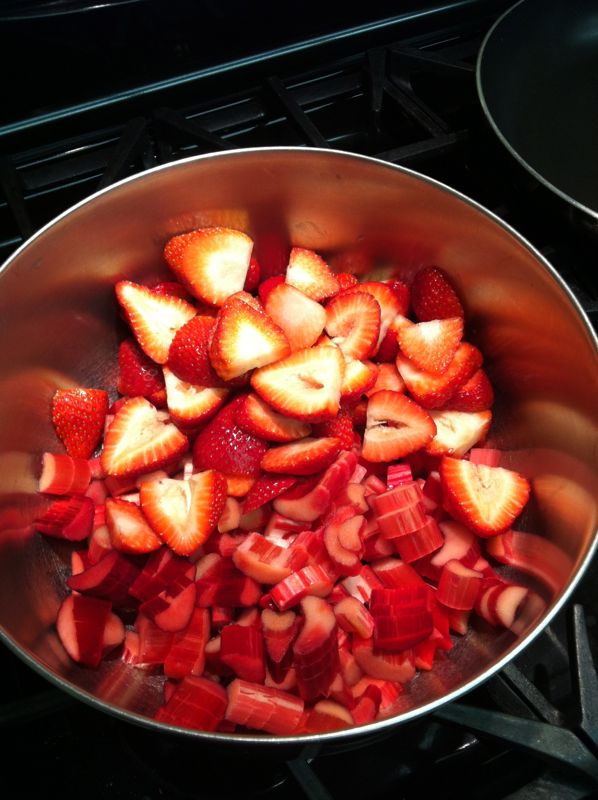
3 1/2 cups (about 1 1/2 pounds, untrimmed) rhubarb, in 1/2-inch thick slices
3 1/2 cups (about 1 pound) strawberries, hulled and sliced if big, halved if tiny
1/2 cup granulated sugar
1/4 cup light brown sugar
1 tablespoon lemon juice
1/4 teaspoon salt
1/4 cup quick-cooking tapioca
2 tablespoons unsalted butter, cut into small pieces
OPTIONAL: 1 large egg yolk beaten to blend with 1 teaspoon water (for glaze — see below)

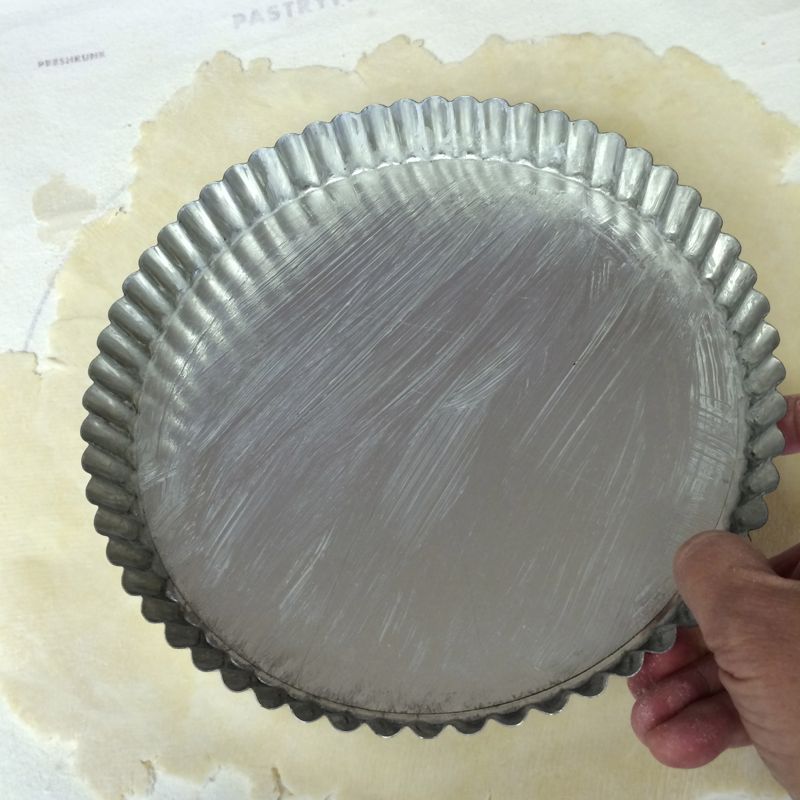
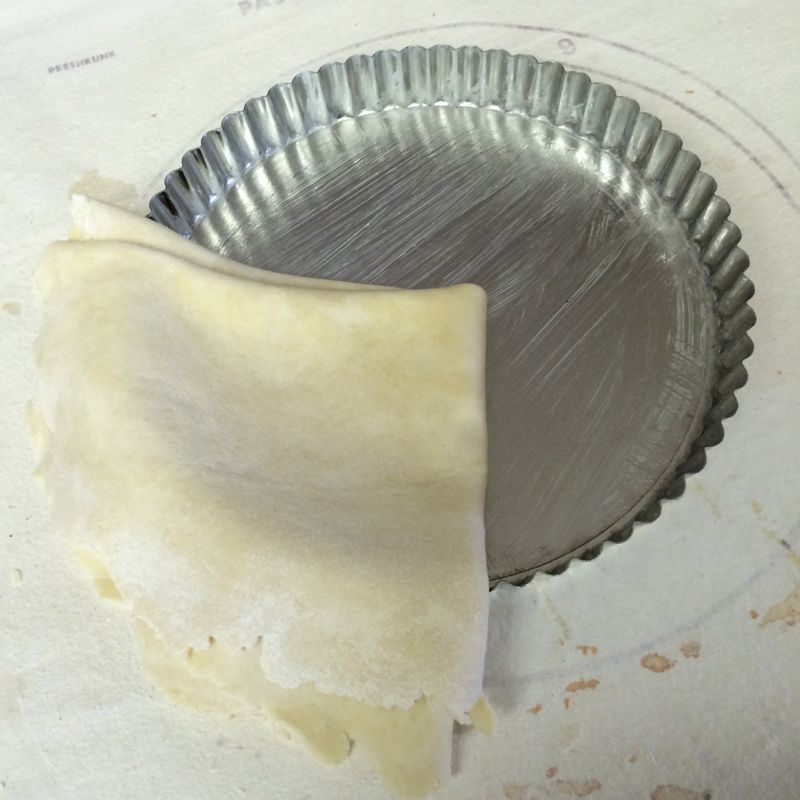
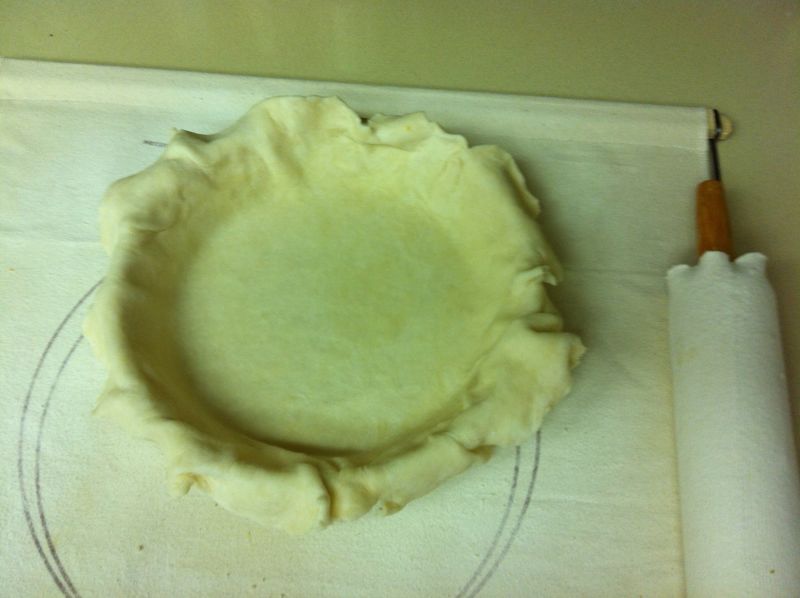
Preheat oven to 400 degrees. On a well-floured counter, roll half of pie dough into a 12-inch circle and carefully transfer to a 9-inch pie plate. (I like to roll it up over my rolling pin — gently — then lift it over to the pie plate and unroll it.  I then ease it into the plate.)

Strawberries and Rhubarb

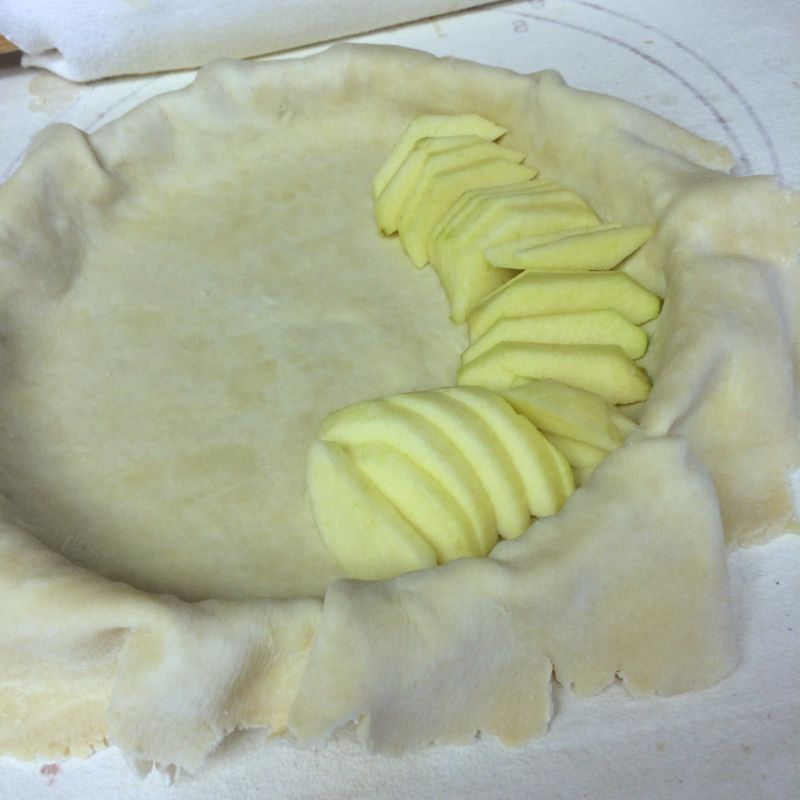
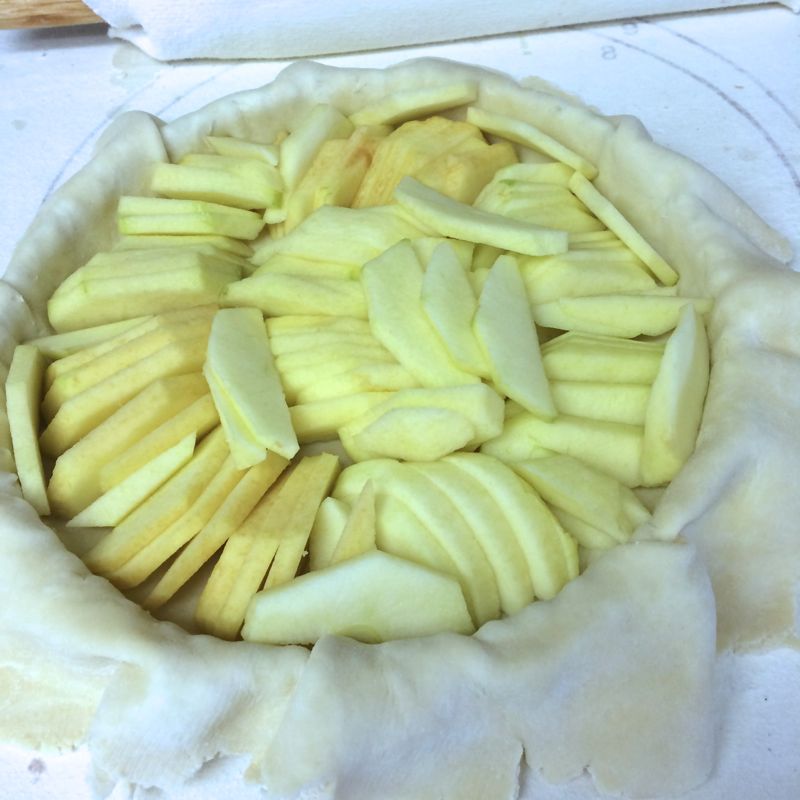
Stir together rhubarb, strawberries, sugars, lemon, salt and tapioca in a large bowl.

Filled with Butter Dots

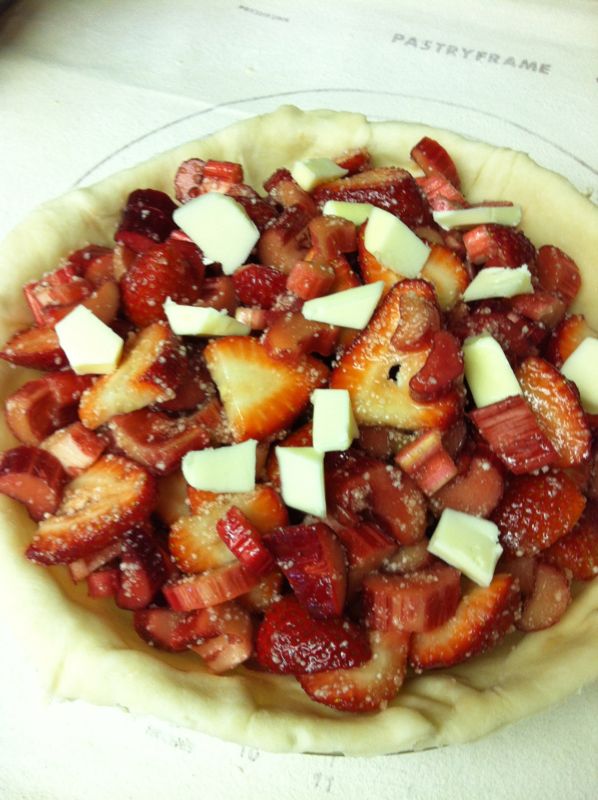
Mound filling inside bottom pie crust and dot with bits of unsalted butter. Trim bottom pie crust even with pie plate edge, then moisten the exposed edge by running your finger, dipped in water, over the dough.

Top Crust

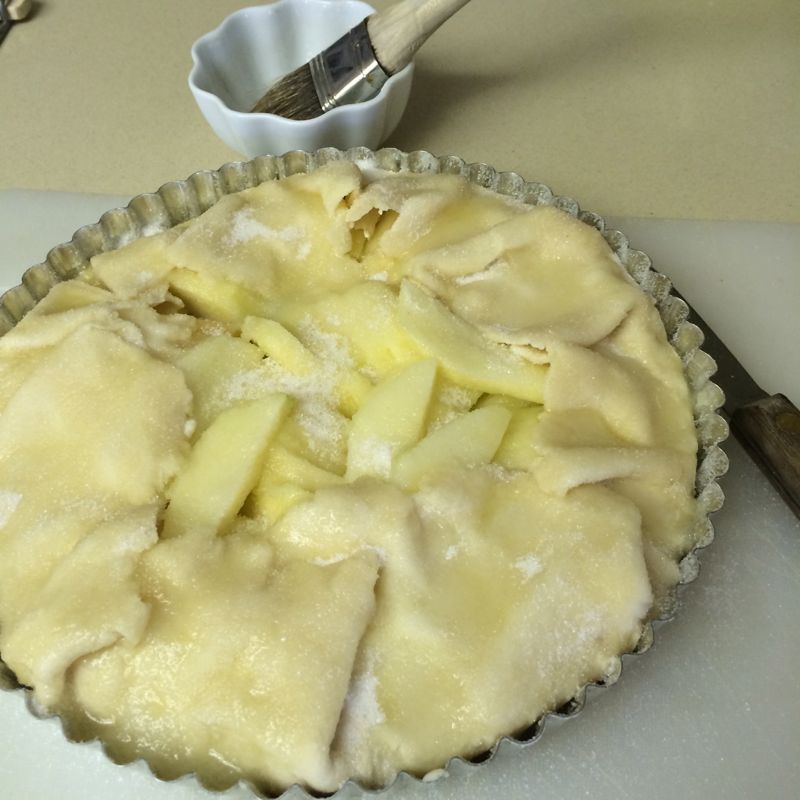
Roll second half of pie dough into an 11-inch circle and cut decorative slits in it. (I used a tiny heart cookie cutter for my vent holes.)  Transfer it to center over the pie filling, as above. Trim top of pie dough so that it hangs over the pie plate by 1/2 to 1.”

Prebaked Pie

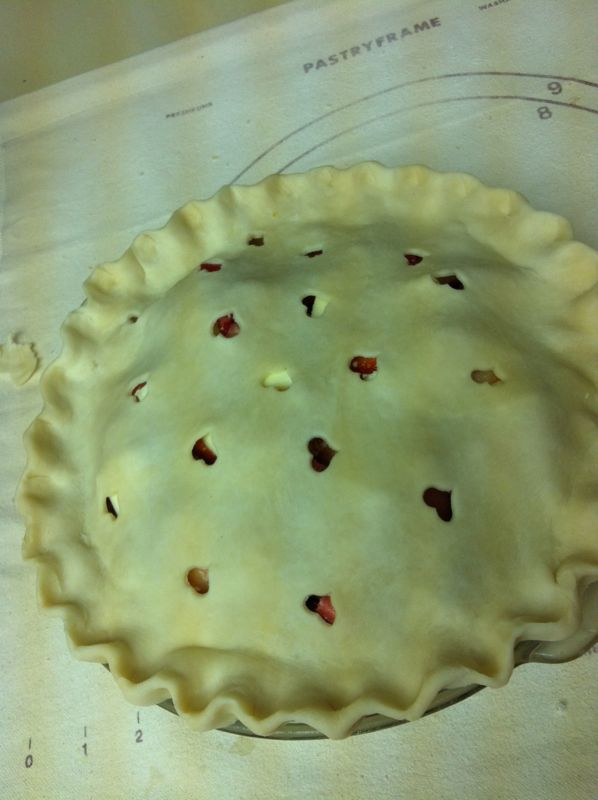
Tuck rim of dough underneath the bottom crust and crimp it decoratively.  (I sprinkle a little bit of sugar on top of the pie crust.  But others like to use the egg wash mentioned above.  Do one or the other.)

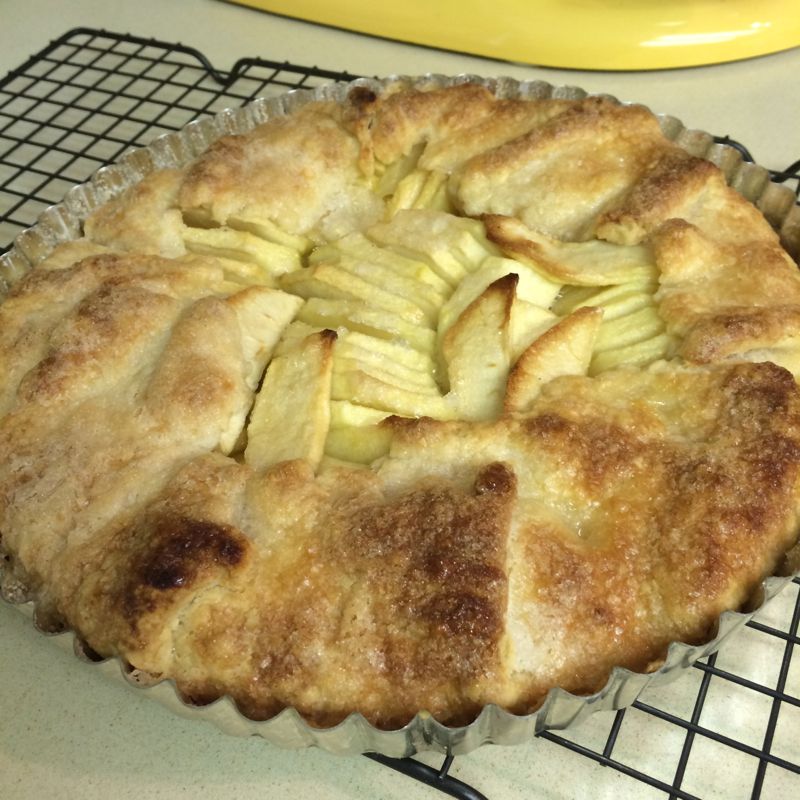
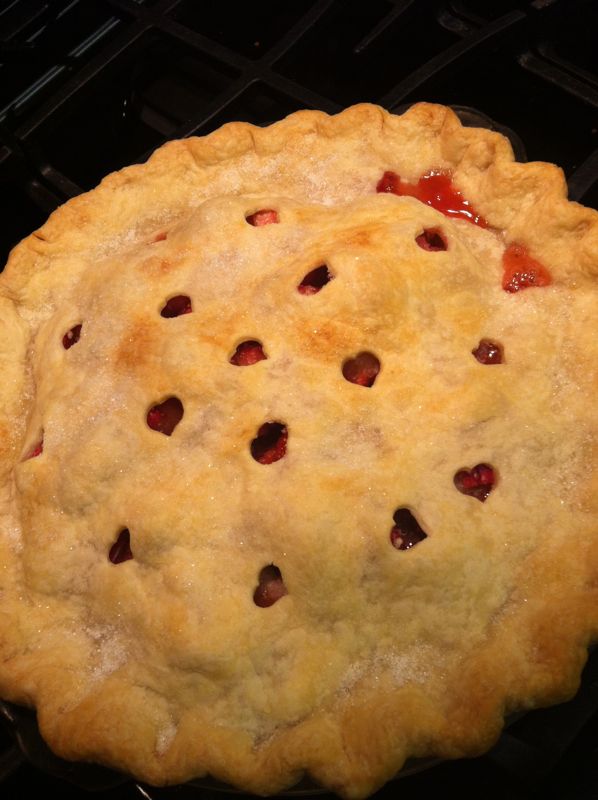
Place in preheated oven and bake for 20 minutes then reduce temperature to 350 degrees and bake for an additional 25 to 30 minutes, until the pie is golden and the juices bubble visibly.  Mine weren’t visible, so I lifted the pie to the stovetop, and listened — I could hear it bubbling.

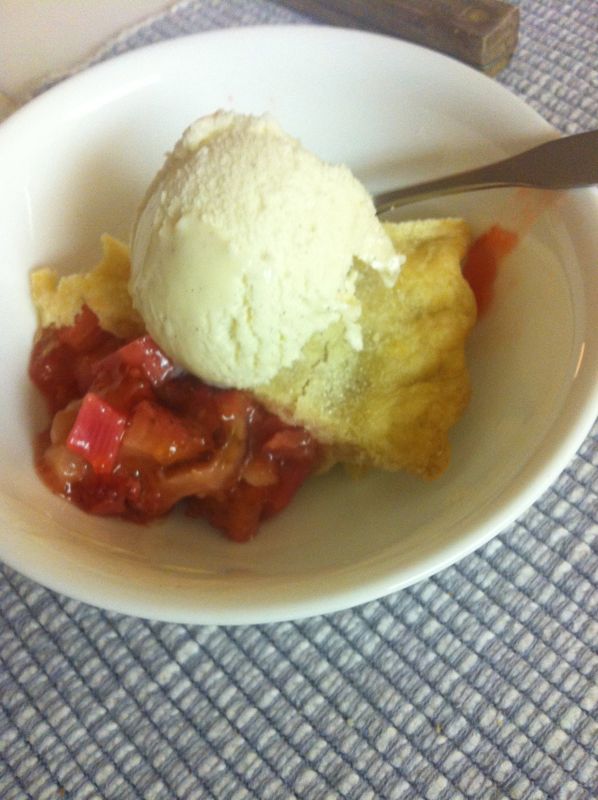
Transfer pie to wire rack to cool. When full cool (several hours later) the juices gel.

Strawberry Rhubard Pie

She notes that pie can be made 2-3 days ahead.  But why?  Make it fresh and eat it all up.

IMG_1885

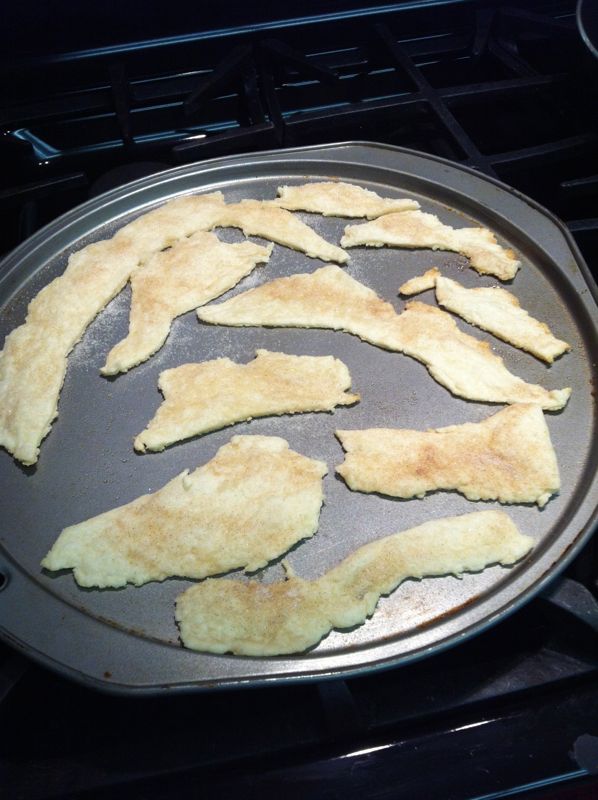
Something we like to do at our house is to place the cut pieces of pie dough on a cookie sheet, sprinkle with a mixture of cinnamon-sugar, then bake at 400 degrees until they are lightly golden, about 6 minutes.  We call them “crusties.”

Apple Galette

10_Finished Apple Galette

This recipe is another from the Smitten Kitchen website, who got it from Alice Waters, who got it from Jacques Pepin.  Smitten Kitchen calls it “Simplest Apple Tart,” but my husband, who lived two years in Belgium and France, calls it a “galette.”  I’m going with his title.

1_Cut Apples

I learned to cut chunks of apple like this from my sister Christine, a stellar cook who taught me a lot of Kitchen Truths.  None of this coring business–just whack if off from around the core. Now on to the recipe.

Dough:
1 cup (125 grams) unbleached all-purpose flour
1/2 teaspoon (2 grams) sugar
1/8 teaspoon salt
6 tablespoons (3/4 stick or 85 grams) butter, just softened, cut in 1/2-inch pieces
3  1/2 tablespoons (50 ml) chilled water

Filling:
2 pounds (910 grams) apples (Golden Delicious or another tart, firm variety), peeled, cored (save peels and cores), and sliced
2 tablespoons (30 grams) unsalted butter, melted
5 tablespoons (65 grams) sugar

Glaze:
1/2 cup (100 grams) sugar

˚˚˚˚˚˚˚˚˚˚˚˚˚˚˚˚˚˚˚˚˚˚˚˚˚˚˚˚

To make the dough:  Mix flour, sugar, and salt in a large bowl; add 2 tablespoons of the butter. Blend in a mixer until dough resembles coarse cornmeal. Add remaining butter; mix until biggest pieces look like large peas.

3_Galette Dough

Add a bit of water, toss, then add a little more water, until dough just holds together. Toss with hands, letting it fall through fingers, until it mostly holds together. If too dry, that is — it won’t be gathered into a ball — add another tablespoon water. Keep tossing until you can roll dough into a ball. Flatten into a 4-inch-thick disk and slip into a ziploc bag and then refrigerate. After at least 30 minutes, remove. Let soften so it’s malleable but still cold. On a lightly floured surface, roll into a 14-inch circle about 1/8 inch thick.

5_Greased small Tart Pan

I held up my pan to make sure it was the right size.

4_Dough Into Pan

Place dough in a lightly greased 9-inch round tart pan.  (You can go free-form, by simply using a parchment-lined baking sheet if you wish; that’s where my husband gets the name “galette”). Heat oven to 400°F.

6_Filling the Tart

And now the filling: Overlap apples on dough in a ring up to the sides if using the tart pan (or 2 inches from edge if going free-form). Continue inward until you reach the center.

7_Filled Tart Pan

I lay another layer in the center, as the first time I made it, the center collapsed.  I sprinkled some granulated sugar lightly over the apples, about 1 Tablespoon.  Then fold any dough hanging over pan back onto itself; crimp edges at 1-inch intervals.

8_ Brush with Butter

Brush melted butter over apples and onto dough edge. Sprinkle the remaining sugar over dough edge and apples.

Smitten Kitchen notes that if you can’t get that much sugar onto the apples, that’s fine, as it makes a lightly tart/sweet dish that way.  (I think by putting one Tablespoon on before folding the dough back, I was able to get all of my sugar on.)  And here’s my true confession: I forgot the butter and sprinkled the sugar all over everything, THEN remembered the butter.  So I just slathered on top of the sugar.  My first one of these I did it correctly, but they both turned out in the end to have the same amount of deliciousness.

10_Finished Apple Galette

Bake in center of 400-degree oven until apples are soft, with browned edges, and crust has caramelized to a dark golden brown (about 45 minutes), making sure to rotate tart every 15 minutes. Yes, do that.2_Apple Peelings to cook

In the meantime, while the galette/tart bakes, make the glaze by putting the reserved peels and cores in a large saucepan along with sugar. Pour in just enough water to cover; simmer for 25 minutes.

9_Appley Juice

She notes to strain syrup through cheesecloth. But I just used a pastry brush from the pan, pushing the peels to the side to get at the syrup.

Remove tart from oven, and set onto cooling rack. Let cool at least 15 minutes. (If you made the free-form galette, slide the parchment paper-with-galette onto the rack.)

Brush glaze over tart, slice, and serve.

Two-cup Measure

And just asking. . . but why don’t they make two-cup measures like this anymore?  It’s a treasure.

Fennel and Blood Orange Salad

Fennel Blood Orange Salad

I found this on Smitten Kitchen, who found it on the New York Times.  When I went looking for my typed file today, I found that it had been published in 2002.  I can’t believe it took me that long to finally try it and put it up here on the blog.  Well, don’t you wait that long.  It’s easy and quick and has miles and miles of flavor.

FENNEL AND BLOOD ORANGE SALAD
By Kurt Gutenbrunner
Published: January 23, 2002
Time: 30 minutes

1/4 cup very coarsely chopped walnuts
1 teaspoon walnut oil
1 medium-large fennel bulb, leaves and stems trimmed off
Salt and freshly ground black pepper
Juice of 1 lemon
2 large blood oranges
1 tablespoon paper-thin shallot slices
10 mint leaves
2 tablespoons extra virgin olive oil
1 teaspoon lime zest

1. Place walnuts in dry skillet and cook over medium heat, stirring, to toast. Toss with walnut oil, and set aside.

2. Slice about 1/2 inch from bottom of fennel and discard. Slice fennel very fine on mandoline, starting with flat bottom side. Put in a bowl. Season with salt and pepper, and add lemon juice.Fennel Blood Orange Salad_1

3. Trim all peel and pith from oranges. Holding peeled fruit over bowl containing fennel, use sharp knife to cut sections from membrane. Let them drop into bowl. Squeeze remaining membrane over bowl to add remainder of juice. Discard membrane.  (This is how it looks before tossing it with everything else.)

4. Add shallots, mint leaves, olive oil and reserved walnuts. Toss gently. Sprinkle on lime zest, and serve perhaps as a first course with smoked salmon or as a side dish with grilled fish..

Yield: 3 servings.