How did I learn about this recipe? My friend Andrea made this cake for her birthday. She’s a remarkable woman, always making some new delicious confection for her birthday. She tries a new one each year, and I love reading on her Facebook posts what she’s chosen for that year. The reason this cake intrigued me? She wrote about this right as I was asked to be in charge of the food for our Women’s Conference (300 people!). I hit on the idea that instead of making a three-layer cake, I’d keep the layers single, and glaze them with the chocolate ganache and serve them that way. Instead of serving 10 with one recipe, I could serve 30 (although they may all be fighting over any leftovers on the table).
To prepare, I made them last night. I wasn’t too sure about this, until I had brushed on the “orange jam” and coated them with the chocolate ganache. Oh, my! Another cooking friend, Wendy, agreed to be my partner in desert-crime and help me make batches and batches of this for the conference. So, thanks, Andrea for the idea and thanks, Wendy for always including me in your food adventures. Here’s one for you.
Yield: Serves 10 Originally published in Bon Appetit, March 1999. My changes are listed below.
Ingredients for Cake
3 large oranges
2 cups plus 2 tablespoons all purpose flour, divided
1 cup whole almonds
2 teaspoons baking powder
1/2 teaspoon salt
2 cups sugar
1 cup unsalted butter, room temperature
4 large eggs
1 cup whole milk
1/2 teaspoon vanilla extract
1/4 teaspoon almond extract
Ingredients–Orange “Jam”
1 1/2 cups fresh orange juice–approximately 3-4 oranges. Use the juice from the three peeled oranges (above). I had to add one more orange to get the juice I needed.
generous 1 tablespoon sugar
Chocolate Ganache Icing (click on link, or see below)
Additional whole almonds, small orange-slice triangles and mint leaves for garnish
Preparation
Preheat oven to 350°F.

Place pan on waxed paper, and using scissors, trace around the pan. Cut out three layers of wax paper on the circle line.

Grease (or butter) the bottom and sides of three 9-inch-diameter cake pans with 1 1/2-inch-high sides. Place the wax paper circle in the bottom of the pan and grease that. Dust with flour; tap out excess. I say to grease the sides, because a) it comes out easier, and b) it’s prettier if you are using the cake as a single layer.

Using vegetable peeler, remove peel (orange part only) in strips from oranges. Coarsely chop enough peel to measure 1/2 cup.

Combine flour, 1 cup almonds, baking powder and salt in food processor; blend until finely ground. Transfer to medium bowl.
 Place 2 cups sugar and orange peel in processor (left); blend until peel is finely minced (right).
Using electric mixer, beat butter in large bowl until blended. Add sugar mixture and beat until fluffy. Beat in eggs 1 at a time. Mix milk and both extracts in small bowl. On low speed, beat flour mixture into egg mixture alternately with milk mixture in 3 additions each.

Divide batter among prepared pans. It’s pretty thick. Smooth it out.

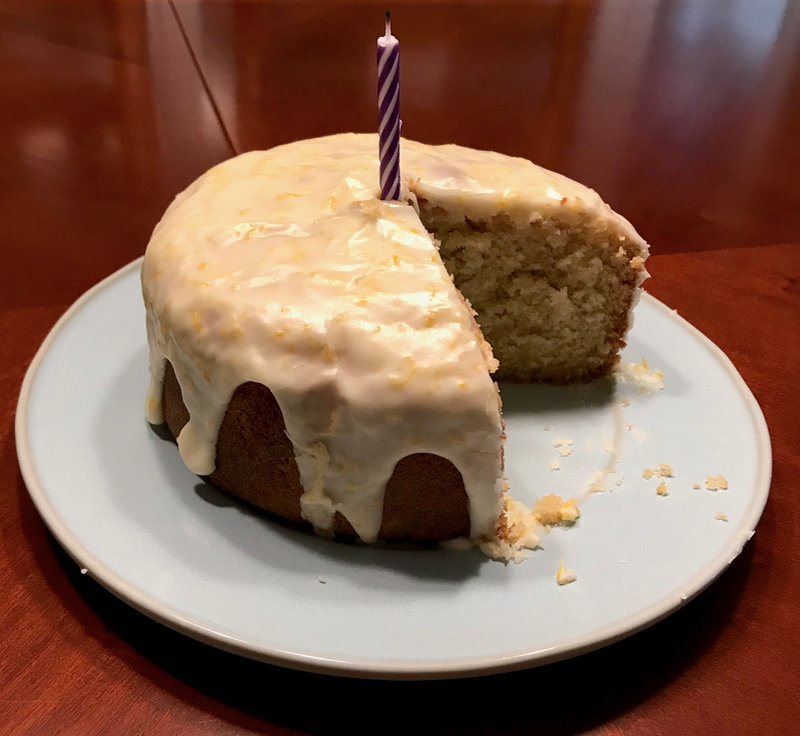
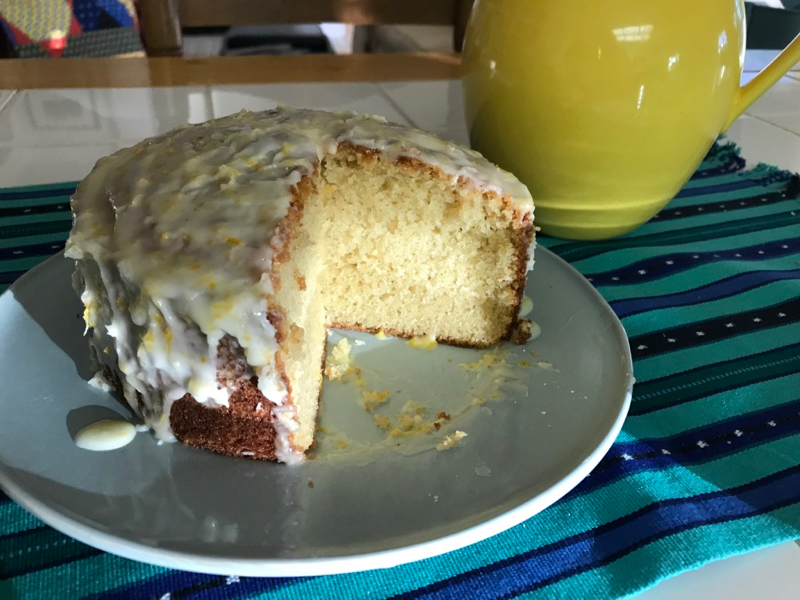
Bake cakes until tester inserted into center comes out clean, about 25 minutes, and cakes begin to pull away from sides (touch test with finger didn’t work).Don’t overbake. Cool cakes in pans on racks 8 minutes. Loosen cake around edges with narrow spatula, then turn cakes out onto racks, remove wax paper from bottom, and cool completely. They are a bit fragile when warm.

Boil 1 1/2 cups fresh orange juice and remaining generous 1 tablespoon sugar in small saucepan until reduced to 1/2 cup, about 15 minutes (watch carefully and stir occasionally). Brush warm juice mixture over tops of cooled cakes.

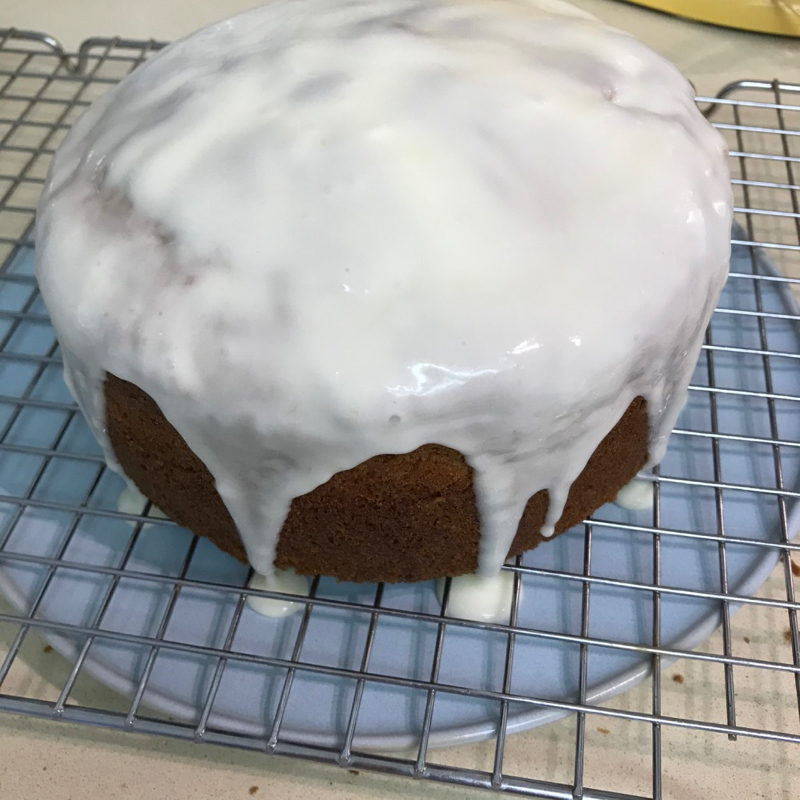
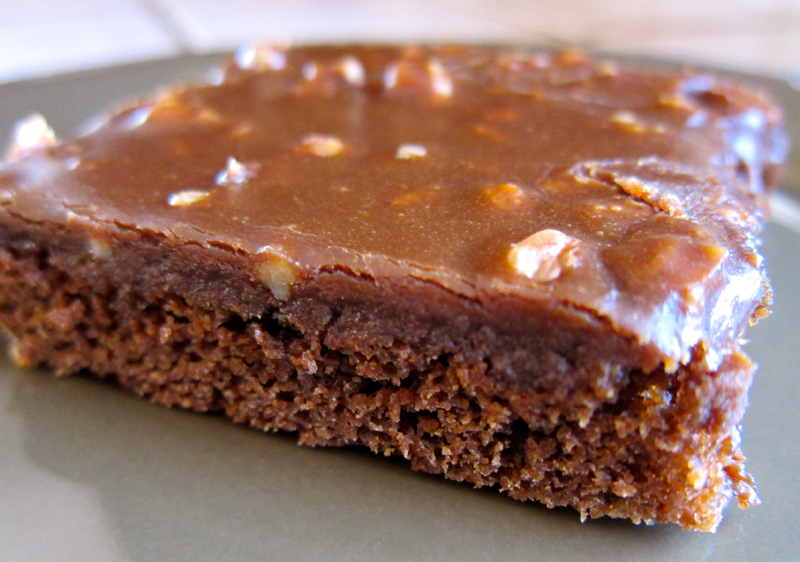
For the Women’s Conference, I poured about 1/2 cup warm ganache over the cake and using an off-set spatula, smoothed it over the cake, letting it run down the edges (I had them on a rack to do this, although not that much dripped over that you couldn’t just do it on a plate). If you need more icing on the edges, smooth some on with the spatula. It makes a silky-looking glaze, but who cares how it looks? It is delicious, and sets up after about 30 minutes. Transfer to plate, decorate with almonds and oranges, or whatever you choose.
 Their photo, in a three-layer cake version:
Place 1 cake layer, orange syrup side up, on cake platter. Spread 1 cup Chocolate Icing over. Top with second cake layer, then 1 cup icing. Top with third cake layer, syrup side up.
Spread remaining icing over top and sides of cake. (Can be prepared 1 day ahead. Cover with cake dome and store at room temperature.)
Arrange additional almonds, orange triangles and mint leaves around top edge of cake. Slice cake and serve.
Chocolate Icing also from Bon Appétit, March 1999
Yield: Makes about 4 cups–enough for two batches of cake. If you are only making one cake, I advise you to double-glaze it, or else cut the ingredients down by at least 1/3.
Ingredients
1 3/4 cups whipping cream
3/4 cup unsalted butter
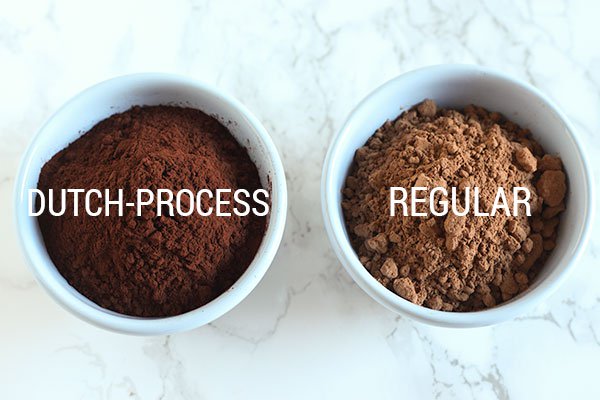
6 tablespoons unsweetened cocoa powder (I used Dutch cocoa)
4 1/2 tablespoons light corn syrup
8 ounces bittersweet (not unsweetened) chocolate chips (I used Guittard)
8 ounces semisweet chocolate chips
1 1/2 teaspoons vanilla extract
1/2 teaspoon (scant) almond extract
Preparation
Whisk first 4 ingredients in medium saucepan over medium heat until butter melts and mixture comes to simmer. Remove saucepan from heat. Add chocolate and both extracts. Whisk until chocolate is melted and smooth. I glazed my single layer cakes while it was still warm, but if doing the triple-layer cake, refrigerate frosting until slightly thickened but still spreadable, stirring occasionally, about 45 minutes.
Note: the original recipe called for 16 ounces bittersweet, but in reading the comments from the reviewers, they all said to go with a mixture. I did. Yummy! You’ll be fighting over who gets to lick the pan.

 Since this is one of those recipes that my mother gave to me, probably about thirty-five years ago, you can imagine my disgust when a famous cowboy-cookbook-authoress put it in one of her cookbooks and claimed it as her own. I don’t even think she was born when this started making the rounds.