Focaccia • 2023

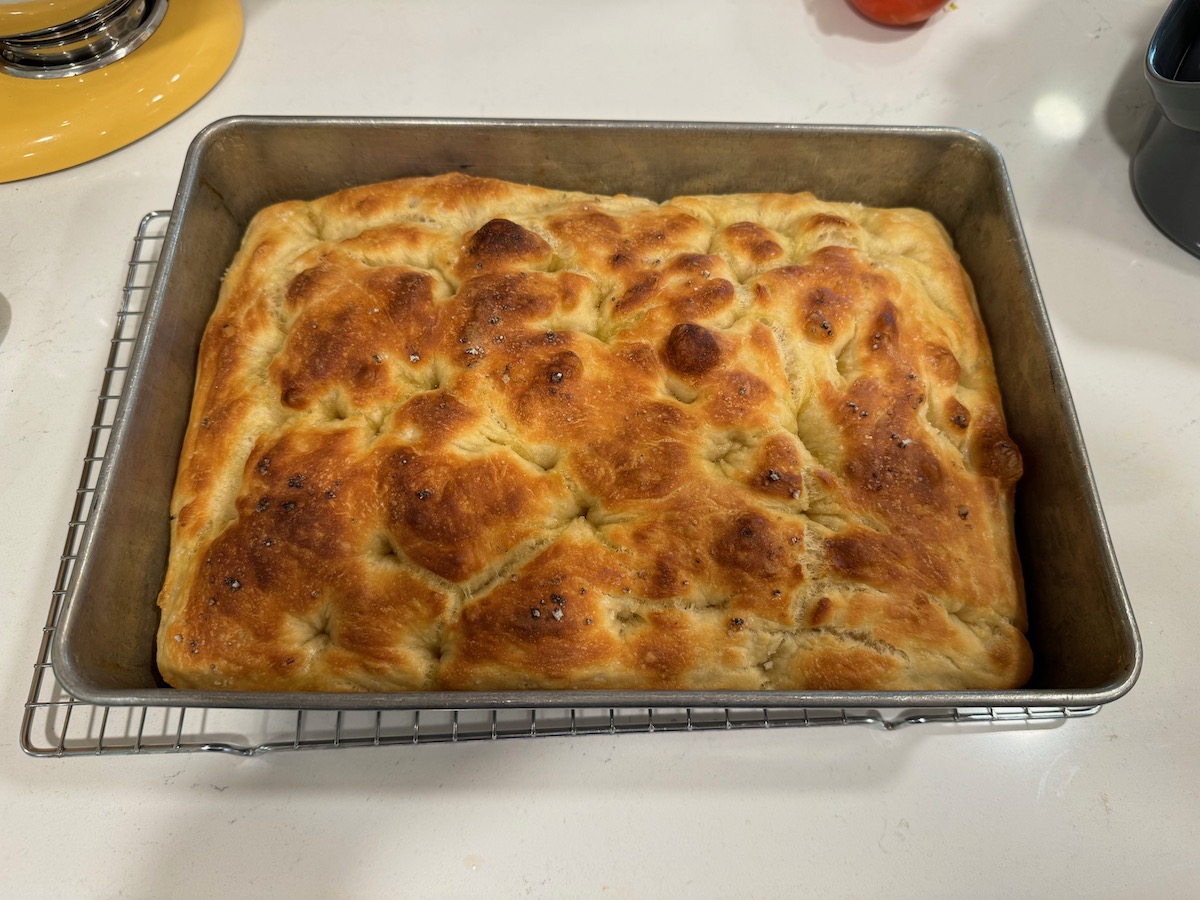
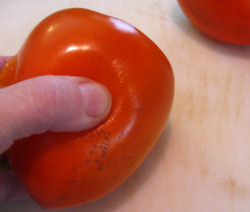
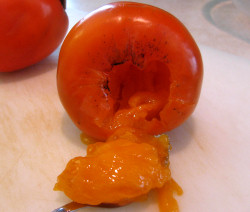
First, the photos that inspired my search for a decent focaccia (unhappy as I was with the version that used to be on here).

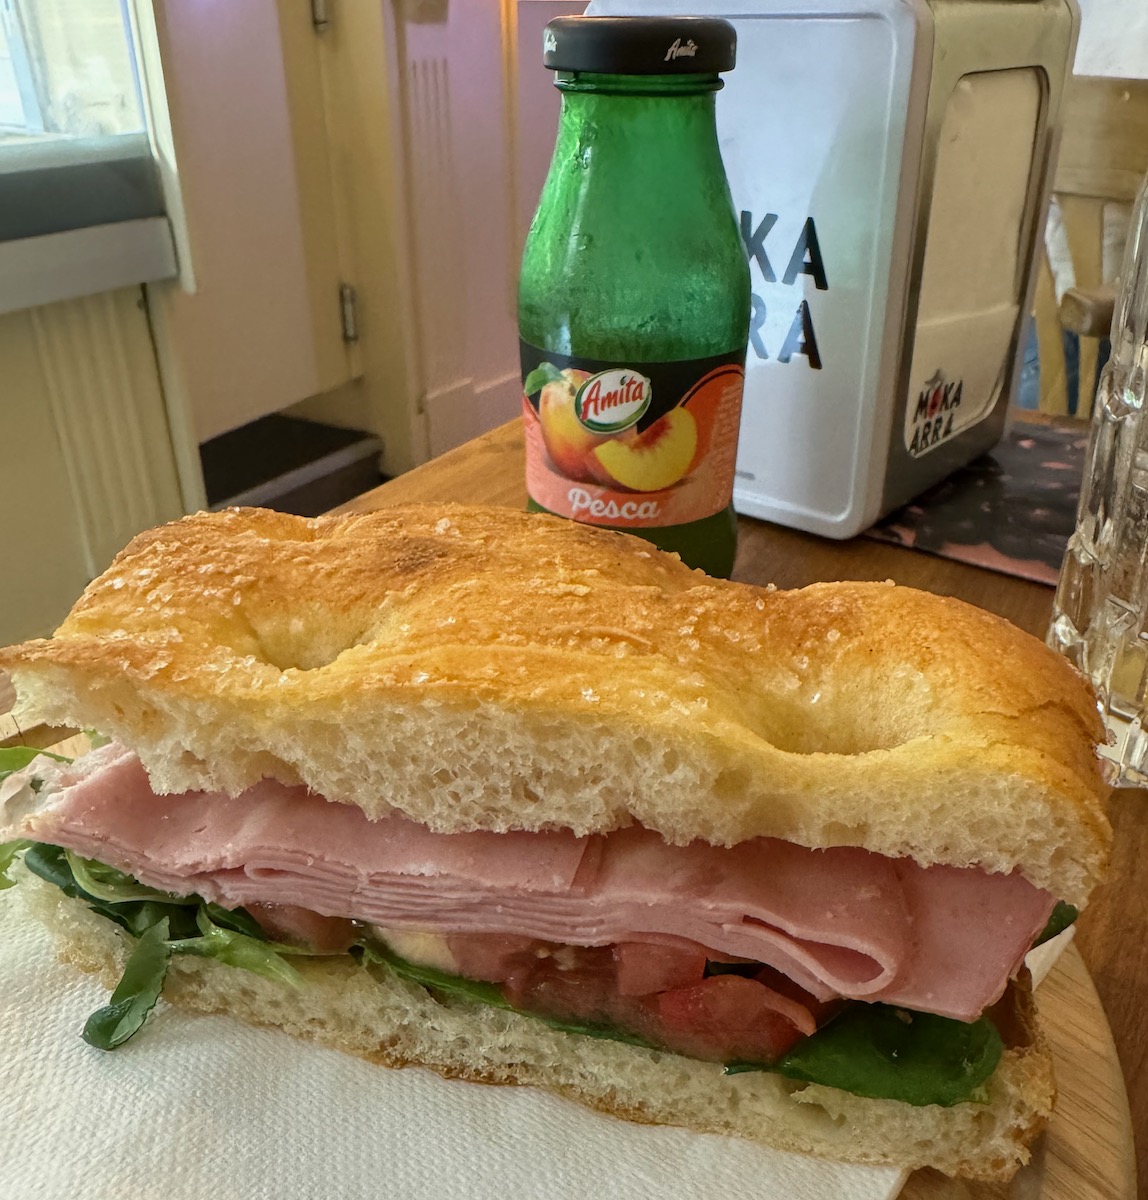
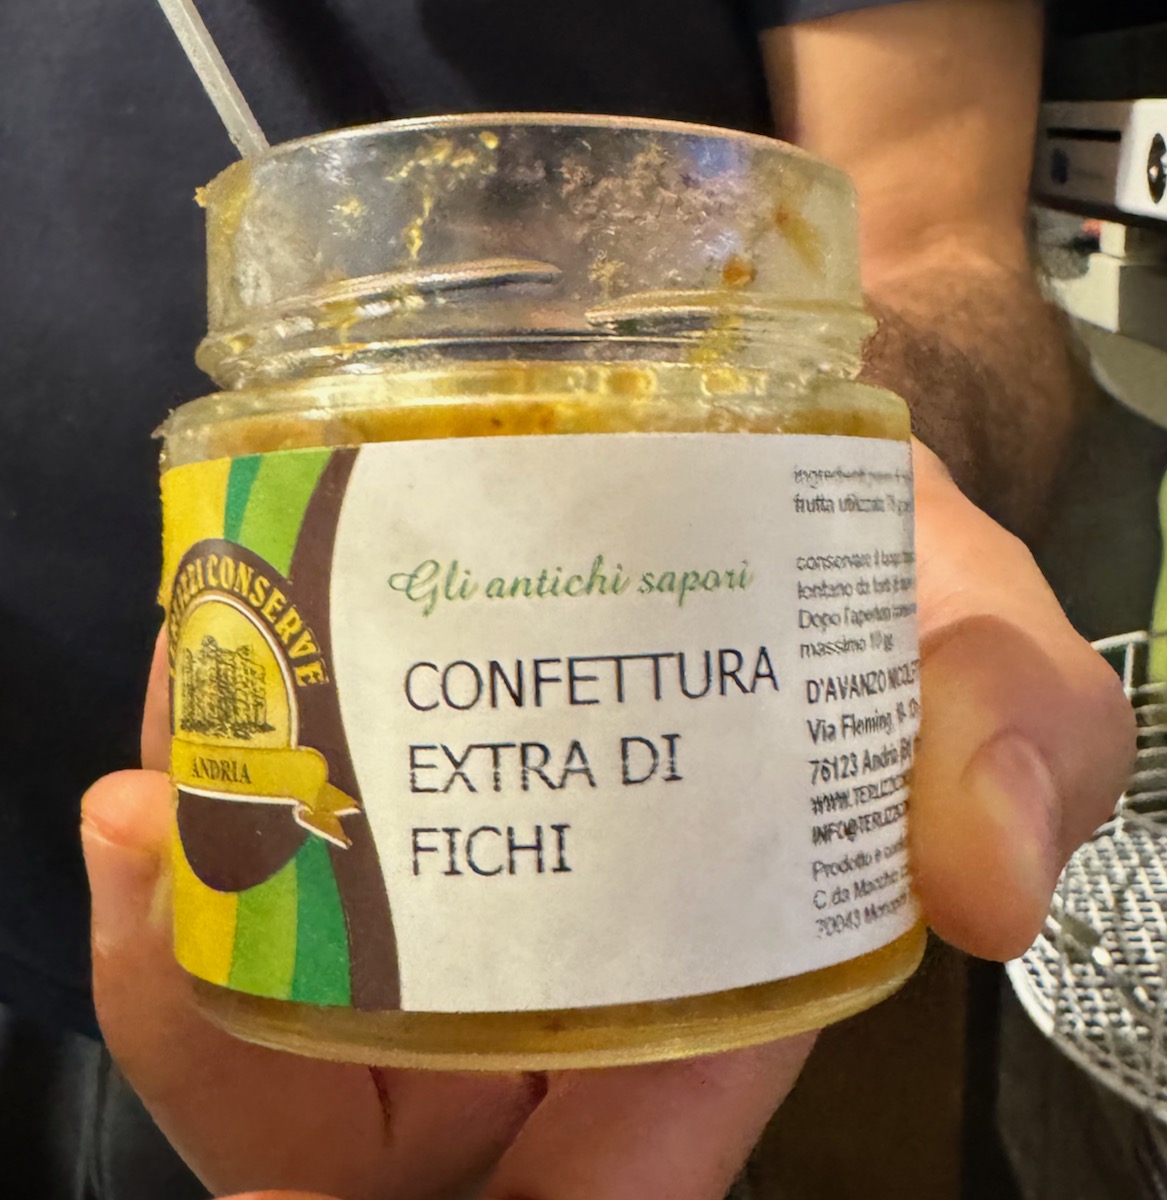
We spent some time recently in Bologna, and most all the focaccia bread we ate was light, moist and spongey. The mortadella, tender and flavorful, was a perfect filling, and at one place, the maker spread fig jam on the sandwich. Divine!

So I’ve looked at roughly 15 different recipes, and the one that comes closest is the one from Cucina by Elena. She does a great job of explaining everything, and you’ll want to linger on her blog to taste all her other recipes.

But, as usual, I started tinkering with it, and now I have the one I want to make, inspired by, and a derivation of hers (which, in turn, was a derivation of another baker’s). This is how it works in focaccia land.

(our friend, Landon)

The timing is this is simple: Stir up the basic ingredients in the evening. Cover with plastic wrap and let sit all night in the fridge. In the morning, prepare the pan, plop the dough into it, let rise 2-4 hours, depending on the temperature of your kitchen. You’ll be eating focaccia by lunch. Which I recommend.

Ingredients

625 grams all-purpose flour (approx 5 cups)
1 scant tablespoon sugar
1 package, or 2 1/4 teaspoons regular dry yeast
1 Tablespoon kosher salt
2 1/3 cups warm water (105- 110 degrees Fahrenheit; no hotter or you will kill the yeast)
6 tablespoons good-quality olive oil
a couple of pinches of flaky salt, about 3/4 teaspoon, for the top after baking

Method

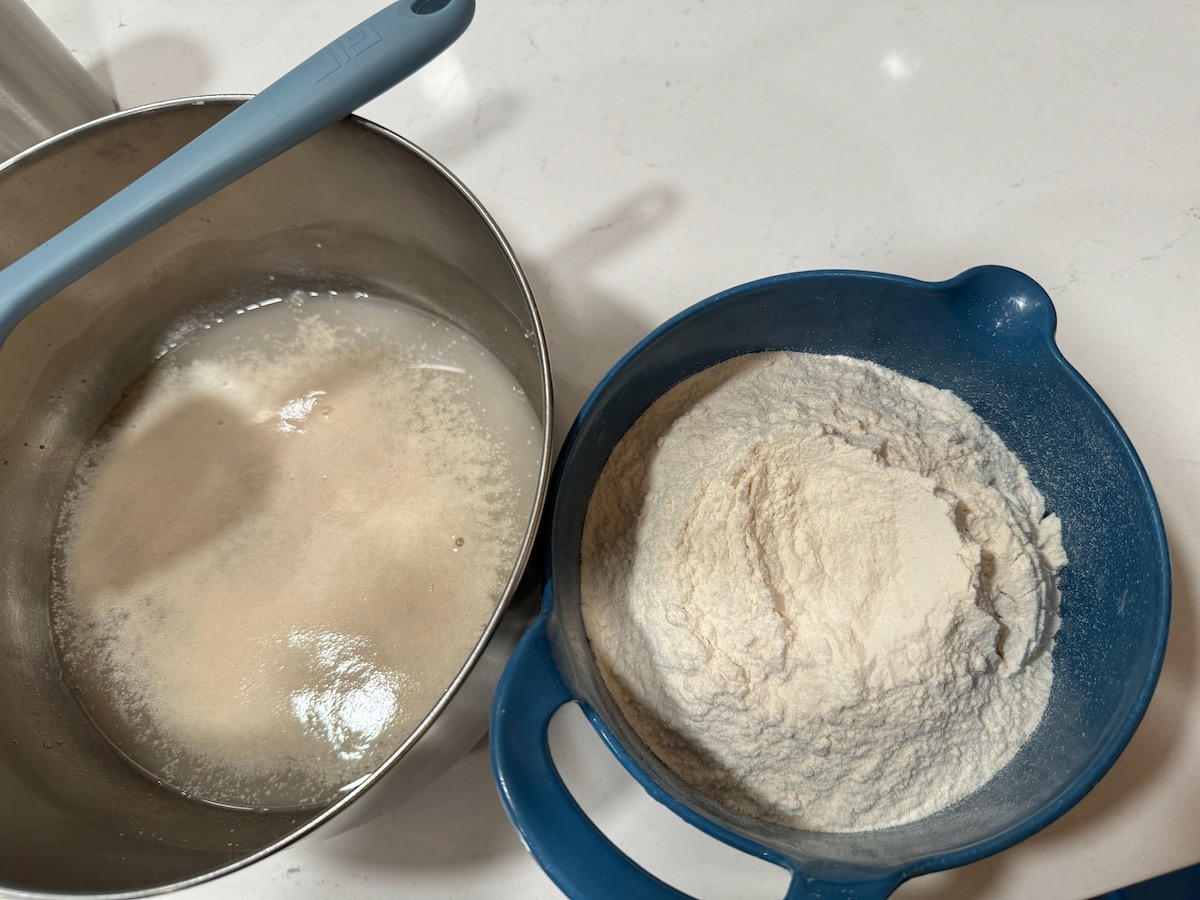
  1. In a medium sized bowl (blue one, shown above), measure out 625 grams of flour, using a scale (approximately 5 cups). Set aside.
  2. In a larger bowl (silver), add 1 scant tablespoon table sugar (12 grams), the 2 1/3 cups of water and 2 1/4 teaspoons yeast (1 package or 7 grams). Give it a small stir. Then let yeast/water/sugar mixture take time to proof. The brew should bubble up, and look cloudy, as in the bowl on the left.
  3. When ready, add 1 Tablespoon kosher salt (if using table salt, no…just don’t) to the water/yeast mixture, then all of the flour. Mix until all the water is incorporated. If needed, add another tablespoon or two of water. Don’t overmix, but make sure there are no dry spots.
  4. In a separate large bowl, pour in about 4 tablespoons good-quality olive oil. I just swirl in four circles of olive oil, that look close to a tablespoon Scrape in your focaccia dough, turning to coat all sides. (This bowl needs to be at least double the size of your dough.)
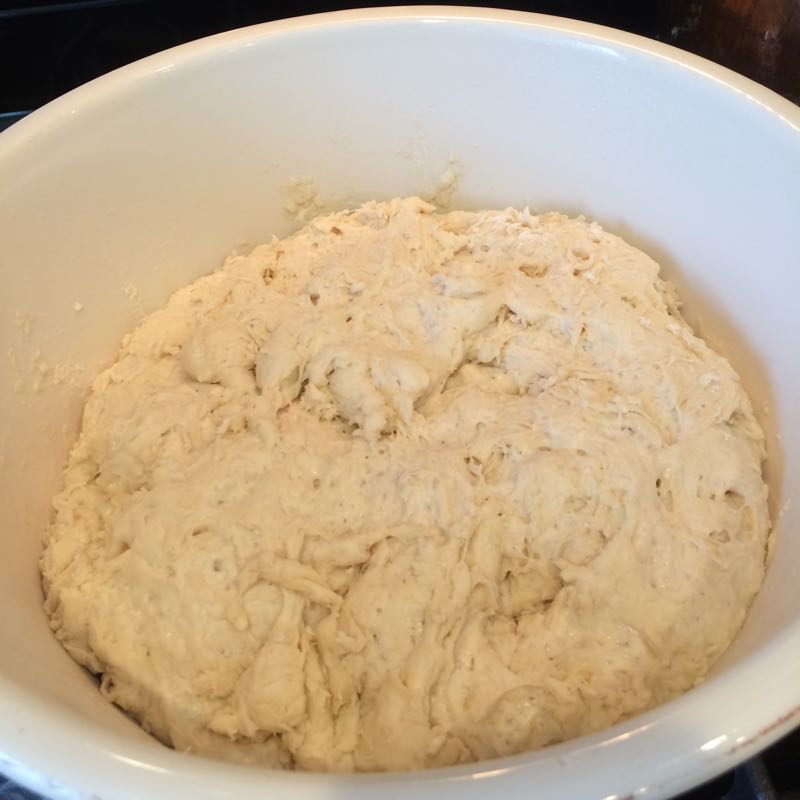
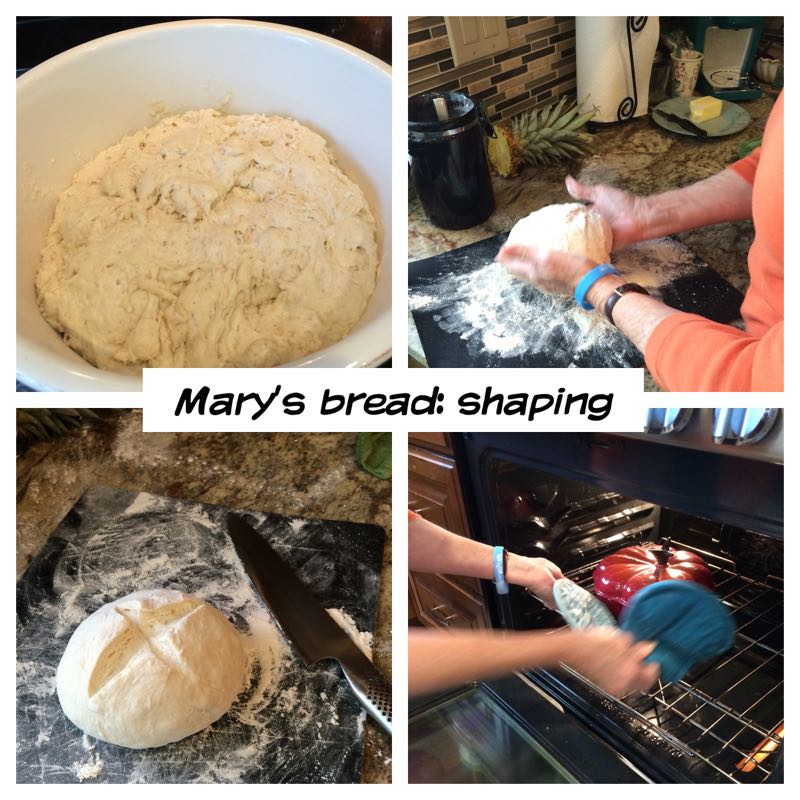
  5. Cover with plastic wrap and put into refrigerator for at least 8 hours, preferably overnight. When you take out the dough, it looks lively and wet. This is a high hydration bread dough (about 77%); you want that. One focaccia maker that I read uses a folding technique in the early stages of her bread. I skipped that: I’m all about easy.
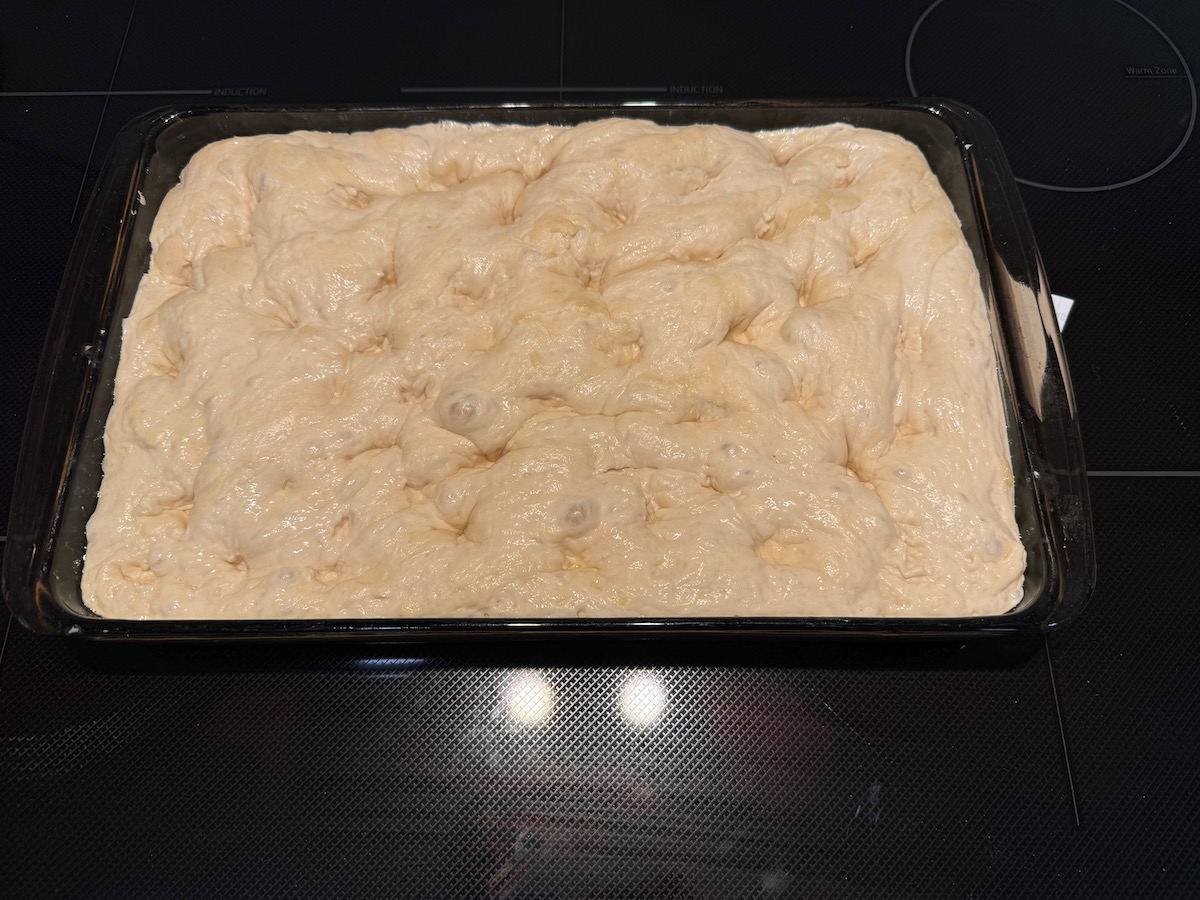
  6. In the morning (or many hours later), and using real butter, grease a metal 9 x 13 pan on the bottom and sides. (I peel back the paper on a stick of butter and use that to stroke the pan.) Then add about a tablespoon or two of good-quality olive oil to the pan and brush on the sides and bottom. (Set brush aside for use at the end.)
  7. Ease dough into prepared pan, and kind of poke and stretch it to fit, but not worrying if it doesn’t. Let rise, uncovered, for 2-4 hours. [I took mine out at 8 a.m. and by 11:00 a.m. it was ready to bake.] It will have nearly doubled in size, and the dough will fill the pan and corners. You might see some bubbles, too.
  8. Preheat oven to 450 degrees Farenheit. Pour a little olive oil onto clean fingers, and coat with the oil. Now with all fingers in action, poke the dough, leaving small divots. Cover surface evenly with pokes.
  9. Drizzle 2-3 Tablespoons good-quality olive oil over the top of this surface, but don’t drown it. You’ll see pools form in the divots; this is normal.
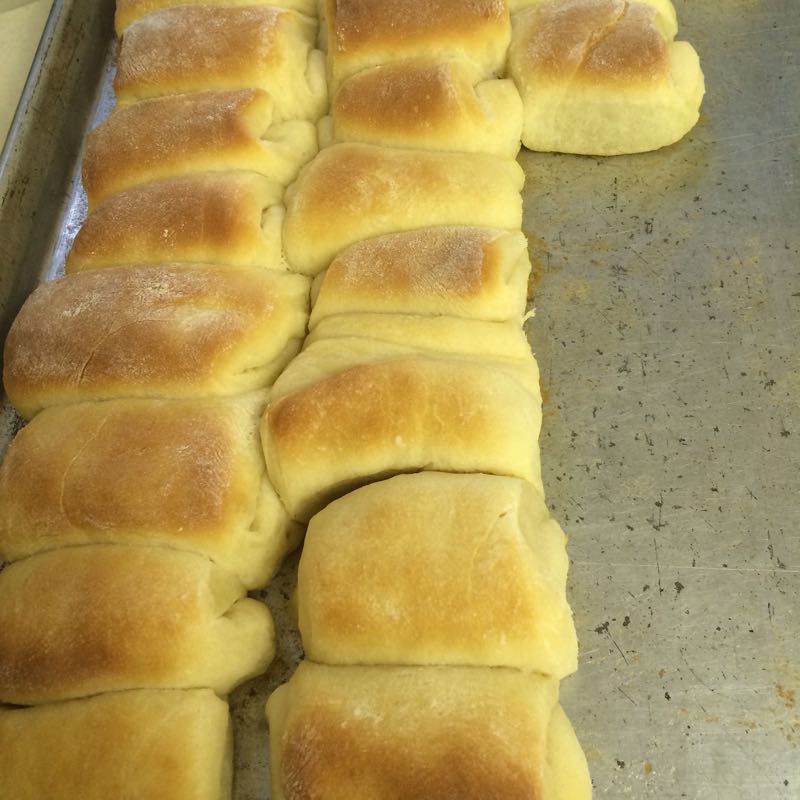
10. Bake for 15 minutes. Check. If not brown enough, bake 1-2 minutes more.

11. Pull from oven, and using the brush from an earlier step, brush olive oil over the surface. Sprinkle with flaky salt. After five minutes, loosen focaccia with a spatula, and transfer to rack for cooling.

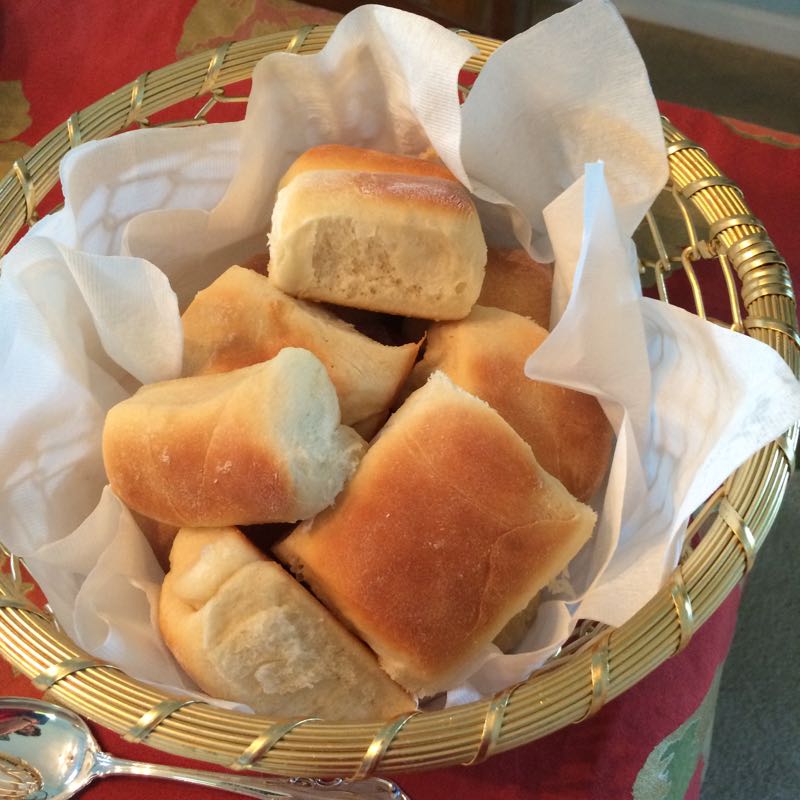
12. Cut into 16 pieces (larger) or 20-25 (smaller).

This freezes very well: place in heavy-duty plastic zipper bag. To rejuvenate, we let sit out for a few minutes (or microwave *very* briefly) then cut in half and toast in a table-top oven for 2-3 minutes, or until warm.

Last Notes: It takes me about 6 minutes to mix it up at the beginning. Add in the 10 minutes the next morning, and you’ll find this is very easy. Just let it sleep overnight in the fridge.

These photos were taken from the very first batch I made, where it said to sprinkle the salt over the top before baking. They turned really dark so I changed the recipe to put the salt on afterwards.

I also cheat a little on the mixing: After getting the water incorporated into the dough, I scrape the dough into the small (blue) bowl where the flour was. Then I pour the 4 Tablespoons of oil into the large (silver) mixing bowl, dump the dough back into that, and turn to coat the bread with oil. This way, I only use two bowls for mixing. It doesn’t matter if there are bits on the bowl from the mixing. No stress.

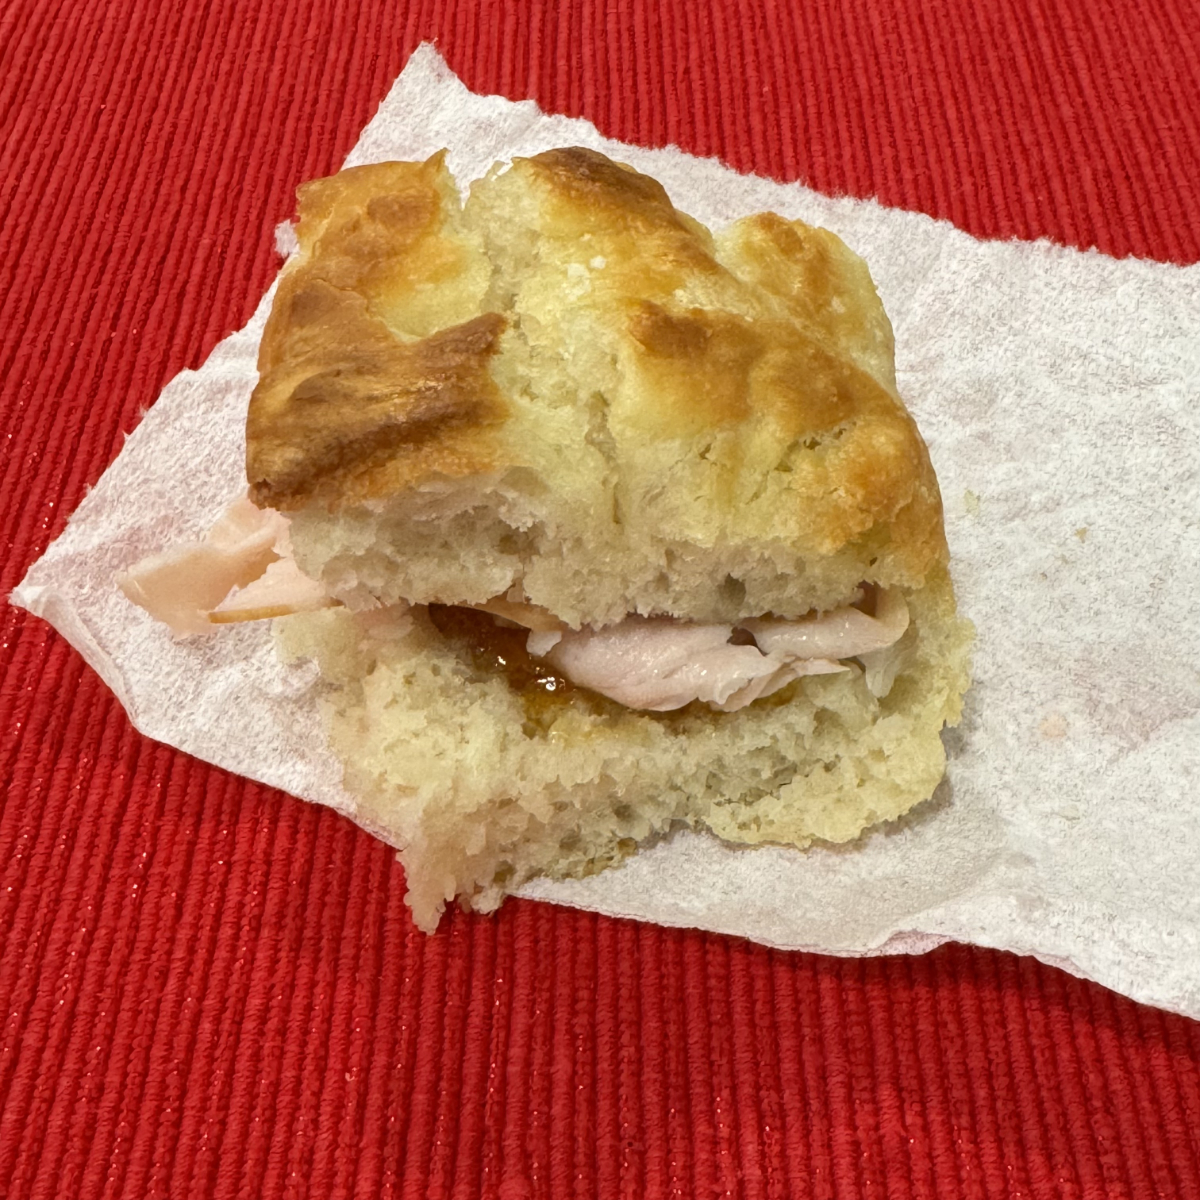
The Second Best Sandwich in the World uses the focaccia bread, spread with a little fig jam (not fig butter), then thinly sliced turkey. A good-tasting tomato will put it over the top.

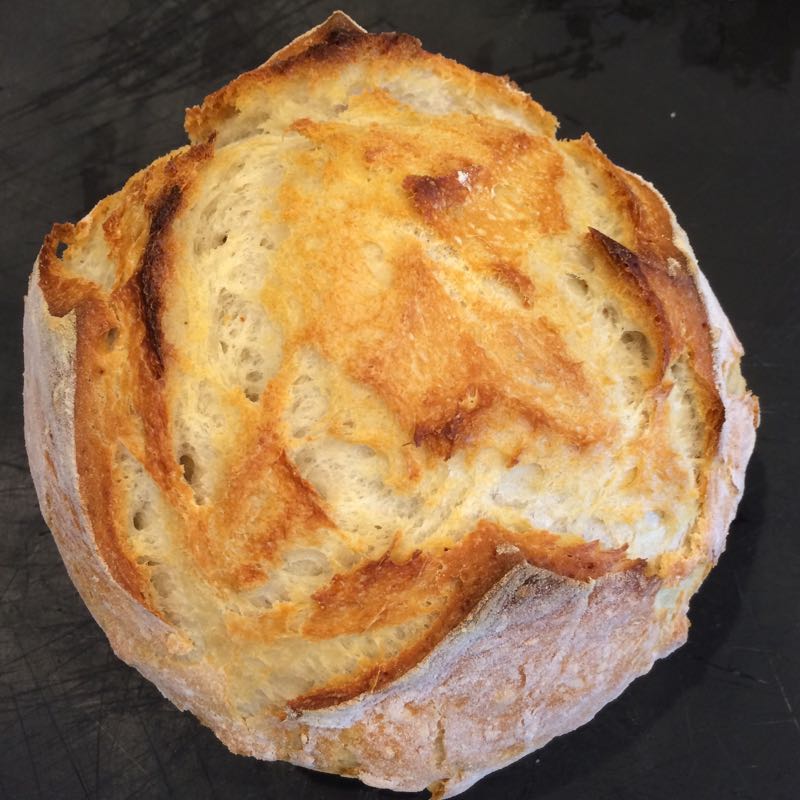
The Very Best Sandwich in the World, is made as above, but with high quality mortadella, and is eaten in Italy. (See the top of the post.)

Banana-Miso Bread with Pecans

Intrigued by the ingredient list in this New York Times recipe (miso?), I wanted to try it. Roasting the pecans is the first step, and I resolve to come back to this and just roast some for snacking. My first hurdle: not enough banana (I measured mine).

In the notes someone had mentioned that his grandmother baked her bananas in order to get enough for a recipe. So while the oven was preheating, I took a mostly unripe banana, placed it on some parchment paper and put it in the oven. I took it out after 10 minutes, but it could have used another ten, I think. It was hot to the touch, and most all of the banana was soft enough for mushing, which I did.

After the nuts were roasted, I just lifted over the parchment paper to the cutting board, and chopped on that. E-Z Cleen-Up!

Another commenter lined their pan with a length of parchment paper, oiling it before putting down and then a light brush of oil on the bottom after it was set in. They said it was helpful to have “handles” to get the bread out, so all the chopped pecans on the top didn’t fall off.
Other Ingredients: I used fine sea salt, and organic mellow white miso (mild); I’m showing this as some mentioned that their bread was salty. Ours wasn’t. I also added more pecans, subbed in some whole wheat flour.

Last changes: I added more nuts; scoop off 1/2 cup for the top, and the rest (plus salt) go into the loaf. I also cut back on the banana. This makes one loaf.

Ingredients
½ teaspoon vegetable oil, plus more for pan
1 1/2 cups pecans
1 teaspoon fine sea or table salt
1/2 cup whole-wheat flour
1 1/2 cups white flour
1 teaspoon ground cinnamon
½ teaspoon ground nutmeg
½ teaspoon baking soda
½ teaspoon baking powder
½ cup butter, at room temperature
1 cup packed brown sugar
2 large eggs, lightly beaten
3 tablespoons milk
2 tablespoons white miso (measure exactly)
1 tablespoon honey
1 teaspoon vanilla extract
3-4 very ripe bananas, mashed (1 1/2 cups) If you are slightly below the measure, add a bit of water to bring it to 1 1/2 cups.

Preparation

  1. Heat oven to 350 degrees. Lightly oil a 9- or 10-inch loaf tin, then line the base with length of parchment paper, letting the edges extend over the sides of pan to serve as handles.
  2. Toss pecans on a parchment-lined baking sheet with salt and oil. Bake until fragrant, 7 to 10 minutes. When cool, chop coarsely and reserve one-half cup for the top.
  3. While the pecans cool, whisk together flour, cinnamon, nutmeg, baking soda and baking powder in a medium bowl.
  4. In a large bowl, beat butter and sugar using an electric mixer until creamy, 3 to 4 minutes. Beat in eggs, milk, miso, honey and vanilla extract until well-combined. Gradually beat in dry ingredients until just combined.
  5. Using a spatula, stir bananas into the batter to combine evenly. Add the remaining one cup of the pecans (and any salt on the pan) to the batter and mix to combine evenly throughout. Add batter to the loaf pan, smoothing when complete. Sprinkle the remaining pecans evenly on top.
  6. Bake until a wooden skewer inserted in several areas around the center comes out clean, 1 hour to 1 hour 10 minutes. Tent with foil if it starts to darken too much on top before the middle is baked through. Check often after 1 hour; time to cook will be variable.
  7. Let bread sit in tin for 10 minutes before removing. Lift out by using the parchment “handles,” and set on a rack to cool for 60 minutes before slicing.

Last thoughts: We found this bread to be rather dense the first time around, so made the changes I suggested. I think I still prefer my regular banana bread, but am thinking about how to combine those salty chopped pecans into my standard recipe.

Mom’s Dinner Rolls

My ancient recipe card with my mother’s recipe says it came from Judy Caldwell, who must have been one of her friends. I’ve modified it since, not only to cut down on the sugar, but also to make it easier to mix.

To shape crescents, divide dough in half and roll into a circle. Cut into 12-16 slices, and roll up from the bottom. I also brushed a bit of melted butter on the tops when they came out of the oven.

Dinner Rolls, from Barbara Sessions

1/4 cup lukewarm water
1 package dry yeast
1 cup milk
1 stick REAL butter
2 eggs
1/4 cup sugar
1 teaspoon salt
4 1/2 cups flour
Optional: 2 Tbls. melted butter to brush on top

In a mixing bowl, place 1/4 cup lukewarm water (110-115 F). Sprinkle one package of dry yeast over the top, or 2 1/4 teaspoons, if measuring from bulk. Let sit until yeast blooms and softens.

Meanwhile, measure 1 cup whole milk in a glass measuring cup. Add 1 stick real butter, cut into pieces. Microwave until warm (no hotter than 115; let sit until cool if it measures too warm). Pour lukewarm milk/butter mixture into bowl with yeast.

Add 2 eggs, mix. Add 1/4 cup sugar and 1 teaspoon salt. Mix.

Add 1 1/2 cups flour and mix; then add the rest of the flour in batches, but letting it remain sticky. I switched to a dough hook when I had 3 1/2 cups in, and added flour until the dough cleaned the bowl. Don’t overmix, and don’t add extra flour.

Remove beaters and cover dough with plastic wrap. Let it rise until double (about an hour). Divide into two, and on floured surface, roll out and shape (see note, above, for crescent rolls). Let rise.

Bake 12 minutes in a preheated 400 F degree oven. When rolls come out of the oven, brush tops with a small amount of melted butter.

Sticky Pecan Rolls for Christmas Morning

These are a winner, all the way around. Perfectly sticky, soft dough, just the right amount of spice all combine for a perfect Christmas morning cinnamon roll. The original recipe comes from Joy Wilson, via the Washington Post, 2020.

Sticky Pecan Rolls

    If you want a fresh-baked batch of rolls when you wake up, proceed with the recipe through the step when you place the cut rolls into the pan with the sauce. Cover the pan with lots of plastic wrap and refrigerate overnight. In the morning, let the rolls come to room temperature for 30 to 40 minutes while you preheat the oven. Then bake as directed.

Ingredients

For the dough:
2¼ teaspoons instant yeast
3 tablespoons warm water
Scant 3 cups (360 grams) flour, plus more for dusting the counter
½ cup (120 milliliters) whole milk, at room temperature, or more as needed
⅓ cup (65 grams) lightly packed light brown sugar
1 large egg, lightly beaten
1 teaspoon vanilla extract
½ teaspoon kosher salt
4 tablespoons (57 grams) unsalted butter, at room temperature, cut into medium chunks

For the filling inside the pecan roll:
½ cup (99 grams) lightly packed light brown sugar
1 tablespoon ground cinnamon
1 teaspoon freshly grated nutmeg
⅛ teaspoon ground cloves
½ teaspoon kosher salt
6 tablespoons (85 grams) unsalted butter, at room temperature

For the sticky topping:
½ cup (120 milliliters) heavy cream
⅓ cup (113 grams) honey
2 tablespoons (28 grams) unsalted butter
¼ teaspoon kosher salt
1¼ cups (125 grams) coarsely chopped pecans

Make the dough

In the bowl of a stand mixer fitted with a dough hook, mix the yeast with the warm water until combined. Add the flour, milk, brown sugar, egg, vanilla and salt. Using a silicone spatula, stir the mixture into a shaggy dough.

Place the bowl on the stand mixer and mix on low speed, slowly adding chunks of butter as the dough comes together. [Note: This is kind of weird, and doesn’t look as if the butter will incorporate, but it does.] If the dough looks too dry, add an additional tablespoon of milk.  Increase the mixer speed to medium and knead the dough until it begins to pull away from the sides of the bowl, about 4 minutes.

Transfer the dough to a lightly floured work surface and knead by hand into a cohesive, relatively smooth ball, about 3 minutes.

Place the dough in a large, greased bowl, cover with plastic wrap and allow to rise in a warm place until doubled in size, 1 to 1½ hours.

Make the filling:

While the dough rises, in a medium bowl stir together the brown sugar, cinnamon, nutmeg, cloves and salt until combined. Reserve the room-temperature butter for use in assembling the sticky rolls.

Make the topping:

In a medium saucepan over medium heat, combine the cream, honey, butter and salt and bring to a simmer. Reduce the heat to low and let the mixture simmer gently until slightly thickened, about 3 minutes. Remove from the heat and stir in the pecans.

Generously flour a work surface and unwrap the dough onto it. Using a floured rolling pin, roll the dough into a rectangle about 12 by 15 inches. Spread the reserved butter over the dough and sprinkle the filling mixture on top. Starting with the long edge of the dough, lift and roll it into a tight log, seam-side down. Using a sharp knife, trim off the uneven edges. Slice the log into 9 equal pieces.

Pour the prepared pecan topping into a 9-inch greased square pan. Nestle the cut rolls over the topping. [Note: I slightly flattened out the rolls into a bit larger circle when I placed them in the pan.] Cover loosely with a clean kitchen towel and allow to rest while the oven preheats, about 20 minutes. (To store overnight, skip the 20-minute rest, cover the rolls with lots of plastic wrap and keep in the refrigerator overnight. Let come to room temperature before baking.)

Position the rack in the upper third of the oven and preheat to 375 degrees.

Uncover the rolls and bake for 30 to 32 minutes, until golden brown and bubbling. Remove from the oven and let cool in the pan for 10 minutes. While the rolls are still warm, run a butter knife around the edges of the pan and invert the entire pan onto a large serving platter. Scrape any nuts or caramel that remain in the pan on top of the rolls. Serve warm.

Nutrition Information

Calories: 420; Total Fat: 24 g; Saturated Fat: 12 g; Cholesterol: 65 mg; Sodium: 130 mg; Carbohydrates: 48 g; Dietary Fiber: 2 g; Sugar: 23 g; Protein: 5 g.

Barbara’s Texas Roadhouse Rolls

Ingredients
4 tsp active dry yeast
1/2 cup warm water
1 tsp sugar (to activate the yeast)
2 cups milk scalded and cooled to lukewarm
3 tbsp butter unsalted, melted and slightly cooled
1/2 cup sugar
7 – 8 cups all-purpose flour (start with less, then add as you go)
2 eggs
2 tsp salt
2 tbsp butter unsalted, for brushing over the finished rolls

Instructions
Add the yeast, warm water and sugar to the bowl of your mixer and lightly whisk. Let it sit for about 10 to 15 minutes until the yeast dissolves and starts to foam.
    To the bowl of the mixer add the milk, butter, sugar, eggs and salt. Lightly mix everything together, using the dough hook of your mixer, for about one minute. Add the flour, 2 or 3 cups at a time, and mix.
   Add additional flour as needed and mix until the dough comes clean from the sides of the bowl and forms a soft dough. (The total flour could be anywhere from 6 to 8 cups, depending on your environment.)
Don’t overmix as roll dough should be softer than bread dough. Place the dough in an oiled bowl and cover with a clean kitchen towel. Let rise in a warm place until double in bulk.
   Brush two baking sheets with melted butter.
   Punch down the dough and turn it onto a floured surface. Divide into two portions for shaping. Roll out the dough so that it’s about 1/2-inch in thickness. Cut into squares or rectangles; some of the edges will be triangular. Re-roll those, or just enjoy the shape. Repeat with remaining dough.  Yield is roughly 30 to 35 rolls. Place onto the prepared baking sheets. Let the rolls rise until doubled in size.

    Preheat your oven to 350 F degrees. Bake the rolls for about 15 to 20 minutes or until golden brown. Brush immediately with melted butter.

If desired, serve with Cinnamon Honey Butter.
Prepare while rolls are baking, by whisking all the ingredients together:
1 stick butter unsalted, softened
1/4 cup powdered sugar
1/4 cup honey
1 tsp cinnamon

Scones

Best made with sultanas (or golden raisins) and served with double (aka clotted cream), these scones are a real treat.

Preheat oven to 425 degrees F.

Mix together the dry ingredients:

2 cups flour
2 teaspoons baking powder
sprinkle of salt
2 Tablespoons granulated sugar

Cut in 2 Tablespoons of butter, until pebbly.

(If adding in sultanas, use about 1/3 cup, and add them in now.)

Add 2/3 cup milk, stirring until dough holds together. Turn out onto floured board and knead five times.

Form dough into ball, flattening it slightly with rolling pin, but keeping it about 1″ to 1-1/2″ thick.  Cut into fourths.

Brush with milk and sprinkle with a little bit of sugar.

Bake at 425 degrees for 10-12 minutes.

Elizabeth Lucinda Meyers Milton’s Biscuits

When I was given this recipe, it was with the stipulation that I always include the full name of Candace’s great-grandmother, from whence it came.  It’s quick, flaky, and can be made with buttermilk, instead of milk, for a richer flavor.

I have also rolled out the biscuit dough into a rectangle, brushed it with butter and sprinkled cinnamon-sugar on it.  I then rolled it up, sliced it into 3/4″ slices, placing them cut side down in a buttered/greased pan: mini-cinnamon rolls! (You can glaze the mini-cinnamon rolls with some powdered sugar thinned with a little milk.)

Preheat oven to 425 degrees Fahrenheit.

2 cups white flour
1/2 teaspoon cream of tartar
2 teaspoons sugar
1/2 teaspoon salt
4 teaspoons baking powder

Stir the dry ingredients together.

Cut in 1/2 cup (1 stick) butter until pieces are the size of small pebbles.

Gradually stir in 2/3 cup of milk.

Turn out onto a floured board and knead five times, or until dough holds together well and there are no loose pieces.

Roll out to 1/2″ thickness with rolling pin.  Cut out with 2″ or 3″ round shape (or cookie cutter without small details), or use the bottom of a glass.  Place touching each other on baking sheet.

Bake at 425 degrees F for 10-12, or until edges are slightly browned.

Persimmons

Fuyu Persimmons

Fuyu persimmons are short and round, shaped just like a large tomato.  They can be eaten raw and somewhat firm, without having a bitter, astringent taste. The Hachiya variety are larger, and teardrop shaped.  Hachiya persimmons need to ripen until they are very soft.  They contain a lot of tannins when they are immature, which make them taste very astringent as well as cause severe stomach problems if a person actually manages to eat one.  As the fruit ripens the tannin level decreases, until the taste becomes very mild. hachiyapersimmons

That’s why the hachiyas (shown above, with a pointy end) make you pucker up when they are unripe!

That website goes on to note: “Fuyu persimmons can be sliced and eaten raw, when they are soft enough so that they give just a little to the touch, like a ripe tomato.  The skin is very fibrous so you will want to peel them before cutting them up.  After peeling them they will be slippery, so slice in half and put the cut side down so they are laying on the flat edge.  This way you can slice or dice them more easily.”

Some say to cook with the hichiya and eat the fuyus in salads, or raw, but one cook found that Fuyus work fine in making her Persimmon Bread.persimmonhachiya1

When I made my bread, I waited until my hachiyas were this soft–or as someone said, like pushing in on a water ballon! And I didn’t peel them, throwing the cored persimmon whole into my food processor with the ripe pears.  If one hachiya is not as ripe as the other, you can cheat by micowaving it until it is soft.  persimmonhachiya2

Alternatively, you can core them, then scoop out the jelly-like flesh. When I made my Pear-Persimmon bread, I simply cored them, then whirred the persimmon — skin and all — in the processor.  We sometimes refer to them as “persey-mons:” once when we were staying in Bologna, I asked the hotel breakfast lady what kind of tree was just outside the breakfast room.  “Persey-mon” was her reply, and so it stuck.Persimmons, sliced1

One way to serve the Fuyu persimmons raw is to core and peel them, then slice them across the width. Layer them into a shallow serving bowl.  Whisk together some white vinegar with some honey, about 2 Tablespoons of each, or until the tart-sweet taste is balanced. Test and add more honey to taste, if needed.  Pour this over the persimmons, then sprinkle with poppy seed.  This is an elegant and easy side dish.

Another recipe I found (untested by me) is to make a salad using spinach leaves as a base.  First, start by making a vinaigrette:

  • 1/4 cup rice vinegar
  • 1/4 cup orange juice
  • 4 teaspoons honey
  • 1 teaspoon sesame oil
  • 6 Tablespoons olive oil

Mix the rice vinegar, orange juice, honey and sesame oil in a small bowl.  Whisk in the olive oil in a slow stream, whisking vigorously to emulsify the ingredients.  Lay down some spinach leaves, then the cored and sliced persimmons.  Sprinkle with toasted pecans, and dried cranberries, then pour the vinaigrette over all. (If you use 2 persimmons, it will serve 4 people.)

My New Favorite Roll Recipe

Thanksgiving Rolls_1

These are a basic roll recipe, without too much egg, so they are light, white and fluffy and taste very good.  I made them last year as well as this year, and we loved them both times.  This is from the Fleischman’s Bake It Easy Yeast cookbook, a staple in my house.  Although it was published in 1973, and retails on Amazon for $196.00 (gotta love those bots), this recipe can also be found on Breadworld by Fleischman, which has many of the recipes I love.

4-3/4 to 5-1/4 cups all-purpose flour
1/3 cup sugar
2 envelopes yeast (or 4 1/2 tsp. yeast)
1-1/2 teaspoons salt
3/4 cup milk
3/4 cup water
1/4 cup butter, melted
1 egg

For top, if desired: 1/4 cup butter, melted

Directions
Combine 2 cups flour, sugar, undissolved yeast and salt in a large mixer bowl. Heat milk, water, and 1/4 cup butter until very warm (120° to 130°F). Stir into flour mixture. Beat 2 minutes at medium speed of electric mixer, scraping bowl occasionally. Add egg and 1/2 cup flour; beat 2 minutes at high speed. Stir in enough remaining flour to make a soft dough. Knead on lightly floured surface until smooth and elastic, about 8 to 10 minutes. Cover; let rest 10 minutes. (Or, if desired, place dough in a greased bowl, cover with plastic wrap, and allow to rise in refrigerator for 12 to 24 hours.)

Thanksgiving Rolls_2Divide dough in half; roll each half to a 12-inch square, about 1/4-inch thick. Cut each into 6 (12 x 2-inch) strips. Cut each strip into 3 (4 x 2-inch) rectangles. Brush each rectangle with melted butter. Crease rectangles slightly off center with dull edge of knife and fold at crease. Arrange in rows, slightly overlapping, on greased baking sheets, with shorter side of each roll facing down. Allow 1/4-inch of space between each row. Cover; let rise in warm, draft-free place until doubled in size, about 30-45 minutes.  Take the time to let them get nicely risen.

Bake in preheated 400°F oven for 13 to 15 minutes or until done. Remove from sheets; cool on wire rack. Brush with more melted butter, if desired.

NOTE:  I do not like the RapidRise yeast, as I feel the breads go too stale when using that (must be the conditioners they have in there, or something).  Regular yeast is what I used, but made sure to allow a bit more time for the rising.

Mary’s Bread • from the Beachside Quilting Retreat

Marysbread_9At our recent Beachside Quilting Retreat, Mary — our hostess — brought a loaf of bread to serve us that first night and we all raved over it, asking her lots of questions, jotting down the recipe.  Two days later, when we went to Summerland’s antique store, where we found two pumpkin-shaped Le Creuset pots: I bought one and she bought the other, and that afternoon, we had a bread-making lesson in between all the sewing and quilting.  While the ingredients are simple and easily whipped into a ragged-looking dough, it’s her cooking method that sets this bread apart.  The heavy enameled cast-iron pot is set into a cold oven, which is then preheated for a long period of time.  This is what she calls the “brick-oven” method of baking as heat and moisture surrounds the baking dough, ensuring a nice crust.  This recipe makes three loaves.Marysbread_1
Measure out 3 cups lukewarm water.  Add 1 and 1/2 T. yeast (2 packages of regular yeast) and 1 T. kosher salt (table salt is okay); let it sit for a few minutes to “bloom.”  Stir in 32 oz. flour, roughly 6 to 7 cups.  Stir with big spoon and cover with plastic wrap, letting it rise in a corner of the kitchen. While it will rise for a total of 2 hours, after it’s risen for roughly 1 hour set the cast iron pot with its lid into a cold oven and preheat the oven for 45 minutes to a temperature of 475 degrees F.

Marysbread_3When the dough has risen for two hours, divide into thirds by grabbing about one-third of the dough. Mary says it’s ragged looking, but keep going. Using lots of flour that’s been spread onto either a pastry cloth or a cutting board, shape it into a ball. Cut an “X” into the top of the dough using a sharp knife or razor blade.

Marysbread_4 Marysbread_5Set ball into hot pan, being careful not to burn yourself. Cover with the preheated lid and cook for 20 minutes.

Marysbread_8Uncover, and cook for 10 more minutes or until it is a nice golden brown. Either tip out the bread — or grab from the pot — onto a counter and/or rack; let cool.

Cook’s Notes:
On the second and third loaf (since the dough has been in the fridge), put the dough out onto the floured surface to come to room temp while the oven heats up. Mary says she has left the dough in the fridge for as long as 12 days. The only noticeable effect has been that the dough gets more sour-tasting.

Variations:

After rising, I divided the loaves into three, shaped the first one (lower left) and started it baking.  I did cut an X into this one.

To the second blob, I added 1/3 cup sunflower seeds, massaging it through the mass.  After shaping, I then pressed onto the top: pepitas (sunflower seeds), a shake of poppy seeds, a shake of sunflower seeds, a shake of kosher salt; no cutting of an X in the top.  After the first loaf came out of the oven (I only have one pan), I baked that.

To the third blob, now quite sticky as it’s been rising a little more, I added 1/3 cup chopped high quality baking chocolate and 1/3 cup coarsely chopped pecans. (Don’t use white chocolate chips as you want the chocolate to melt into the bread, not remain intact; look for the bar type of white chocolate that has cocoa butter in it.) It’s a lot to mush into the bread dough, I admit, but when it was time to shape it, I concentrated on poking the bits back into the loaf, keeping them from emerging from the top.  When it bakes, as I also didn’t cut an X in the top.  The dark blobs (above) are the melted, baked chocolate that did emerge through while baking, but it tasted fine.

I did this loaf last in case there was residue of chocolate in the pan: there was, but it brushed right out.  That would be something to check for if you are making all three loaves with the white chocolate.

I would like to try mixing the chocolate/pecans with the flour and incorporating it that way, but this time, I wanted three different loaves.