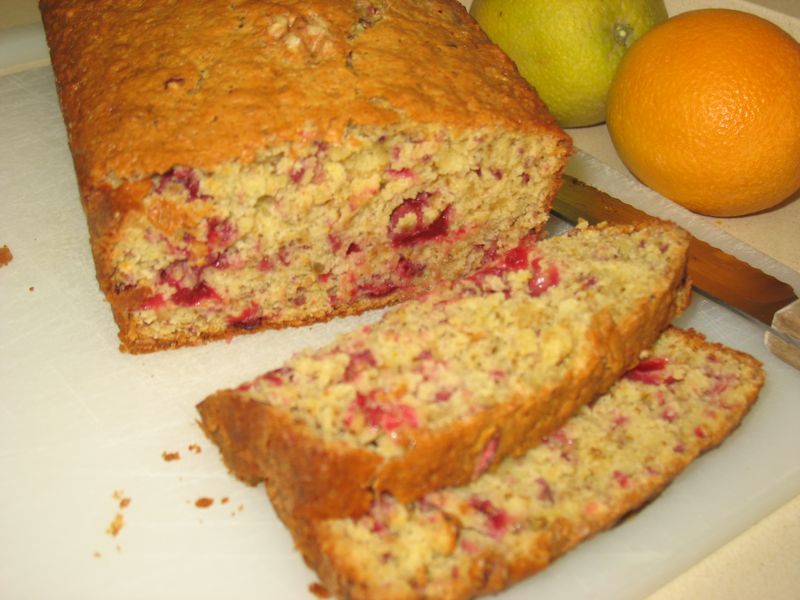
This is another of my mother’s great recipes, a moist bread so fresh-tasting with cranberries and orange flavor that you’ll find your day just won’t start quite right during cranberry season if you haven’t had a slice of this for breakfast. But it’s also good for snacks, and a fairly guilt-free snack at that: with only one egg and two pats of butter, it’s low-fat, but with flavor.
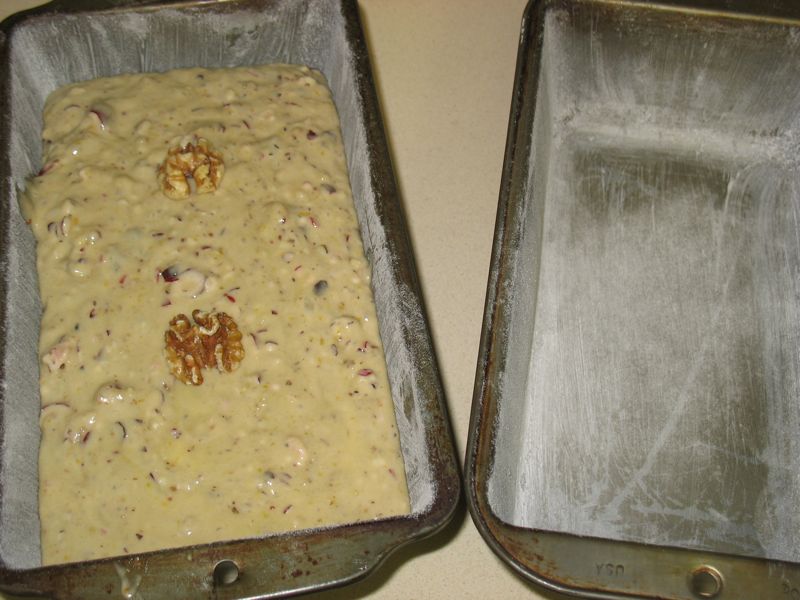
Although the recipe makes one loaf, why stop there? All the photos below show me making up two loaves.
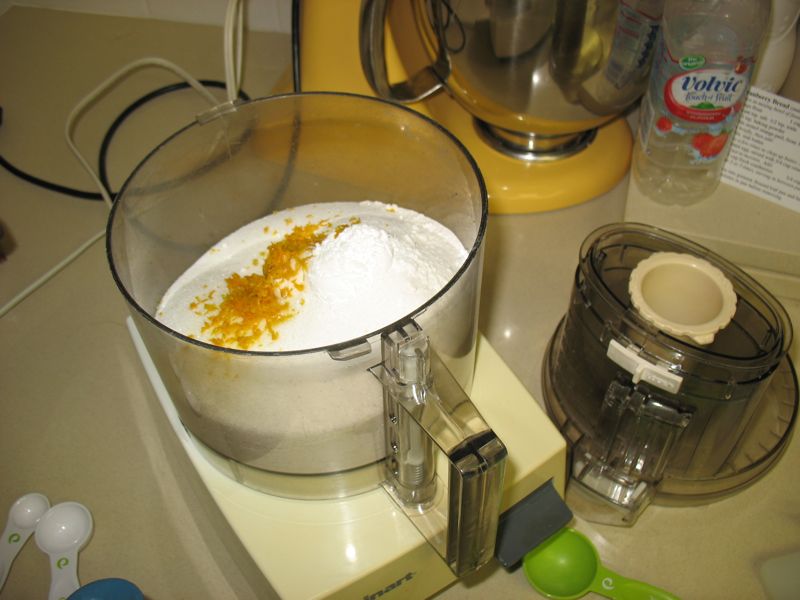
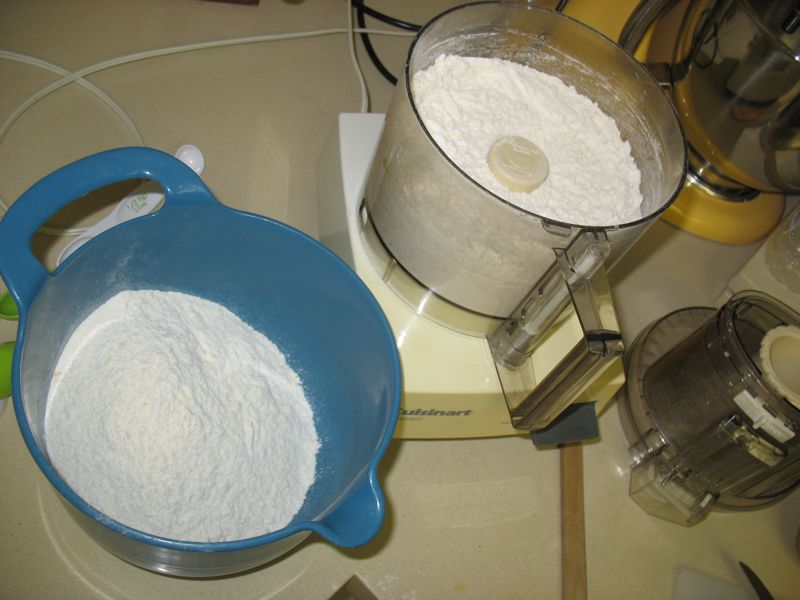
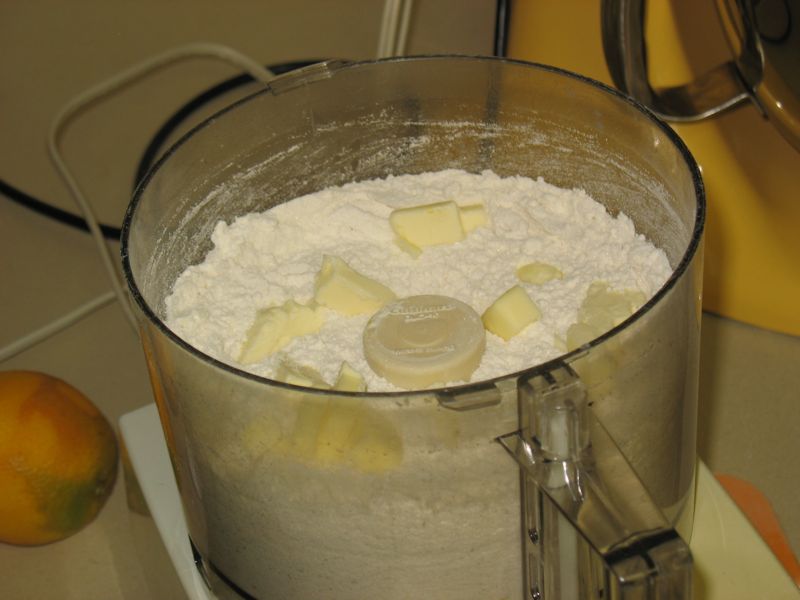
To make two, I first mix up the dry ingredients for one batch in the food processor…
…then transfer it to a bowl and start the second batch.
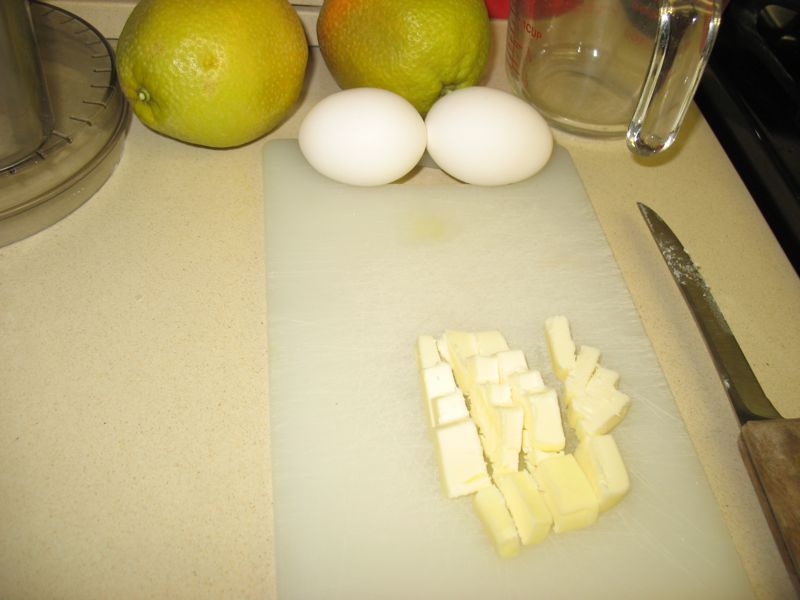
I cut up, then. . .
…pulse in the butter, then follow the recipe as written.
When you finish with one batch, scrape out the bowl well, then pour in the reserved dry ingredients and start again. No need to wash up in between.
Cranberry Bread (makes 1 loaf)
Place in mixing bowl of food processor:
2 cups flour
1 cup sugar
1 scant tsp. salt
1/2 tsp. soda
1 and 1/2 tsp. baking powder
1 Tbls. zested orange peel, from 1 large orange
Mix briefly, then add:
2 Tbls. real butter.
Pulse a few times to chop up butter, then add:
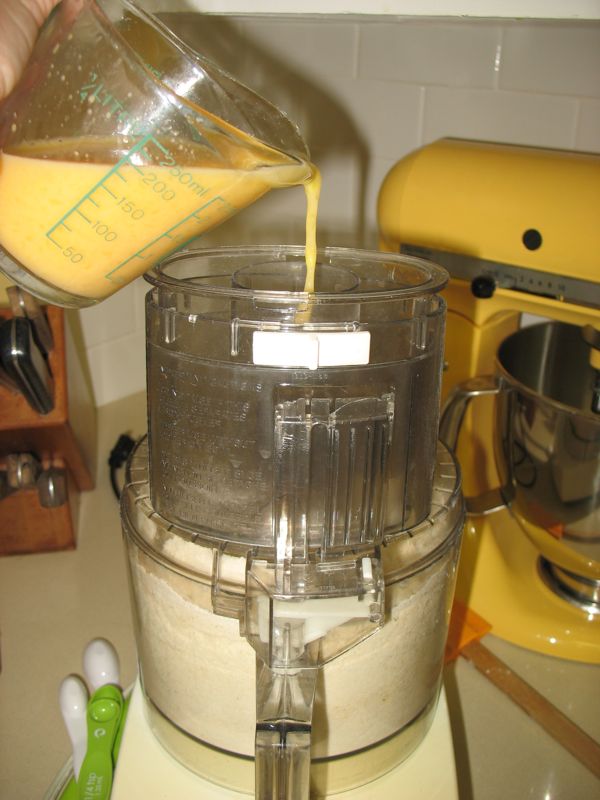
1 beaten egg, mixed with 3/4 cup orange juice.
Mix just to moisten. Add:
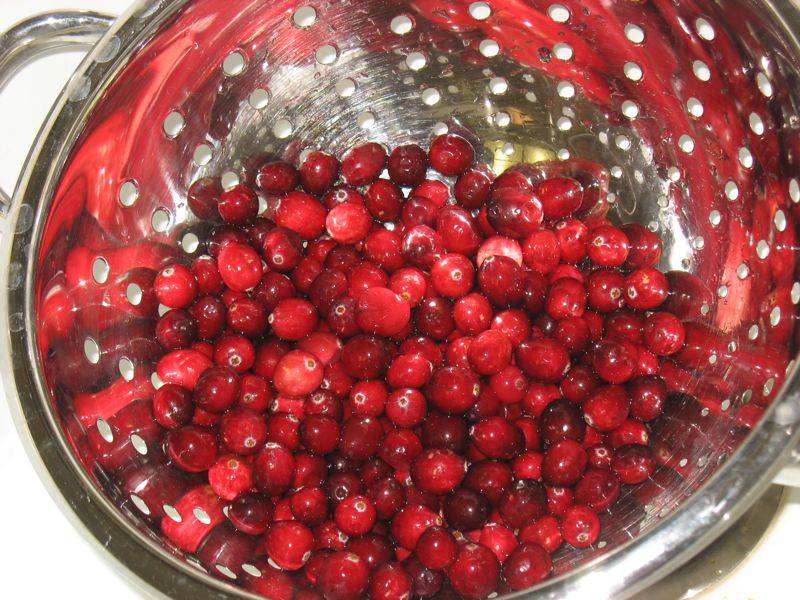
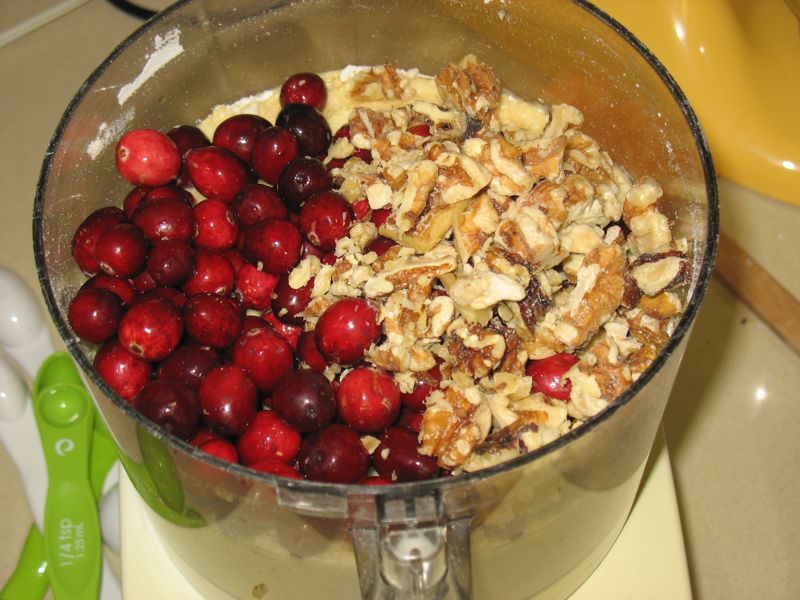
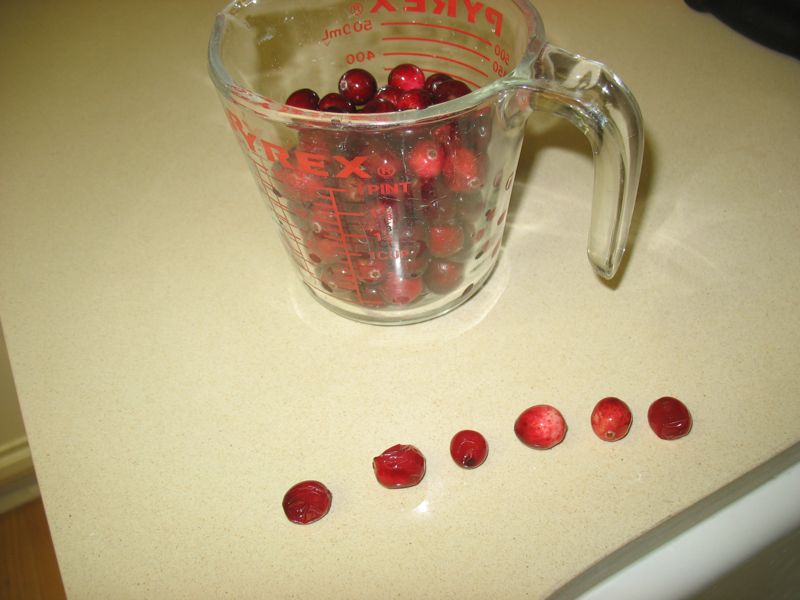
1 and 1/2 cups fresh cranberries
3/4 cup chopped walnuts.
Pulse 2 or 3 times, stirring in between pulses with spatula, if necessary.
Spoon into greased, floured loaf pan and bake at 350°F for 60 minutes. Cool 15 minutes in pan before removing. Then it should pop right out. Slice, wrap up for the freezer, or to share with a friend, and enjoy!
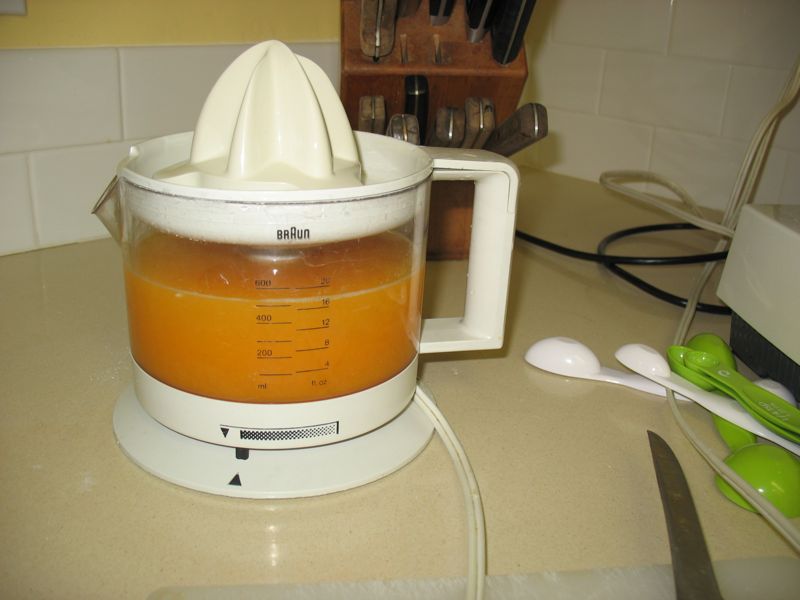
I used freshly squeezed orange juice.
In front are the reject berries: soft, underripe, or nearly goners.
I was casting around for a buttermilk roll recipe, as I had to do a luncheon for seventy people and I wanted to order the local bakery’s buttermilk rolls, but alas, the tight budget prevented that option. This one did the trick, as it has a good “heft” and bite to it, as well as that slightly tangy taste that buttermilk gives. I’d make it as written once, then if you wanted to cut that flavor, I suppose you could up the sugar by a tablespoon or two, but you’re on your own for that variation. This one is a little odd because it calls for yeast AND baking powder AND baking soda, but I suppose the soda’s there as a companion to the buttermilk; I always see them together in my recipes.
Can I remember where I found this? Nope–one of the mindless tired nights trolling the web, but there aren’t too many buttermilk rolls out there that you’d want to make. This one has the notation that “they got it from their neighbor” and “it doubles and triples well,” but my mixer could only handle the single version (I know because I tried the double. Don’t do that at home) but after I figured out the logistics, I was on my way. If you measure the dough (see below), each batch makes about 18 rolls. As breads go, this one’s an easy one.
One last thing. Don’t use the bread machine yeast as it has dough conditioners in it. In my experience (strictly anecdotal) I think it makes the bread go stale faster. Try for the regular kind. (Sorry about the blurry picture.)
Ingredients
2 cups buttermilk (100-110 degrees F)
2-3 packages dry yeast, or about 2 1/3 Tablespoons dry yeast granules
2 tablespoons sugar
2 teaspoons salt
1 teaspoon baking soda
1 teaspoon baking powder
3 tablespoons extra virgin olive oil
5 – 6 cups flour (I used the full six cups of flour)
shortening, for baking sheets
cornmeal, for baking sheets
Directions
In a large mixing bowl or bowl of a heavy duty mixer, dissolve yeast and sugar in warmed buttermilk. Add 1 cup flour, and beat until smooth. Allow to set for 5-10 minutes, until mixture starts to foam and bubble. Add salt, baking soda, baking powder, and olive oil.
Stir to dissolve, and add 3 more cups flour, 1 cup at a time, and mix until smooth. If using mixer, replace paddle beater with dough hook.
Add fifth cup flour, 1/4 cup at a time, while kneading; dough will still be rather sticky.
Add sixth cup flour, 1-2 Tbsp at a time, while kneading dough, until dough is no longer too sticky. I used nearly the full amount of 6 cups flour.
If using mixer, dough will begin to form a ball around the dough hook. If kneading by hand, dough will no longer stick to bowl and hands too much, though it may still be slightly sticky. Use more or less flour as necessary to reach this state. Place dough in an oiled bowl, and turn to oil top of the dough. Cover, and let rise in a warm place, 80-90º F, until doubled in volume, about 45 minutes.
Punch down dough, and knead by hand for about a minute to incorporate surface oil.
Here’s where the measuring comes in. Divide dough into one-ounce pieces, about the size of a large walnut, for small rolls, or two ounce pieces, a little larger than a golf ball, for normal size rolls. I used a scale and made 2 1/2 ounce pieces, which yields about a 3″ diameter roll–a good sandwich size.
Shape pieces by hand into smooth balls, as shown above, by pulling the dough around to the underneath. Then roll them around underneath your hand on the counter. The resistance of that surface is needed. Alternatively you could use a glass-topped stove, or a large smooth cutting board, but no flour. Apply some slight pressure downward as you roll the ball under your hand. When you feel it kind of come together, stiffen up (my husband said they felt “cold” in his hand) and when turned over there is a little dimple, they are ready. Check out the video, above. I figure it’s about 20-25 circles of the hand that does it. No need to count–figure out what it “feels like” and go for that.
Place about one inch apart on greased cookie sheets that have been sprinkled with cornmeal.
Brush the rolls with cold water, or mist them using a spray bottle. I forgot this step once, and the world didn’t end.
Rising rolls, covered with the souvenir dishtowel from Zabar’s in New York City
Let rolls rise in a warm (80 degrees F+), draft-free place for 30-45 minutes, until doubled in volume. A good place to do this is your oven: if the oven has a pilot light, just place the baking sheets in the oven. If you have an electric oven or one with an electric ignitor instead of a pilot light, turn on the oven for 45-60 seconds, and turn it off before placing the baking sheets in the oven.
Remove the baking sheets from the oven, and preheat oven to 400 degrees F.
Bake rolls for 16-18 minutes, checking after 16 minutes, until a medium, golden brown.
Remove rolls from baking sheets, serve immediately, or cool to room temperature on wire racks if you plan to freeze them. If you are going to freeze them, place cooled rolls in plastic freezer bags, preferably double bagging them.
To reheat, thaw for about a half hour, and heat in a 350 degree F oven for about 10 minutes.
This recipe makes about 60 mini-rolls or 30 large rolls, or 18 even-larger (2 1/2 ounce) rolls. Here’s the little sandwich we made for the luncheon, using 1 1/2 ounces of lunchmeat (or about 3 pieces of thinly-sliced Hillshire Farms pieces of turkey). Since we were making these a week ahead, we slipped them into ziploc sandwich bags, then into larger bags.
Nutrition Facts
Serving Size: 1 (1223 gram–I think this must be the smallest roll; I didn’t check)
Servings Per Recipe: 1
Calories 99.0
Calories from Fat 15 — 15% Daily Value
Cholesterol 0.6mg
Sugars 1.6 g
Total Carbohydrate 17.7g — 5%
Protein 2.8g
First of all, this apparently is NOT traditional Irish Soda Bread. According to the Society for the Preservation of Irish Soda Bread, the traditional one does not have raisins in it. Well, we can agree on that score. The one I love to make doesn’t have raisins either — it has sultanas — also known as golden raisins.
Back in March of 2009, when we were having book group, I wanted a recipe to take to Joan’s house to compliment the fresh-squeezed orange juice she had promised to serve for refreshments. And, because it was March. And when we in America think March, we think green, Ireland, shamrocks, and corned beef and cabbage. Of, if you’re like me, See’s Irish Potatoes, as well. Now, with this recipe, you can think “Irish Soda Bread.” Modified slightly from one published in Bon Appetit Magazine.
You’ll need a sturdy 10-inch baking pan; I use a springform pan. It will fill that all the way.
5 cups all-purpose flour
1 cup sugar
1 Tbs. baking powder
1 1/2 teaspoons salt
1 teaspoon baking soda
1/2 cup (1 stick) REAL butter, chilled when cut into small cubes, then left out to come to room temperature (if you are having a hot day, maybe leave it in the fridge)
2 cups golden raisins (also known as sultanas; you can buy them at Trader Joe’s)
2 Tablespoons caraway seeds
2 1/2 cups buttermilk
1 large egg
Preheat oven to 350F. Generously butter heavy 10-inch-diameter springform pan with 2 to 2 1/2-sides. In large mixing bowl, blend first five ingredients to blend well. Add cubes of butter; mix only until they become coated with flour and are about pea-size (NO MORE!). Stir in sultanas and caraway seeds. In a separate bowl, whisk egg and buttermilk together to blend. Add to dough. Mix briefly, just until dry is thoroughly moistened. You may have some dry ingredients in the bottom of your mixing bowl, use a wooden spoon to stir in the dry ingredients thoroughly. A light touch on the mixing yields a tender loaf. Go easy.
Turn dough into the prepared pan, smoothing top and rounding slightly in center. If desired, dip a small sharp knife in flour and cut a 1-inch deep X in the top center of the dough.
Bake until the break is cooked through and tester inserted into center comes out clean, about 1 hour. Cool bread in pan for ten minutes, then transfer to a wire rack to cool thoroughly. To serve, slice into 3/4″ slices, across the loaf. This is really good spread with butter (and a little bit of jam if you want, but I’m sure that’s not Irish, either). For book group, I carted it over there warm, and we gobbled it down accompanied by sweet orange juice, freshly squeezed from Joan’s own orange trees.
May you have warm words on a cold evening, a full moon on a dark night, and the road downhill all the way to your door.
This recipe was prompted by buying four gorgeous persimmons from a neighbor’s table, set up on the sidewalk with a box (with a slot) where I could put my dollar.
First step to the bread: thinking the persimmons were the Fuyu variety and trying to serve them for a side dish. Oh, pucker-up-city! But they were gorgeous.
Next step to the bread: letting them sit out on the counter until they were, as one cook said, the texture of a wobbly water balloon. Yes, that means the Hachiya (a kind of a wedge-shaped persimmon) is ready. It also helped that I had two pears that were mush, and didn’t want to let them go to waste. After hunting for a pear-persimmon combination, I used James Beard’s Persimmon bread recipe as a starting point, but had to make a few changes. Like no cognac because I don’t do alcohol. And monkeying with the recipe to accommodate the pears. But here’s mine, which makes two 9-inch loaves of bread.
2½ cups all-purpose flour
1 cup whole wheat flour
1½ teaspoons salt
2 teaspoon baking soda
1/2 teaspoon ground nutmeg
1 teaspoon cinnamon
1/2 teaspoon ginger
2 cups sugar
1 cup melted butter and cooled to room temperature
4 large eggs, at room temperature, lightly beaten
2 cups persimmon/pear puree (from about 2 squishy-soft Hachiya persimmons and 2 very ripe pears)
2 cups walnuts, chopped
1 cup cranberries
Oven 350 degrees F.
Grease and flour 2 loaf pans, tapping out excess flour.
Measure the dry ingredients in a large mixing bowl, mixing them together with the blade attachment.
Prepare the fruit puree: rinse the persimmons, then cut the thick flowery stem out of the top. Place in a food processor. I don’t peel mine at all. [One of my persimmons turned out to be rather hard on one side, so I put it in a small bowl and microwaved it until it was soft and cooked and matched the softness of the other persimmon (desperation measure).] Peel, core and add the pears to the food processor, then puree the fruits together.
Melt the butter in a small microwave proof bowl (about a 4 cup bowl), add the eggs to this and whisk, then add the pear-persimmon puree and whisk. Add this mixture to the dry ingredients in the mixing bowl and blend on a low speed for about 1 minute. Scrape all around the bowl to make sure the dry ingredients are being incorporated, then blend for about another minute. Add nuts and cranberries. (The original recipe says you could also add raisins, apricots, dates, or a mixture of these fruits.)
Bake 1 hour or until toothpick inserted into the center comes out clean. (Mine was done at 55 minutes–it is a darker bread, but you don’t want to get it too done.) Turn out of pans and let cool on wire rack.
It must be good because Dave gave it his Second-Helping-Stamp-of-Approval.
It’s pictured here on my Grandmother’s china, which I got from my mother this year. The very first recipe I ever tried for persimmon bread was my grandmother’s, written out on a 3 x 5 index card. I still have it in my recipe file. It has canned persimmons and shortening in it, which is why I decided to create a new one.
Thanksgiving Day at our house this year was a quiet affair with all the children scattered to different places, my husband and I decided to have a quiet meal at home. So that allows me to try a couple of new things, without the pressure of deadlines and wondering if the company will like it.
I have already written about the cranberry sauce, but here’s the other new thing I tried: orange dinner rolls. I’d heard a couple of people say they were having them for their turkey-dinner, and then when I was cleaning out looking for that cranberry sauce recipe I thought I’d lost, I found a clipping of one of those “restaurant request” columns and it featured this recipe. The restaurant was the Morrison Lodge in Oregon on the Rogue River, and the SOS columnist for the LATimes noted that the recipe “originated with Elaine Hanton, who, with her husband B. A., purchased the lodge in 1964.”
I’d nearly forgotten to make these, in the rush of side dishes and turkey. So with an hour to go, I zipped through the mixing of the dough, rolled them out and shaped them and let them rise on the stove, next to the warm air. Since it only makes 24, it’s a quick mix, quick shape into muffin tins and they came out of the oven just as the turkey was being sliced. Good timing. Good rolls!
Total time: About 1 hour, plus rising time for the dough Servings: Makes 2 dozen rolls Note: Adapted from Morrison’s Rogue River Lodge
Ingredients for Dough
1 cup lukewarm water
1 packet active-dry yeast (2-1/4 teaspoon yeast)
3 1/4 cups (13.8 ounces) flour, divided, plus additional for kneading
2 1/2 tablespoons sugar
2 1/2 tablespoons shortening, at room temperature
1 egg, at room temperature
1 teaspoon salt
In each cup of a 12-muffin tin pan, place about 1/2 teaspoon melted butter, then swish up around the sides with a pastry brush.
1. In a large bowl, or in the bowl of a stand mixer, combine the water, yeast and one-half cup flour, stirring to dissolve. Set aside just until the yeast is activated (the mixture will begin to bubble), 5 minutes.
2. While the yeast is activating, combine the remaining flour, salt, and 2 1/2 tablespoons sugar in a separate bowl.
3. With a fork (if working by hand), or using a dough hook, work half of the flour/sugar mixture into the activated yeast, then add the shortening and egg until combined. Slowly add in the remaining flour/sugar mixture (the mixture will at first be stringy, then very sticky as the flour is absorbed). Stir in the salt.
4. Move the dough to a floured surface. With floured hands, gently knead the dough (it will be sticky at first) about 5 minutes, adding flour as needed just to keep the dough from sticking to your fingers or the kneading surface. The finished dough will be tender, soft and slightly tacky. [Cook’s Note: I added a bit more flour and just used my mixer for another minute or two, remembering to keep the mixing brief.]
5. In a small bowl, combine the remaining one-third cup sugar with the orange zest. Using 1-2 Tablespoons of melted butter and a pastry brush, stroke the butter liberally inside 2 muffin tins, coating the wells thoroughly. There should not be puddles of butter–just coverage.
6. On a well-floured surface, roll the dough into a rectangle measuring 24 inches by 10 inches.
7. Brush the dough with 3 Tablespoons of melted butter, then sprinkle over the orange-sugar mixture.
8. Roll the rectangle lengthwise into a tight tube (as when rolling cinnamon rolls). Cut the tube into 24 (1-inch) slices, using thread if possible (the thread will slice more easily and cleanly than a knife). If you use a knife to cut the slices, roll the tube one-quarter turn after each slice to keep the tube round; otherwise, it will flatten from all the slicing.
9. Place each of the slices into the prepared muffin tin (the tins must be well-greased or the finished rolls will stick to the bottom). Cover loosely and set aside until the rolls double in size.
10. Bake the muffin trays one at a time, until the rolls are puffed and golden brown, about 8 to 10 minutes. Rotate the trays halfway through for even baking.
11. Cool the rolls slightly, then unmold. Serve warm. I always tip up the rolls in their tins even if I’m not going to use them immediately as this allows the steam to escape and you won’t have soggy rolls.
I found this recipe in a (Sunset?) magazine when I was 17, and since I was a pretty good baker by that time, I decided to make it for my family. I used up a good amount of nuts, real butter and got to talking on the phone with a friend while I mixed up the rest and put it in the oven. The smell was really yummy and we were all looking forward to a slice of my newest recipe. I pulled it out of the oven, and what? Something was wrong. It was flat, and hadn’t raised at all. It tasted. . . terrible. My mother came in and started to try and help me find the source of the problem. Did you put in the salt? Salt? I said. I don’t think so.
Okay, then what about the baking powder? Baking soda? They need to sugar to help with their chemical and culinary reactions, she said.
Sugar! I’d forgotten the sugar. And probably one of the other three ingredients, judging from the height of the loaf.
Since then I have made it many many times. I never talk on the phone while mixing up the ingredients, and it has turned out perfectly every time. You can increase the batch easily as one large can of pumpkin makes three loaves. Tonight I made a plain loaf, a nut loaf and a loaf with mini-chocolate chips (add in about 1 cup). We have family coming and we’ll be ready.
Pumpkin Nut Bread
3/4 cup milk
1 cup canned pumpkin
1 egg
1/4 cup melted butter
2 1/2 cups unsifted all-purpose flour (I substituted in 1/2 cup whole wheat flour for part of this)
1 cup sugar
2 teaspoons baking powder
1 teaspoon each soda, cinnamon, and nutmeg
1/2 teaspoon each salt and ground ginger
1 cup chopped pecans or walnuts or filberts or a mix of all three
[for the chocolate chip loaf, substitute 1 cup mini-chocoate chips for the nuts]
In a large mixing bowl, combine milk, pumpkin, egg and melted butter. Mix to combine. Add in sugar.
In a separate bowl, combine 1/2 cup flour with spices, soda, salt and baking powder. Mix well and add to the pumpkin mixture. Then add in the rest of the flour and blend only until dry ingredients are moistened.
Pour into a lightly greased 5″ x 9″ load pan; bake in a moderate oven (350F) for 1 hour and 15 minutes or until inserted toothpick comes out clean. Makes 1 loaf.
I had these scones on the morning of the Royal Wedding–very fitting. My friend Judy had combed the internet for a treat for us to eat while we watched the Royal Wedding off of her TiVo, and combined two recipes to create this yummy treat. She served it with fruit with a yogurt/honey topping and some orange juice. These scones are a little sweeter, said her husband, than anything they’d serve in Britain, and I agree. The texture is more biscuit-like, but I think they are delicious and was happy to have such a treat while we critiqued the hats and swooned over the festivities.
Royal Wedding White Chocolate Scones
1 3/4 cups flour
1/3 cup sugar
2 tsp. baking powder
1/2 tsp salt
1-2 Tbsp. orange zest
1 stick butter, chilled and cubed (1/4 lb.)
2/3 cup white chocolate chips, coarsely chopped
1/2 cup orange juice
Directions:
1. Preheat oven to 400º F. Spray a cookie sheet with nonstick cooking spray.
2. Whisk together the flour, sugar, baking powder, salt, and zest. Using a pastry blender, cut it the butter until the mixture resembles coarse crumbs. Stir in the chocolate chips. Gradually mix in the orange juice, one or two tablespoons at a time, to form the dough.
3. Turn out the dough on a floured surface. If necessary, knead briefly to form a compact ball. Pat into a 9-inch circle that is about ½ inch thick. Use a 2 ½-inch biscut cutter to cut out 12 scones, reforming leftover dough as needed. Transfer scones to cookie sheet.
I knew I wanted to serve crostini (basically toasted baguette slices) with the Torta, but after cooking solidly for a week, my brain went blank. So I opened the new Gourmet cookbook (with green titles and cover–lovely, lovely–a sad end to a fine enterprise) and looked up Ruth Reichl’s how-to’s. Saved.
Dave cut the La Brea bread baguette on an angle to get the nice shape on the slices. I set them out on a rack, brushed both sides with good-quality olive oil, then salt and peppered them (lightly). I toasted them lightly under the broiler, keeping an eye on them.
They were magnificent right out of the oven, and I ate them for my lunch. They were a little less magnificent that night, even a little soggy, after being kept (in a bowl, under plastic wrap) all day. I think it was the constant rain we had, because the next day Dave and I popped them into the toaster for just a minute, and they were back to magnificent–especially when slathered with the leftover Sun-dried Tomato and Pesto Torta.
To arrange in a bowl, first cover the bottom of the bowl with a single layer of crostini. Then, layer the slices in a circle around the edges, building up as you go, leaving the middle hollow. It looks very cool, although I have no photos to show you.
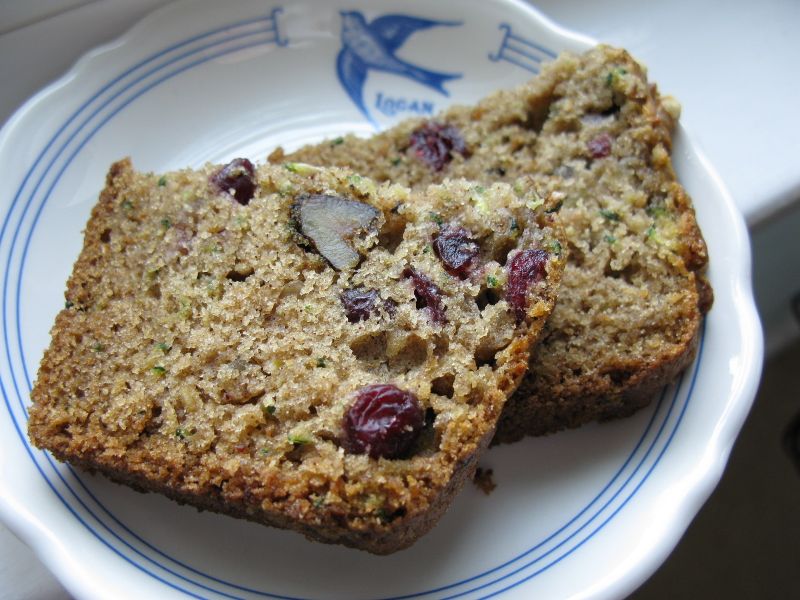
I had been making that same old zucchini bread recipe that we all have: vats of oil, overly sweet, soggy. I wanted to find a new recipe that used whole wheat flour, so one day I did some internet searching and found five. I began with one and modified it so much that I now call it my own, rich with nuts and cranberries. I never moved on to the other four, satisfied with this one. When I took my friend Judy a slice or two, she gave it a thumb’s up. She never lies, so it must be good.
About the flour: measuring the zucchini is never a science, more of a hit-and-miss. Because of this, the amount of flour you’ll add in is also less of a science. I have added up to the full 4 cups at some times. If your bread is too wet, it will be soggy when cooked. If you add too much flour, your bread will be a brick. I realize this assumes some experience in making fruit breads; just do your best.
Elizabeth’s Zucchini-Whole Wheat Bread
Yield: two loaves
3 eggs
2 cups sugar
1 Tablespoon vanilla
approximately 4 1/2 cups shredded zucchini
1 cup butter, melted
1 Tablespoon baking soda
1/4 teaspoon salt
3/4 teaspoon nutmeg
1 Tablespoon cinnamon
1 and 1/2 cups unbleached white whole wheat flour, from King Arthur (can also use whole wheat flour)
2 1/2 to 3 cups white flour (first add in 2 and 1/2 cups, then add more if your bread is too wet)
1 and 1/2 cups chopped walnuts
1 and 1/2 cups dried cranberries
Optional: zest and juice of 1 lemon (about 3 Tbls)
Preheat the oven to 350 and grease two loaf tins.
In a large bowl, mix together the eggs, sugar and vanilla until well-blended. Mix in the shredded zucchini, then the melted butter, and the lemon juice and zest (if you are using it). Stir together the whole wheat flour, spices, salt and baking soda and add to the zucchini mixture. Check to see if your bread is too wet. Depending on the size of my eggs (I use either large or extra-large) or how moist your zucchini is, you may need all of the flour listed. You don’t want it flopping around in the bowl, but you don’t want it too dry, either. (Perhaps it should be the liquidity of a fresh icy milkshake? if you’ve never made bread before; I’m just guessing here.) Fold in the nuts and cranberries. (If yours are in the freezer like mine are, because you bought the giant bag from a Big Box store, then un-glob them before adding.)
Pour into the two loaf pans and bake for 10 minutes. Then lower the temperature to 325 and bake for 55-60 minutes longer, or until a wooden toothpick inserted into the center comes out clean. (If you are like me, one may have to cook longer than the other one.) Cool in pans for 10 minutes, loosen edges with spatula and turn out onto wire racks to cool thoroughly, if you make it that long.
On all my fruit breads, I slice a thin layer off of each end, then cut the rest into slices. I wrap them 4 slices at a time in waxed paper, then place them in a zipper plastic bag to store. I also place three walnuts halves on top before baking, not only to indicate that they have nuts in them, but also because we love to eat nuts in our fruit breads.
I think about the fires recently in the hills around us here in Southern California, and remember back to the Oakland California fires in an earlier era. While many stories were poignant and very sad, one that has stuck in my memory is the story of the woman who lost everything in the fire. Interestingly, she despaired the most over the loss of her recipes, some of which were family treasures passed down for several generations. (I have a few of those as well.)
Some weeks after the fire, one of her neighbors found out where she was living, and brought her a loaf of her own bread, with the recipe attached to it. Little by little, her recipes came back to her, because she shared them. Little by little, she rebuilt her life.
My mother cooked for a crowd: her family of seven children. I remember coming home as a teenager to the smell of this bread, freshly baked. It was perfect in the afternoons, just warm crumbly bread, some homemade jam, and a glass of milk. Of course the fantasy memory might include then happily skipping off to do the homework, but I think the real memory probably was slicing one more slice, in order to avoid leaving Mom’s kitchen and her good bread. This is one recipe I don’t want to lose, so I’m posting it here.
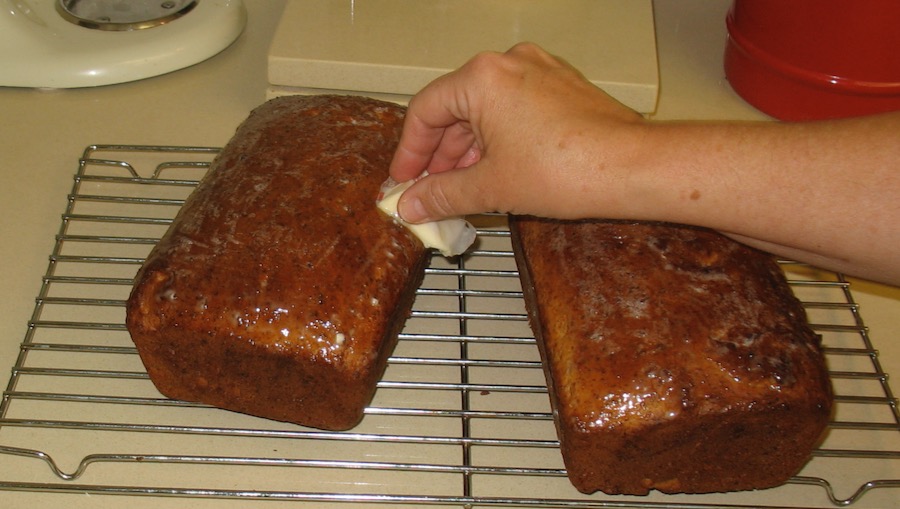
When I made a batch, the bread turned out to be softer than I had remembered. How to get the *crunch* that lingered in my memory? Toast it, slice by slice in the the toaster, and drizzle with honey. Lovely.
My mother and I talked about this recipe and she says it never lasts in their house, mainly because they give away one of the two loaves every time. She still is still teaching me more things than just making bread.
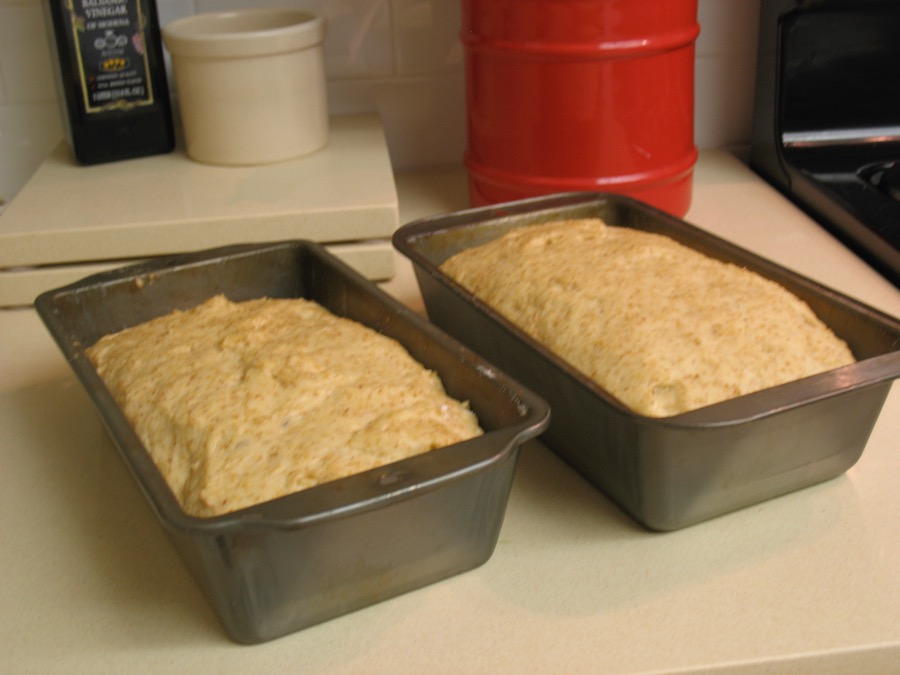
Mother’s Wheat Germ Bread
Combine in a mixer bowl:
1 1/2 cups boiling water 6 Tbls. shortening (I suppose you could substitute butter) 1/2 cup honey 1 teaspoon salt
Dissolve 2 packages yeast in 1/2 cup warm water and add to above mixture. Then add 2 eggs, mixing well, but not overbeating.
Add: 1 cup wheat germ and 3 cups white flour and beat for 2 minutes at medium speed. Blend in 2 1/2 cups more flour.
“Blob it in” (the recipe says) into 2 greased loaf “tins,” and let rise to within 1″ of the top of the pan.
Bake at 375 degrees for 45-50 minutes. Brush tops with melted butter.
I find that I’m used to a more complete recipe these days: Do I turn the loaves out onto racks immediately, or let them cool for 10 minutes in the pan? When do I brush on the melted butter? How long do I mix the dough? This is a recipe from days when most women cooked, and cooked regularly, and knew what to do. I smile at even earlier recipes that say things like “Cook in a moderate oven until done.” Translation, please?