Kitchen Sink Cookies

Adapted from Barb of Sweet Mac Shop

I loved the cookies from Sweet Mac Shop, but found them a tad too sweet to my tastes. So I made some adjustment to some of the measurements, but kept the interesting combination of pretzels, caramel bits and chocolate chips. I also subbed out some whole-wheat flour for the all-purpose flour for a bit chewier texture. These are hard to resist!

I buy these at Walmart.

Ingredients
1 cup butter, still a little cold, but soft
3/4 cup brown sugar, packed
1/2 cup white sugar
1 tsp vanilla extract
2 large eggs
1 cup whole wheat flour
1 1/2 cups all-purpose flour
1 tsp. baking soda
1 tsp. baking powder
1/2 tsp. salt
1 1/2 cups semi-sweet chocolate chips
1 1/2 cups chopped pretzels
1 bag Kraft Caramel Bits (11 oz)

Instructions
Preheat oven to 400 degrees.

Place butter in a stand mixer with paddle attachment, then add both sugars and beat for 4-5 minutes until light and fluffy. Add in eggs and vanilla and beat one more minute.

Mix together the whole wheat flour with the baking soda, baking powder and salt. Whisk together and add slowly to mixer on low speed. Add the all-purpose flour; mix just to combine.

Coarsely chop pretzels. Add chocolate, caramel, chopped pretzels to the cookie mixture and just mix until combined.  Over-mixing will break down the pretzels.

Sweet Mac Shop uses the OXO size 20 scoop to make all her cookies evenly shaped, and I did the same, scooping them out on a parchment-covered baking sheet. Pop into freezer for 10 minutes. (I store the tray of cookies in the freezer and bring them out in between to set up a new batch.)

Pull out 9 balls of dough at a time and space them on a half-sheet baking sheet lined with parchment paper. Bake for 8-12 minutes. 

Gingerbread Cookies

I was visiting Matthew’s house at Christmastime, when we decided to rustle up a batch of Gingerbread Cookies, for eating and for sharing.  I found this recipe online at the King Arthur Flour website, and they all turned out so well I wanted to put it up here (I own the King Arthur cookbook).  We made a few modifications for ease in preparation, which I’ve incorporated into the recipe below.

Ingredients
3/4 cup unsalted butter
3/4 cup brown sugar, packed
3/4 cup molasses
1 teaspoon salt
2 teaspoons cinnamon
2 teaspoons ground ginger
1/4 teaspoon allspice or cloves
1 large egg
1 teaspoon baking powder
1/2 teaspoon baking soda
3 1/2 cups King Arthur Unbleached All-Purpose Flour

Instructions
In a large mixing bowl, place the brown sugar, molasses, salt, and spices.  Melt the butter in a microwave, and add to the sugar/molasses mixture.  Beat in the egg.

Whisk the baking powder, soda and flour together, then to the molasses mixture about a quarter at a time.

Place the dough in a gallon-sized quart bag, shape it into a flat disk, zip closed, and refrigerate for 1 hour or longer. The dough may be sticky and hard to roll if not thoroughly chilled, so make sure it’s cold before continuing.

Preheat your oven to 350°F. Get out several baking sheets; line with parchment parchment paper.

Once the dough has chilled, take one-half of the dough out of the refrigerator.  I always use a floured pastry cloth and a stockinette on the rolling pin, but if you don’t have this, work on a well-floured surface, and roll the dough 1/8″ to 1/4″ thick; the thinner you roll the dough, the crispier the cookies will be.

Cut out shapes with a cookie cutter, cutting them as close to one another as possible to minimize waste.  Roll scraps into a ball, and re-roll and cut out again.

Transfer the cookies to prepared cookie sheets. Bake the cookies just until they’re slightly brown around the edges 8 to 10 minutes, or until they feel firm. Let the cookies cool on the baking sheets for several minutes, or until they’re set. Transfer them to a rack to cool completely. Repeat with the remaining dough.

Cook’s Note: We doubled this with no troubles at all, but worked with only 1/4 of the dough at a time, keeping the rest refrigerated.

Orange-Cranberry-Pistachio Biscotti

I had to make a batch of cookies to take to a holiday event, and decided to revamp my traditional biscotti recipe, adding pistachios, orange zest and dried cranberries (Craisins) to the recipe.  The original, Anise-Almost Biscotti, are great biscotti, but I omitted the almonds and the anise and added the above treats.  They were a hit.

Preparation: Position rack in center of oven and preheat to 350°F. Line1 baking sheet with parchment paper.

Ingredients
1 and 1/4 cups sugar
10 tablespoons (1 1/4 sticks) unsalted butter, melted
3 large eggs
1 tablespoon vanilla extract
3 1/4 cups all purpose flour
1 tablespoon baking powder
1/3 teaspoon salt
zest from two medium oranges (about 1 Tablespoon)
1/2 cup dried sweetened cranberries (Craisins)
1/2 cup coarsely chopped pistachios (unsalted, unroasted preferred, but it’s okay if you don’t have them that way.  I buy mine at Trader Joe’s).

In mixer, mix sugar, melted butter, 3 eggs, vanilla extract, and orange rind. In another bowl, sift (or stir together) flour, baking powder and salt.  Add flour mixture to egg mixture and stir on low speed, scraping when needed until well blended.  Add dried cranberries and pistachios.


Glop half of the dough onto the parchment-lined cookie sheet. Dough is kind of gooey–so I used my spatula to shape each dough half into 13 1/2-inch-long, 2 1/2-inch-wide log. Mine got a little wide, so the final biscotti were a little flat. Remember that, when you shape them. Space the logs 2-3 inches apart.  (What you see here is a doubled batch.)

Bake logs until golden brown (logs will spread), about 35 minutes (a little longer than the usual biscotti). They should be firm to the touch. Don’t turn off the oven! 

(traditional biscotti shown here)

Cool logs completely on sheet on rack, about 20 minutes.  I dragged mine over onto a baking rack by using the edge of the parchment paper, and tilting the cookie sheet a little bit.

Transfer logs to work surface; discard parchment paper. Using serrated knife, cut logs on diagonal into 1/2-inch-wide slices. Stand them on edge, as shown in the first photo.  If you do it this way, you don’t have to turn them over, and you can get it all on one baking sheet.  Bake 15-20 minutes.  You want to make sure there are no doughy spots, and they are good and crunchy.

Transfer to rack and cool. These can be prepared 1 week ahead of your Big Party. Store in airtight container at room temperature.  These have a melt in your mouth crispness that are typical of homemade biscotti, but unlike store-bought, they won’t break your jaw.

Blueberry Crumble Bars


I first ate these at Quilt Night, an evening where a lot of quilters gather to stitch, trade tales and have a treat.  And what a treat this was: Laurel outdid herself. She called them “Blueberry Oat Bars” but we have since renamed them, since they remind us of eating blueberry crumble. I’ve since made them for my husband and I, a daughter and her family, a couple moving out of the area, a son and his family, and it gets rave reviews from everyone.

To begin, heat oven to 350 F; grease 9 x 13 baking pan.

Topping

1 ¾ cup old-fashioned Quaker oats, uncooked
1 ½ cup all-purpose flour
¾ cup brown sugar, firmly packed
½ cup chopped walnuts
½ t. baking soda
½ t. salt
¾ cup butter, melted

Combine oats, flour, brown sugar, nuts, baking soda and salt. Add butter, mixing until crumbly. Reserve ¾ cup mixture; press remaining mixture onto bottom of prepared dish.  Bake this bottom layer for 10 minutes.

Filling

2 cups fresh or frozen blueberries
½ cup granulated sugar
3 T. water, divided
2 T. cornstarch
2 t. lemon juice

While bottom layer bakes, combine blueberries, granulated sugar and 2 T. water in medium saucepan.

Bring to a boil, simmer 2 minutes, uncovered, stirring occasionally. Combine remaining 1 T. water, cornstarch, and lemon juice; mix well. Gradually stir into blueberry mixture; cook and stir about 30 seconds or until thickened.

Spread over partially baked base to within ¼ inch of edge; sprinkle with reserved oat mixture.

Press topping down into blueberries slightly.

Bake 18 to 20 minutes or until topping is golden brown.  Cool on wire rack; cut into bars. Store tightly covered, or freeze.

NOTE: I doubled this, and used a rimmed baker’s half-sheet to bake it in.  All times are the same; ingredients are doubled.

SaveSave

SaveSave

SaveSaveSaveSave

Chocolate-dipped Valentine Cookie

Chocolate-dipped Valentine Cookies

I had planned to make biscotti for the church ladies this week, then remembered that they all sort of nibbled around the corners of that cookie, not wanting to make it sound crunchy, even though outside of their happy mouths no one can hear the crunching, so thought I’d try and find a Valentine Cookie that was quieter.  I found this while searching and proceeded to make them up as directed.  Except I tripled them–Kids, Don’t Try This At Home!  Just make them in a single batch and you and your mixer will be much happier.

I also noticed in the comments that many substituted out the peppermint extract for almond extract.  I think that would be a better choice, as I found the peppermint in full strength to impart an almost bitter taste to the cookie.

I also have an ancient sugar cookie recipe that mixes the ingredients a little differently: cut the butter/cream cheese into the flour, add the eggs/liquids, and go from there.  I am thinking that would have been a lot easier than the mess I made in the kitchen today.

Ingredients:
1 cup butter, softened
1 (3-ounce) package cream cheese, softened
3/4 cup sugar
1 egg
1 teaspoon peppermint extract
3 cups all-purpose flour

Glaze
1 (12-ounce) package (2 cups) real semi-sweet chocolate chips
2 tablespoons shortening

Directions

Combine all cookie ingredients except flour in large bowl. Beat at medium speed, scraping bowl often, until creamy. Add flour; beat at low speed until well mixed. Divide dough in half; wrap each half in plastic food wrap. Refrigerate 2 hours or overnight until chilled.

Heat oven to 375°F. Roll out dough, one-half at a time (keeping remaining dough refrigerated), on lightly floured surface to 1/4-inch thickness. Cut out cookies with 2 1/2-inch heart-shaped cutter. Place 1 inch apart onto ungreased cookie sheets. Bake 7-10 minutes or until edges are very lightly browned. Remove from cookie sheets to wire cooling rack; cool completely.

Melt chocolate and shortening in 1-quart saucepan over low heat, stirring occasionally, 4-6 minutes or until melted. Dip half of each heart into chocolate. Place onto waxed paper-lined cookie sheets; refrigerate until chocolate is firm. Store refrigerated.

Mom’s Mint Surprise Cookies

IMG_1882

I don’t know where my mother got this recipe, or if she invented it herself, but it’s a cookie I always associate with her and with holiday baking. When I baked up a batch and brought them as a gift to each child at her 75th birthday party, all of us children nodding a knowing smile.

As a child I loved them warm, right out of the oven, or set in the sun on cooler day to warm the mint chocolate surprise waiting inside the spiced cookie.  I liked nibbling the edges of the cookie, freeing me to separate the two halves like those sandwich cookies, and lick off the chocolatey goodness before finishing up the cookie.  However you choose to eat them, they are a winner.

IMG_1871

You’ll need these: Trader Joe’s UFO’s Mint Chocolate Wafers.  Better get two bags because the wafers seem to disappear quickly.

UPDATE: I went in to Trader Joe’s yesterday (December 2013), and they no longer make, nor carry these.  I’m leaving this post up anyway, as it is a good childhood recipe, and maybe someone, somewhere, will make these again!

UPDATE, APRIL 2014: I found some Dark Chocolate Mint Wafers at Kitchen Krafts.  I’ll try them out and see if they work okay.

Barbara Sessions’ Mint Surprise Cookies

2/3 cup shortening
2/3 cup butter
1 cup brown sugar
1 cup white sugar
1/4 cup honey
2 eggs
1/2 cup whole wheat flour
3  1/2 to 4 cups white flour
2 tsp. each: salt, soda, cinnamon, cloves, ginger
12 oz. bag Trader Joe’s UFO’s Mint Chocolate Wafers

Cream shortening, butter, sugars and honey.  Add eggs, beating well after addition.  Mix together whole wheat flour, 1/2 cup white flour and spices.  Blend and add to creamy mixture.  Add the rest of the flour, depening on the size of eggs you used. Chill.

IMG_1872

Wrap one Tablspoon dough around one chocolate mint wafer.

IMG_1876

Bake 375 degrees F for 10-12 minutes.  Let cool on rack, if you can stand to wait.  They freeze well.

IMG_1883

Sugar Cookies

Sugar Cookies

This recipe is for plain old sugar cookies.  The kind that you roll out and cut with shapes, while your granddaughters (and you) try to sneak the dough.  I first made this recipe about 40 years ago while in high school, when we had to bake giant football-shaped cookies for the football players, a fund-raiser hosted by Girls for Gunn.  I was in leadership that year, so took over my mother’s kitchen making 8″ cookie footballs, decorating them with icing, cutting cardboard to fit and stretching plastic wrap over them to deliver on the morning of Homecoming. I have made it multiples of times since, first with my own children and now with my grandchildren.

You can make it ahead and store it in the refridgerator; it may need a few minutes to warm up a bit before you can roll and shape them.  These cookies are good with a shake of sugar over them just before putting them into the oven, or, if you leave them plain, decorated with frosting and sparkles/candycorn/M&Ms, or what have you.  These granddaughters were fascinated by the physics of placing candy corn on the uncooked cookies, then watching the corn melt into strange and unusual formations while in the oven.

Elizabeth Eastmond’s Sugar Cookies           

3 cups sifted (or stirred) flour
1 cup sugar
1 and 1/2 teaspoons baking powder
1/2 teaspoon salt
1 cup soft butter (don’t use margarine)
1 egg, slightly beaten
3 Tablespoons cream
1 teaspoon vanilla extract

400° F oven  Yield: approximately 72 cookies

Sift flour, sugar baking powder, salt into mixing bowl.  Using electric mixer (or pastry blender) cut in butter until particles are fine.  Add egg, cream and vanilla extract.  Blend thoroughly.  Gather dough into ball.  Chill, if desired, for easier handling.

Roll out on floured surface 1/2 at a time to a thickness of 1/8 to 1/4 inch.  (The thinner the cookie, the crispier.  The thicker the cookies, the softer they will be.)  Cut into desired shapes; place on ungreased cookie sheet. {If you don’t plan to frost them, sprinkle them with granulated sugar before baking.} Bake 400°F for 5-8 minutes or until golden.

Lime Sugar Cookies

Lime Sugar Cookies

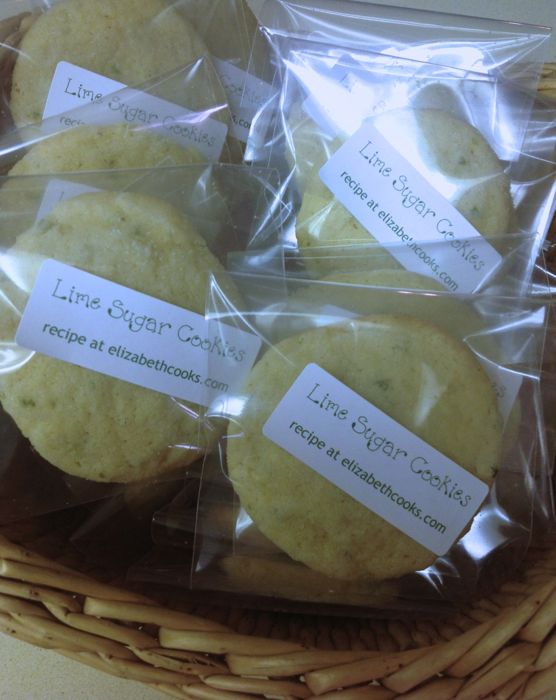
It’s been unbearably hot here this past couple of weeks, and it came time to make a treat for the ladies at church and all I could think about was cool things: icy drinks, ice cream, and lime, because for some reason I associate lime with cool summery things.  And I usually make the ladies a cookie, so I went hunting for a recipe.  What I present below is a variation of a recipe found on Epicurious (first published in Gourmet Magazine in July of 2000), incorporating a few of the reviews.

Lime Sugar Cookies_1

While I don’t usually like cookies that take too many steps (I believe you’re just supposed to throw stuff into a mixing bowl, then onto the cookie sheet, then pop the resulting warm baked treat into your mouth), this extra step of making lime sugar is a good step to add, for these cookies are pretty tender, and getting the lime-infused sweetness into them and onto them adds to their appeal.

Lime Sugar Cookies_2

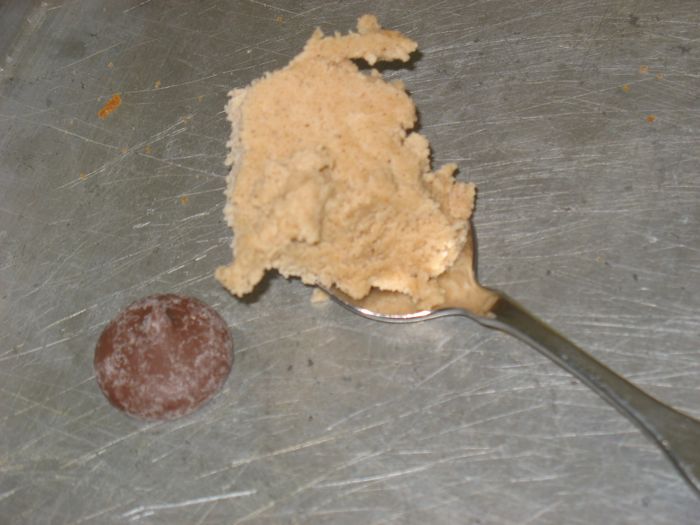
If you don’t have a food processor, I suppose you could use a rasp to grate the lime peel, then blend into the sugar WELL, and it will probably work.  This batch made about 55 cookies.  Last caveat: the dough is really soft and must be chilled for easier handling, so while these are easy to whip up, be sure to chill them at least four hours.  As far as shaping goes, I used a small cookie dough scoop to get them uniform; alternatively you could roll the dough into the size of a golf ball with your hands.

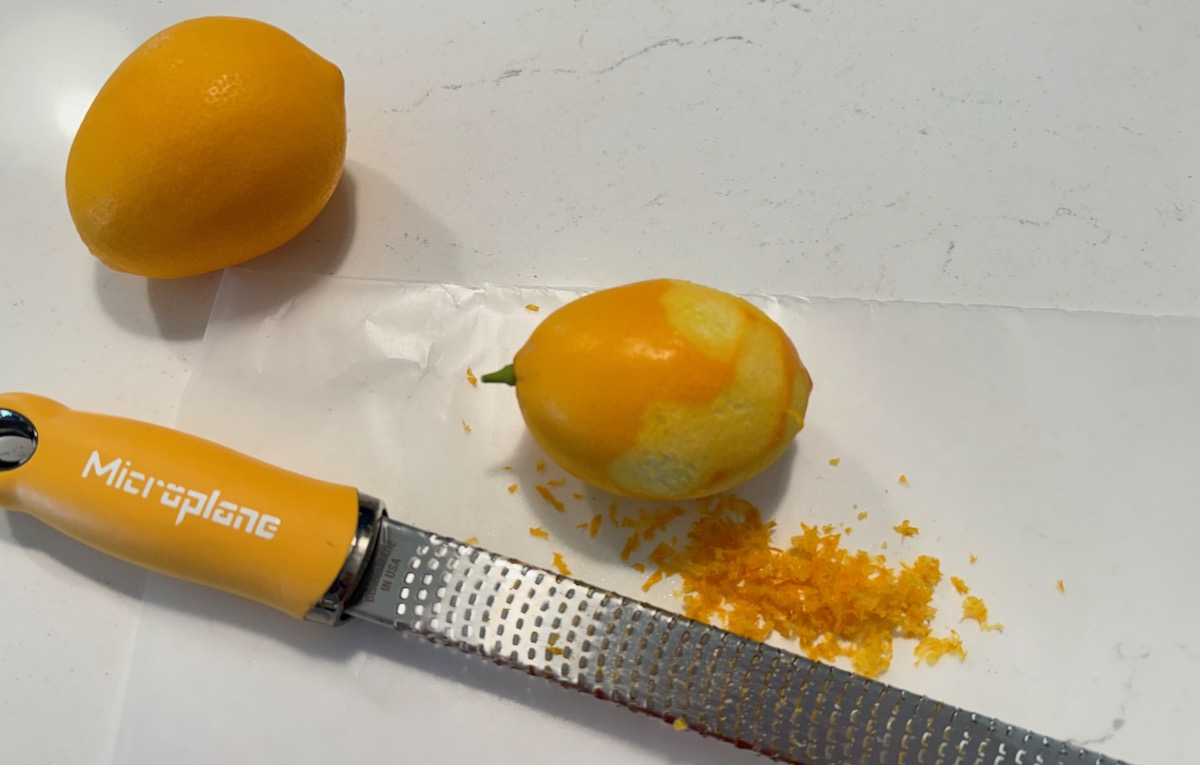
First make your Lime Sugar
9 limes
2  1/2 cups sugar

Preparation
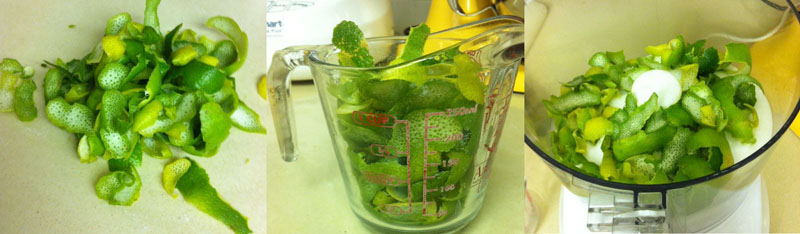
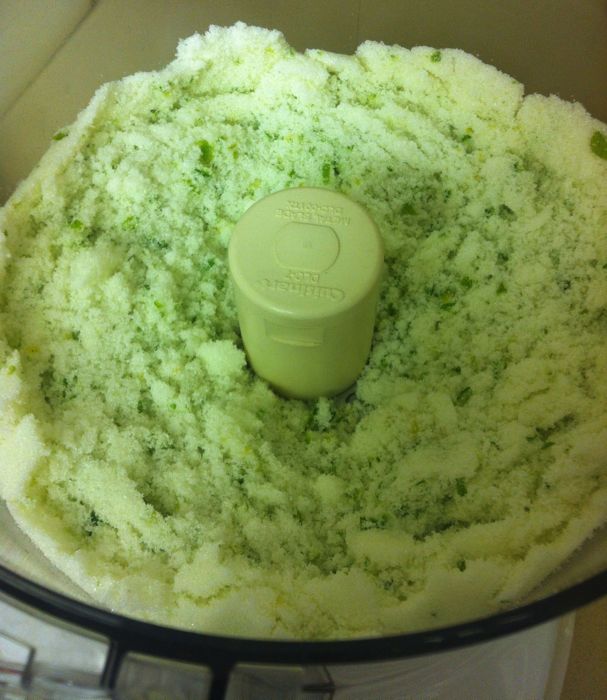
Remove zest from limes in strips with a vegetable peeler being careful not to strip off the white pith along with the zest (a little won’t matter, but pith imparts a bitter flavor). Unchopped, the zest measures a healthy one cup (see photos above).  Place sugar in the food processor, add lime peels and grind until mixture is pale green with bits of zest still visible. Lime sugar may be made 3 days ahead and kept, chilled, in an airtight container, but could also be frozen for longer storage.  NOTE: The sugar becomes aerated in the food processor; do not pack when measuring.

Now make the Cookies
2 and 1/4 sticks (18 tablespoons) butter, softened
6 tablespoons cold vegetable shortening
3 cups lime sugar
3 large eggs
3 teaspoons vanilla
3 3/4 cups all-purpose flour
3 teaspoons baking powder
1 and 1/2 teaspoons salt

Preparation

Beat together butter, shortening, and lime sugar with an electric mixer until light and fluffy. Beat in eggs and vanilla. Combine flour, baking powder, and salt together then add gradually to the egg mixture; beat on low speed until just combined.

Cover and chill dough until firm, at least 4 hours.

Preheat oven to 375°F.

Mix 1 cup granulated sugar with 1/2 cup lime sugar in a bowl.  Using a small cookie scoop about the size of a golf ball, scoop balls of dough into the sugar mixture, then roll to cover well. (At our house, we put the sugar mixture in a ziploc bag, add the dough balls to that and shake gently to cover them in sugar.)

Lime Sugar Cookies_3

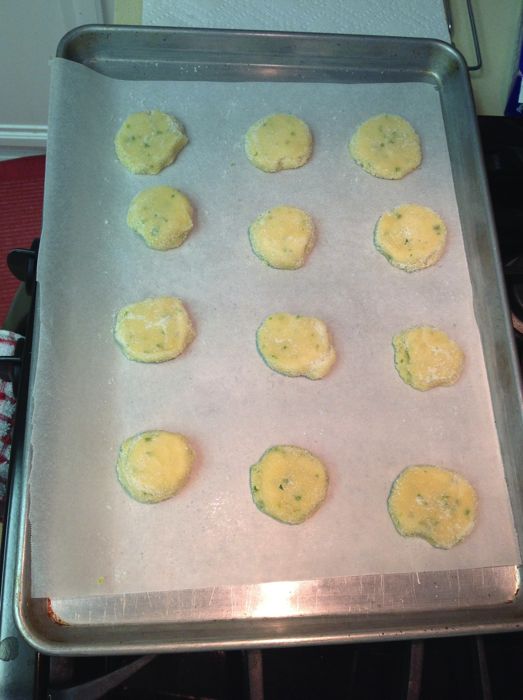
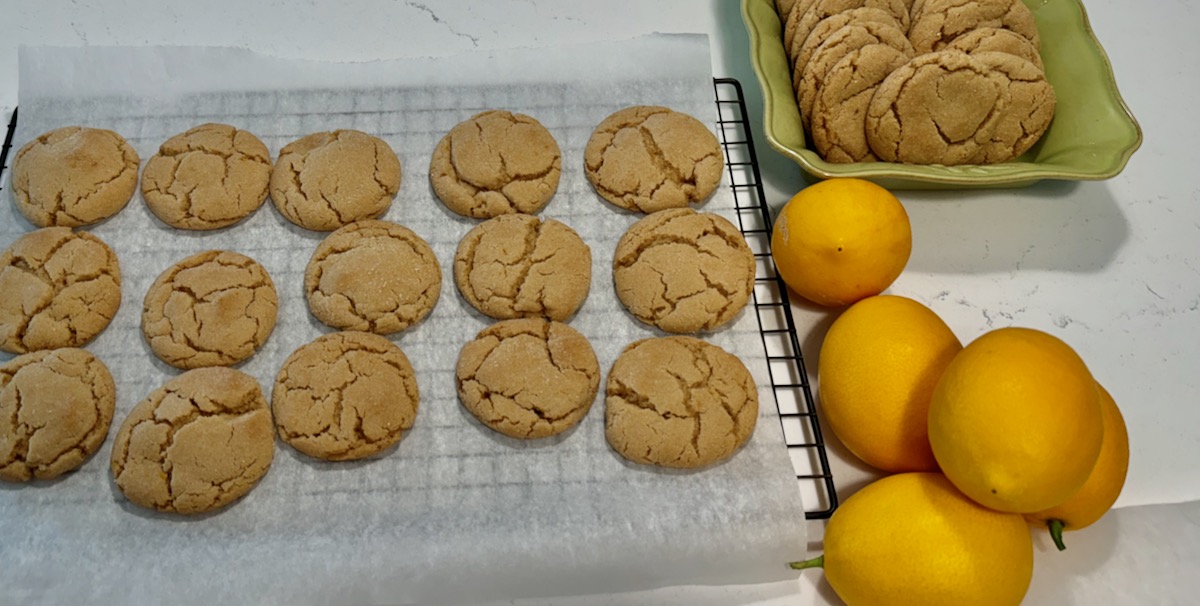
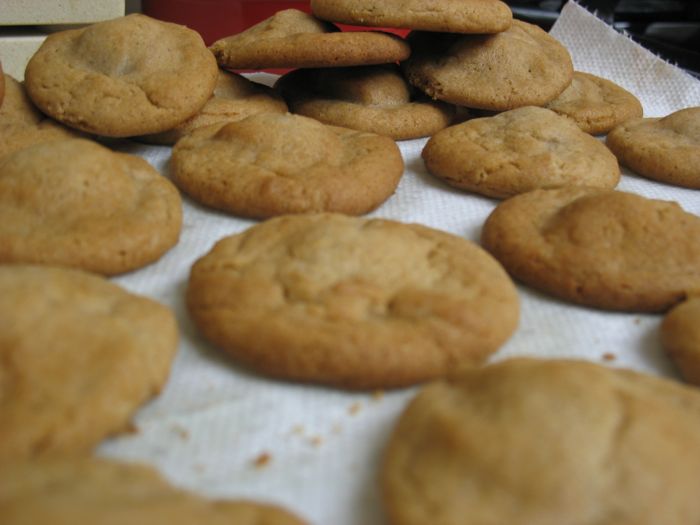
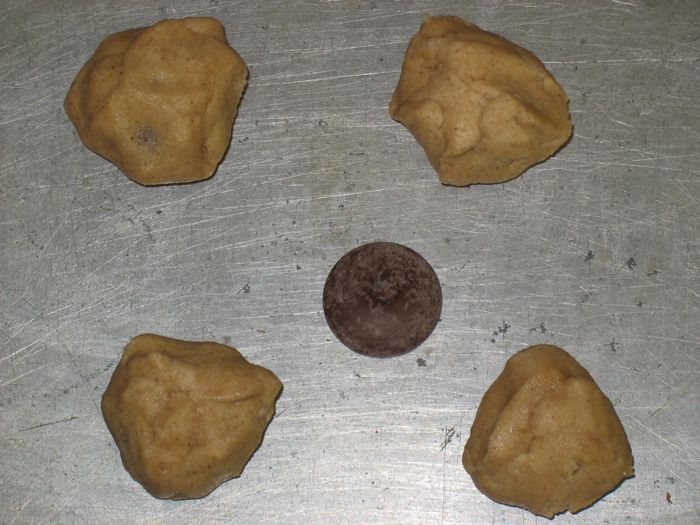
PROPERLY PLACED COOKIES

Shake off excess, then place 2-3 inches apart on parchment-lined cookie sheet.  Press lightly with bottom of a drinking glass to flatten slightly.

Bake cookies in batches in middle of oven 11 to 12 minutes, or until pale golden with slightly dark golden edges. (Don’t overbake.)  Immediately transfer with a metal spatula to a rack set. Cool cookies.  Dough can be made 2 days ahead and chilled, wrapped well in plastic wrap.  Cookies keep in an airtight container at cool room temperature 2 days.
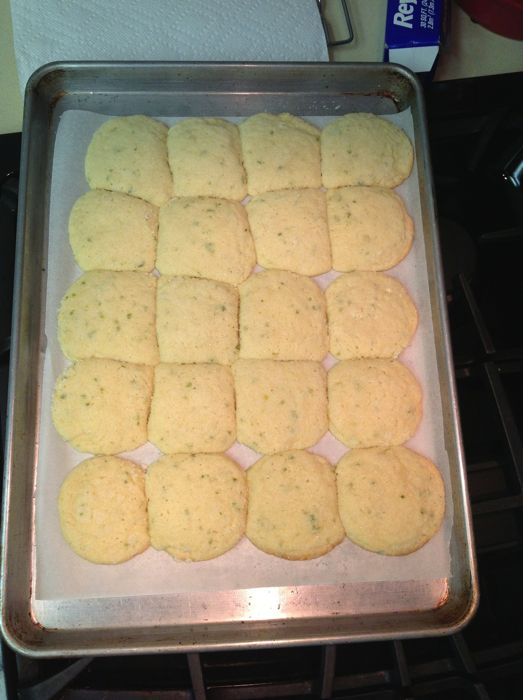
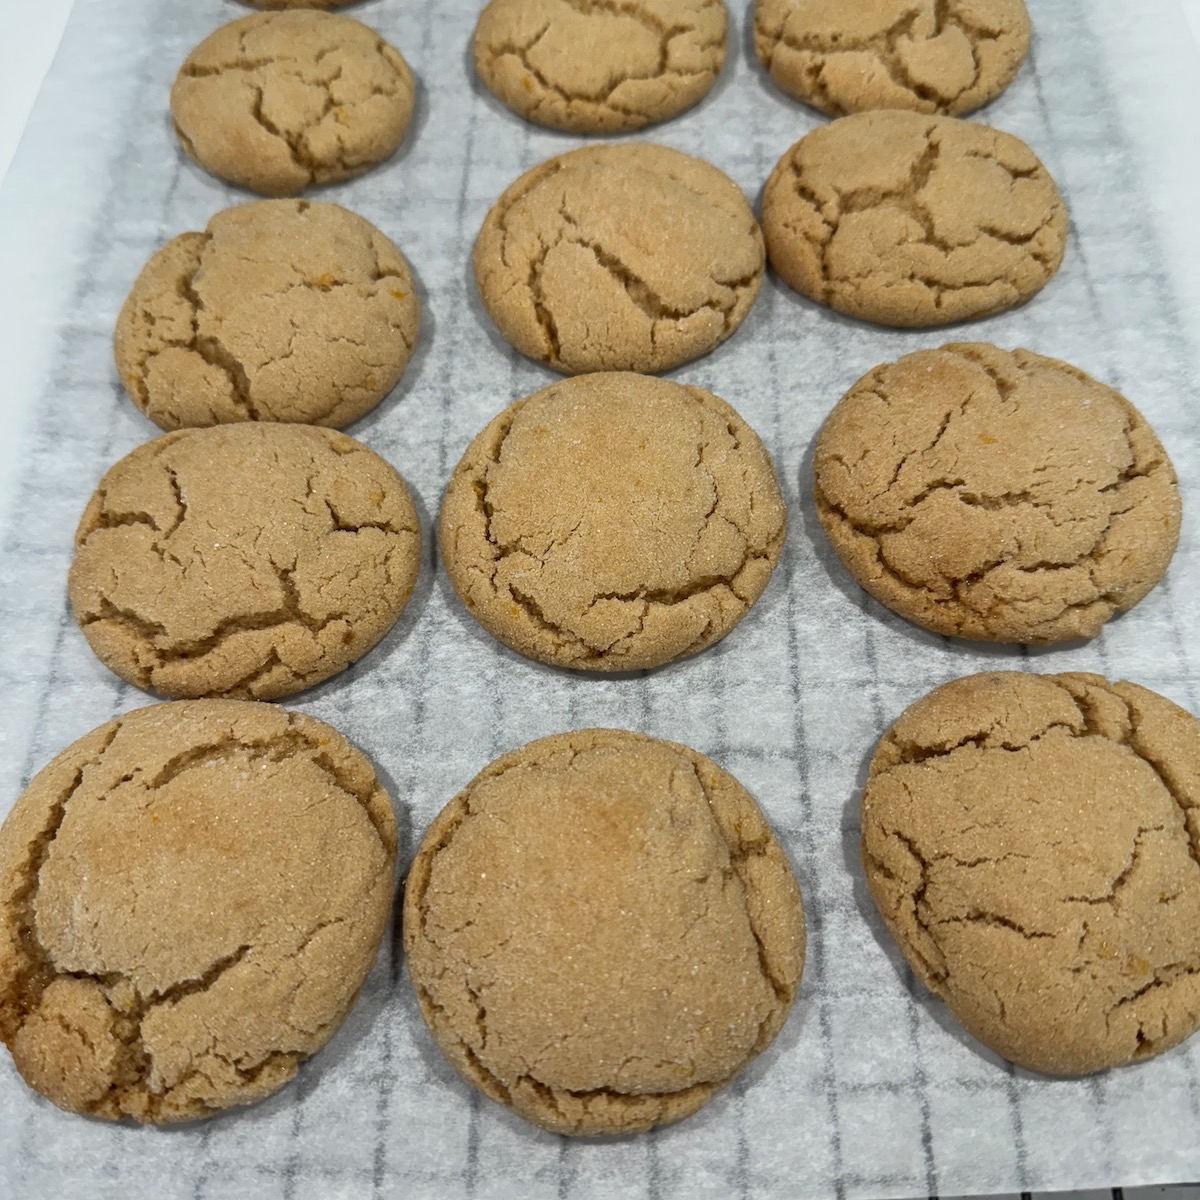
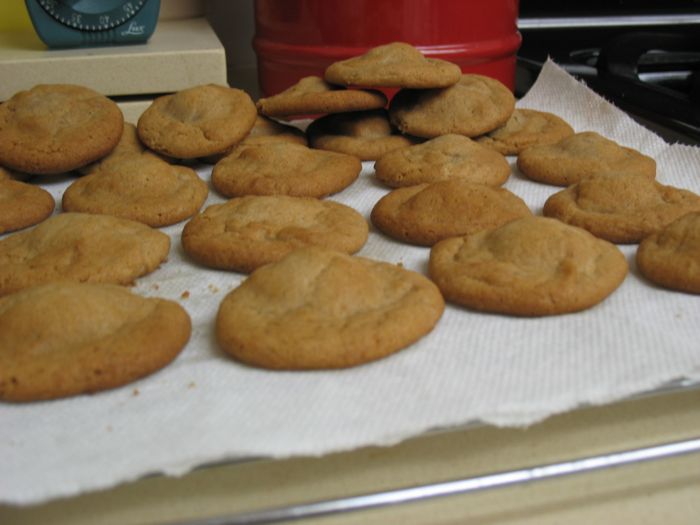
 Lime Sugar Cookies_4

FAIL.

This is why you shouldn’t crowd the cookies.  They were still good, but required 13 minutes to cook and were slightly square. Confession: I still packaged them up and gave them out, but put the prettier ones on top.

Reindeer Christmas Cookies

My daughter informed me that these are all over Pinterest, but I found them by following a series of links to *this* page, where I swear this cook has photoshopped her cookies to look that good.  Or maybe she’s just a better baker than I am, or maybe it’s because I substituted a cube of butter for some of that shortening — thinking it would taste better — but forgot how soft it makes cookies.  So note to self: don’t swap out the shortening.  Now, prep your stuff.

I couldn’t find baby chocolate-dipped pretzels, so if you think I was going to dip them all, you don’t know me very well.  Spend your time where it counts, and improvise the rest.  So I cut all my sort-of-mini pretzels in half.  Antlers are kind of hoary looking, aren’t they?

I purchased minty white chocolate M&Ms for the nose.  They come in a package with red and white.  We ate all the white ones, while saving the red ones for this project.  I had also purchased mini M&Ms for the eyes.  We decided we liked brown and blue, and that the reindeer with the green eyes looked like Zombie Reindeer (so that would be for a different holiday).

Make up a double batch of the dough in the Christmas Kiss cookies. Roll them into 1-inch balls, but I have to admit that I used my cookie scooper, which I think is 1 and 1/2 inches. Place a couple of scoops of sugar in a large plastic baggie, drop in the balls of cookie dough, and shake lightly to coat them with sugar (so much easier than rolling them around in a dish).

Flatten them slightly with the bottom of a glass, then pinch their “nose” slightly, to get that elongated shape.  Bake for 8 to 10 minutes, then remove from the oven.  QUICKLY set in a matching pair of antlers, then do the nose, then the eyes last.  Or get someone to help you: my husband did all the antlers while I was throwing on noses and eyeballs.

Let cool on the cookie sheet.  When mostly cool, transfer to a rack.

NOTE: you can see I used parchment paper on this batch.  You can buy it in rolls from the grocery store or (now) from Costco.  If you don’t use parchment paper, the world won’t end.  However, you may want to transfer your cookies to the cooling rack when they are still sort of warm, instead waiting until they are really cool.

Christmas Kiss Cookies

Cream together:

1/2 cup peanut butter
1/2 cup shortening
1/2 cup white sugar
1/2 cup brown sugar.

Add:

1 egg
2 Tablespoons milk
1 teaspoon vanilla extract (not flavoring, use extract!).

Mix together then add to creamed mixture:

1 3/4 cup flour  (I use 3/4 cup whole wheat flour, and 1 cup white flour)
1 teaspoon baking soda
1/2 teaspoon salt

Form into balls about 1 inch in diameter, roll in granulated (white) sugar.  Bake in 350 oven for about 8-10 minutes or until set.  Take out of oven and immediately press a chocolate kiss into center.  Remove to wire rack  to cool.  Kisses will get soft as they take on the heat of the cookies, but will firm up again as the cookies cool.