This started from a recipe from a national newspaper. I made it just as they said and wrote “meh” on it as a review. This week I have three winter squashes sitting on my counter, so decided to give it another go, but do it with some serious changes. Two thumbs up, this time.
Ingredients
1 small butternut or honeynut squash, about 1 pound, peeled, seeded and chopped into 1/2″ cubes
3 Tablespoons vegetable oil (I used olive oil)
approx. 1 teaspoon kosher salt
1/2 small white onion, minced
1 can full-fat coconut milk
2 to 2 1/2 cups chicken broth (about 1 1/2 cans, about 20 oz.)
1 small jalapeño, seeded, cut in half and then in thin slices
fish sauce to taste (start with 1 Tablespoon)
Method
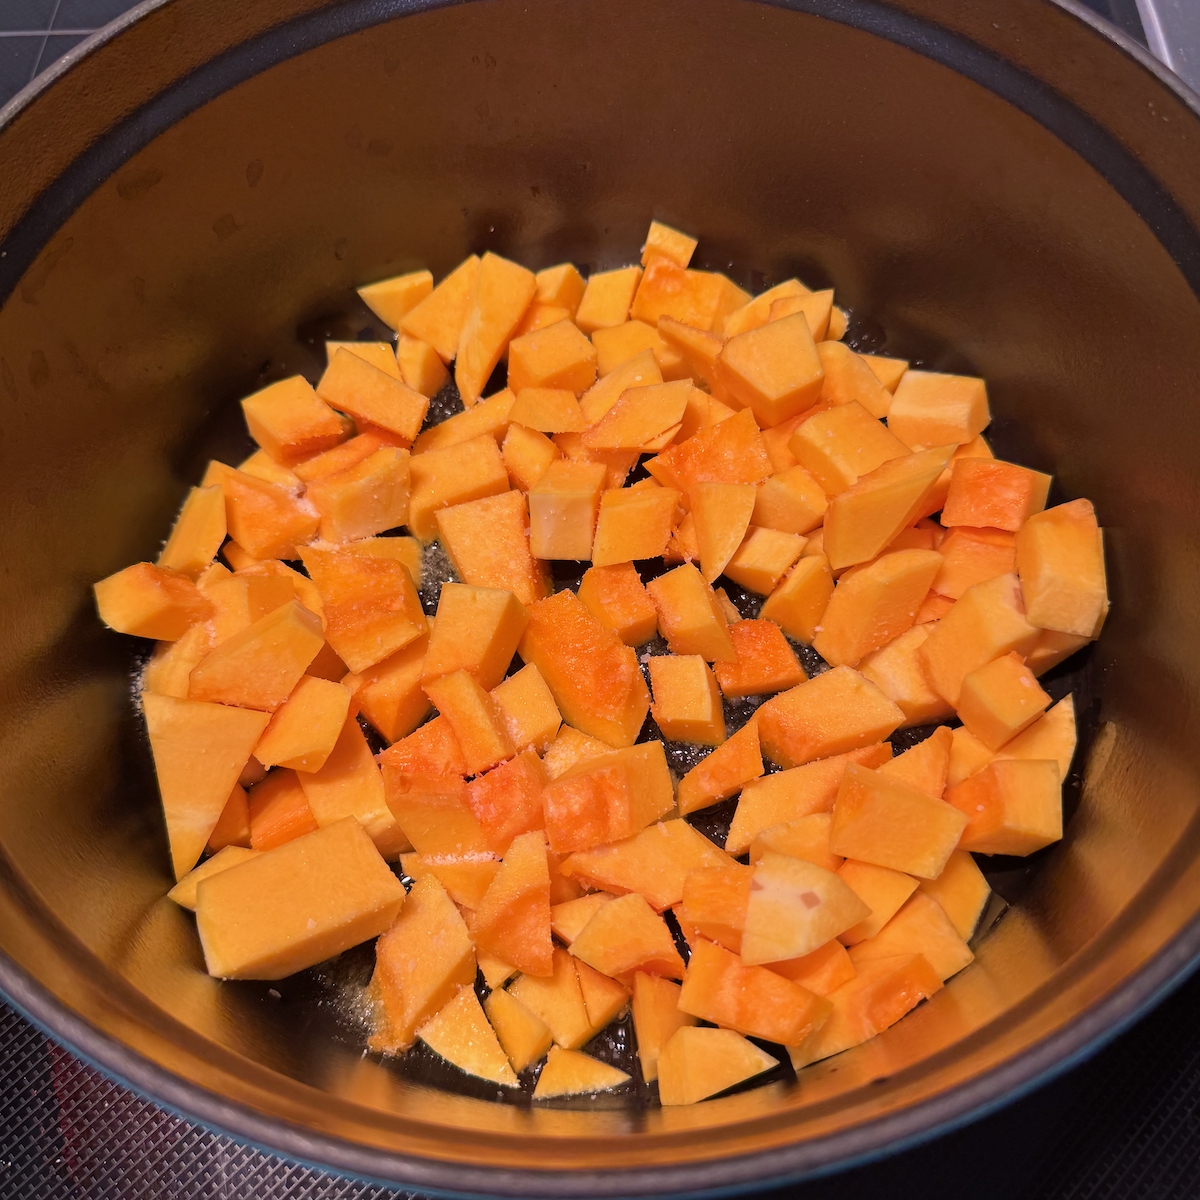
In a medium pot, place the vegetable oil, then toss the squash cubes to coat. Sprinkle with salt, and let cook for 5-7 minutes, stirring occasionally.
Add the minced fresh onion and stir. Let cook another 5-7 minutes, or until the cubes of squash have touches of golden on them.
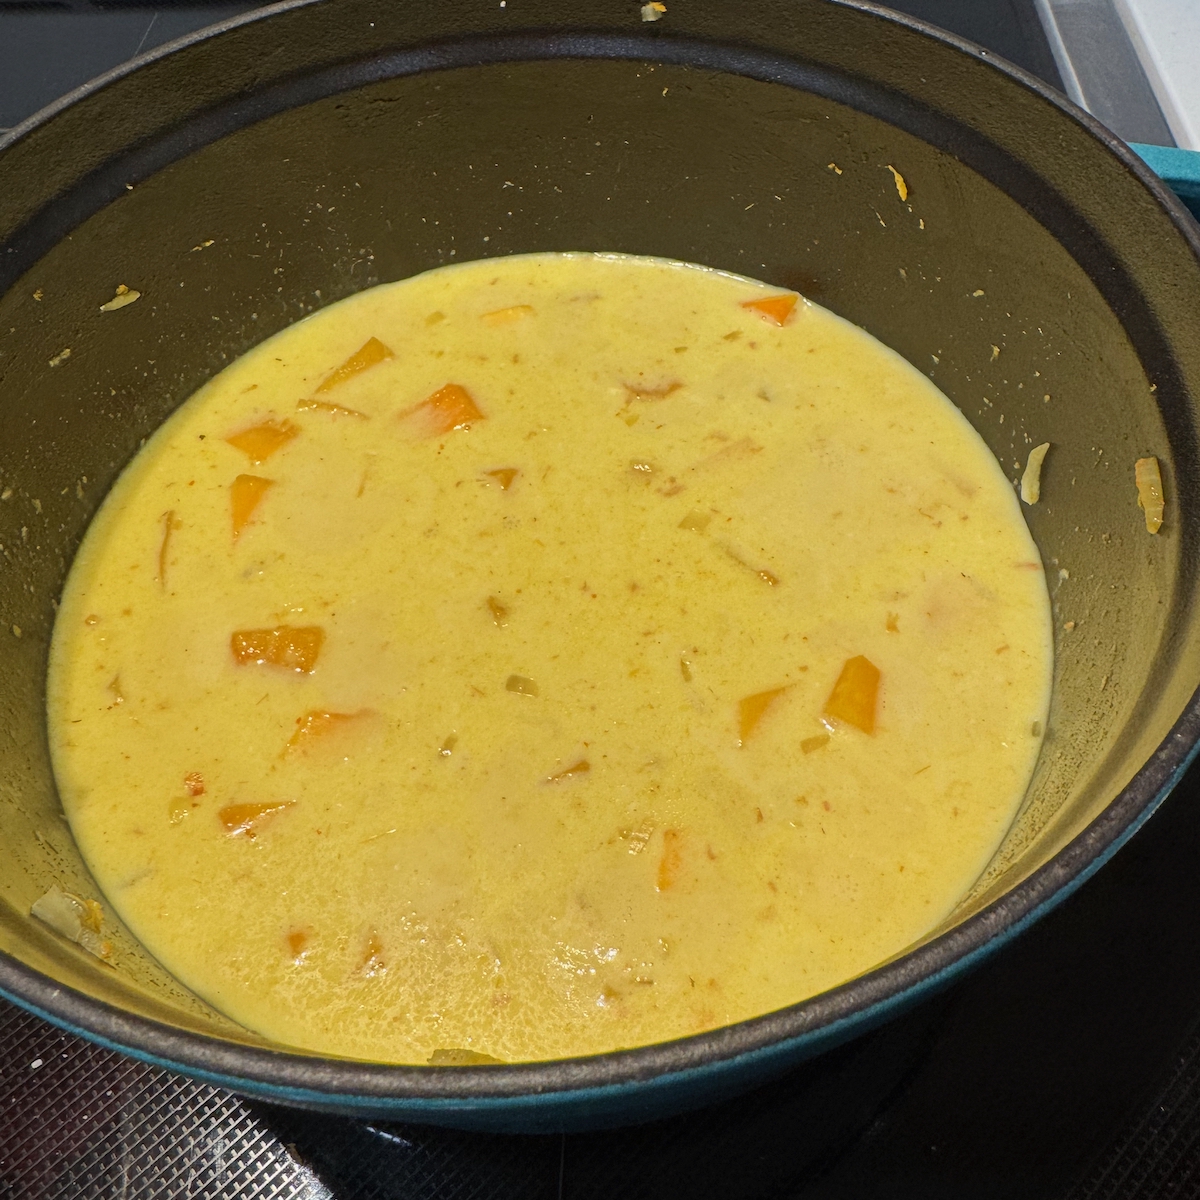
Add the ginger, the curry and the turmeric. Stir until fragrant, about 1 minute.
Pour in the coconut milk and 1/2 cup of the chicken broth. Bring to a simmering boil and let cook until the squash is mostly tender. Turn off the heat and using an immersion blender, whir up the squash mixture until no large chunks are visible, and soup is mostly pureed. (It’s okay to have a few chunks.)
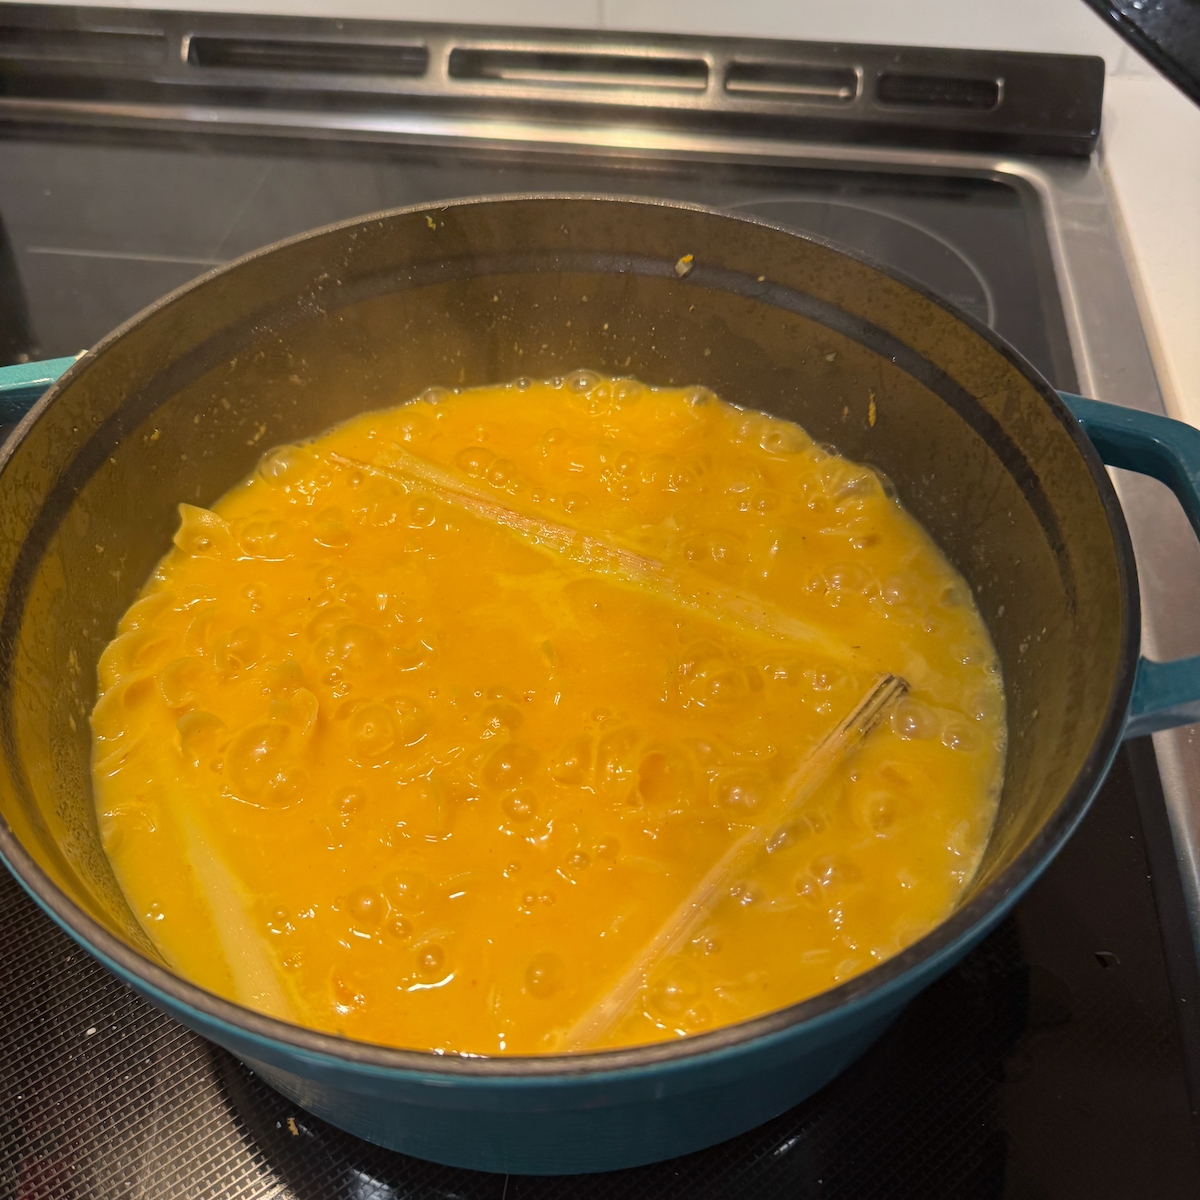
Add the rest of the chicken broth and return to the heat. [NOTE: Hold back on the full amount of chicken broth if it looks too thin. You need enough to cook the dry noodles, but you can always add more at the end if the soup is too thick.]
Snap (or cut) the lemon grass into three parts and drop into the simmering soup. Add the curly noodles, and simmer until the noodles are al dente, about 8-10 minutes. Stir occasionally.
Add the shrimp, submerging them, stirring only a bit until they are cooked through, about 3 minutes. Remove the lemon grass and discard.
Spash the fish sauce and the lime juice into the soup, and stir. Taste, then adjust the salt level. You can do this by either adding a bit more fish sauce, or using some kosher salt.
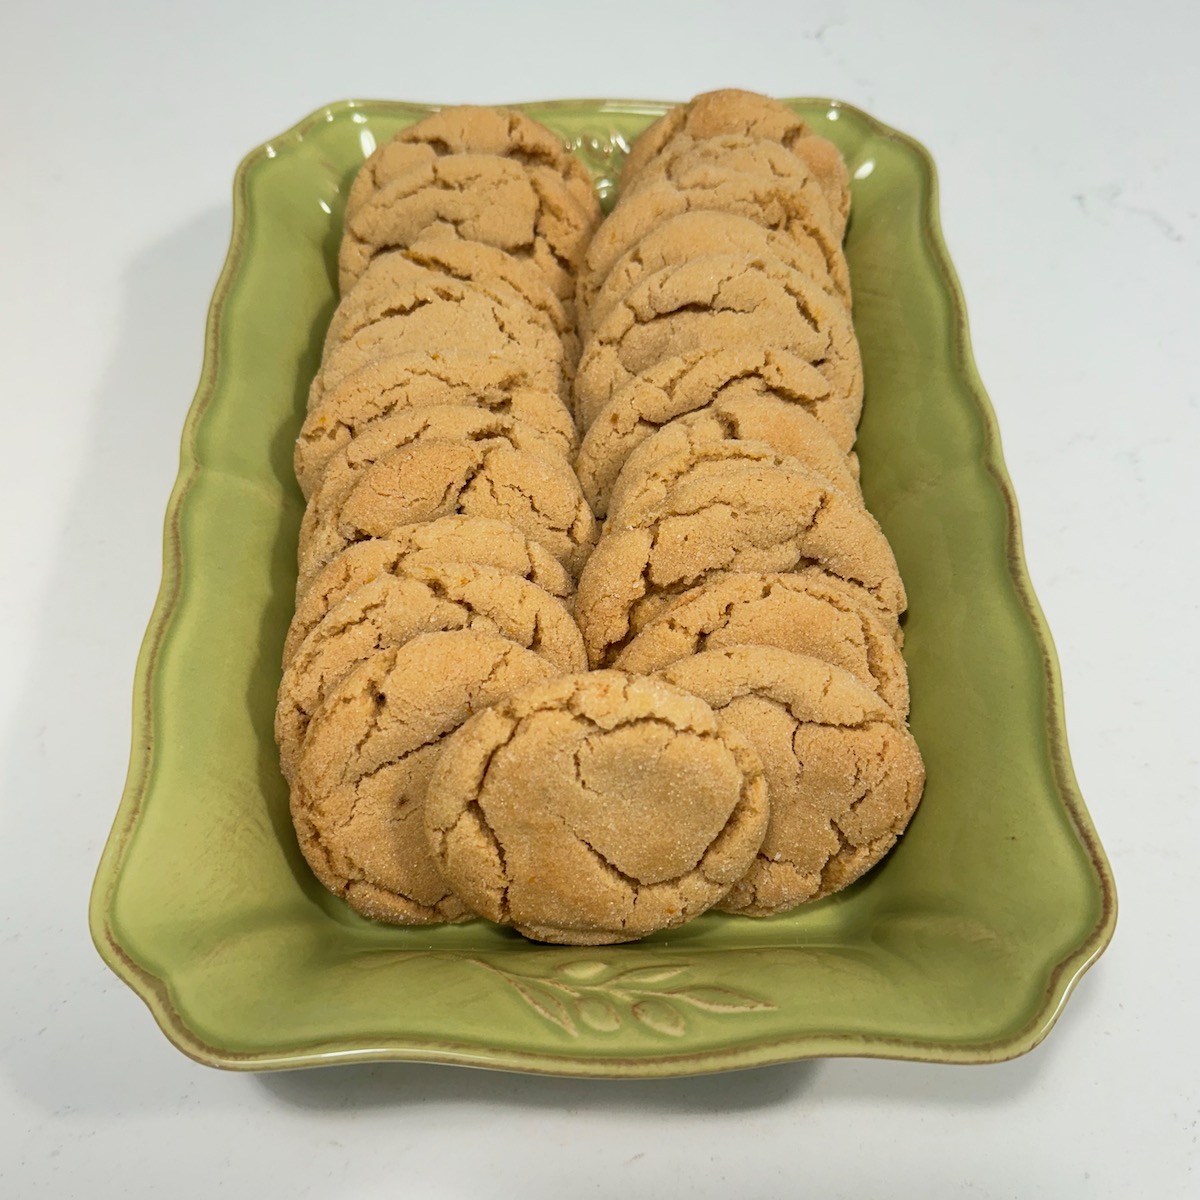
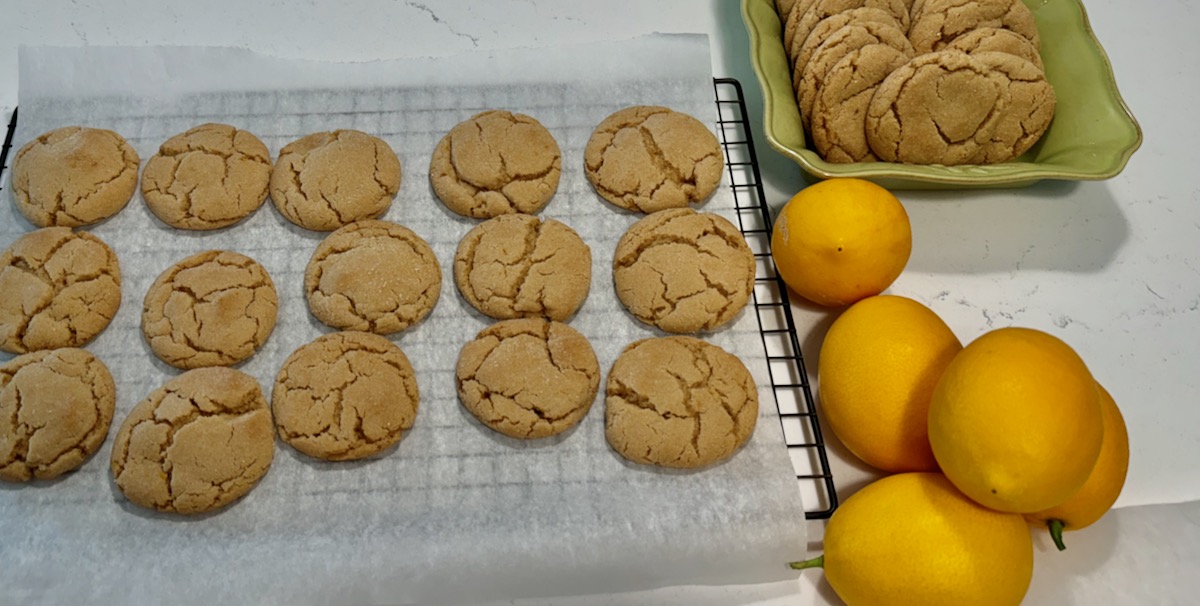
This recipe was on the back of the round box of oatmeal when I was doing my early living. And my middle living. And even lately, I saw it until I didn’t. It’s my go-to recipe for oatmeal cookies. I mostly don’t add raisins, but I always add chopped walnuts.
3/4 cup shortening 3/4 cup margarine or butter 2 cups packed brown sugar 1 cup white sugar 2 eggs 1/2 cup water 2 teaspoons vanilla extract 6 cups old-fashioned oatmeal 1 cup whole wheat flour 2 teaspoons salt 1 teaspoon soda 1-2 cups regular all-purpose flour 1 cup raisins (optional) 1 cup lightly chopped walnuts
Heat oven to 350 degrees F. Beat together shortening, sugars, egg, water and vanilla until creamy. Add oatmeal. Add combined wheat flour, salt and soda; mix well. Add regular flour in 1/2-cup increments, until mixture is somewhat firm, but not dry.
At this point you can add lightly-chopped walnuts (bigger pieces) or 1 cup raisins. (I soak the raisins in hot water for 5 minutes before adding to plump them up.) Bake 12-15 minutes or until light golden brown. Cool one minute on cookie sheet, then remove to cooling rack.
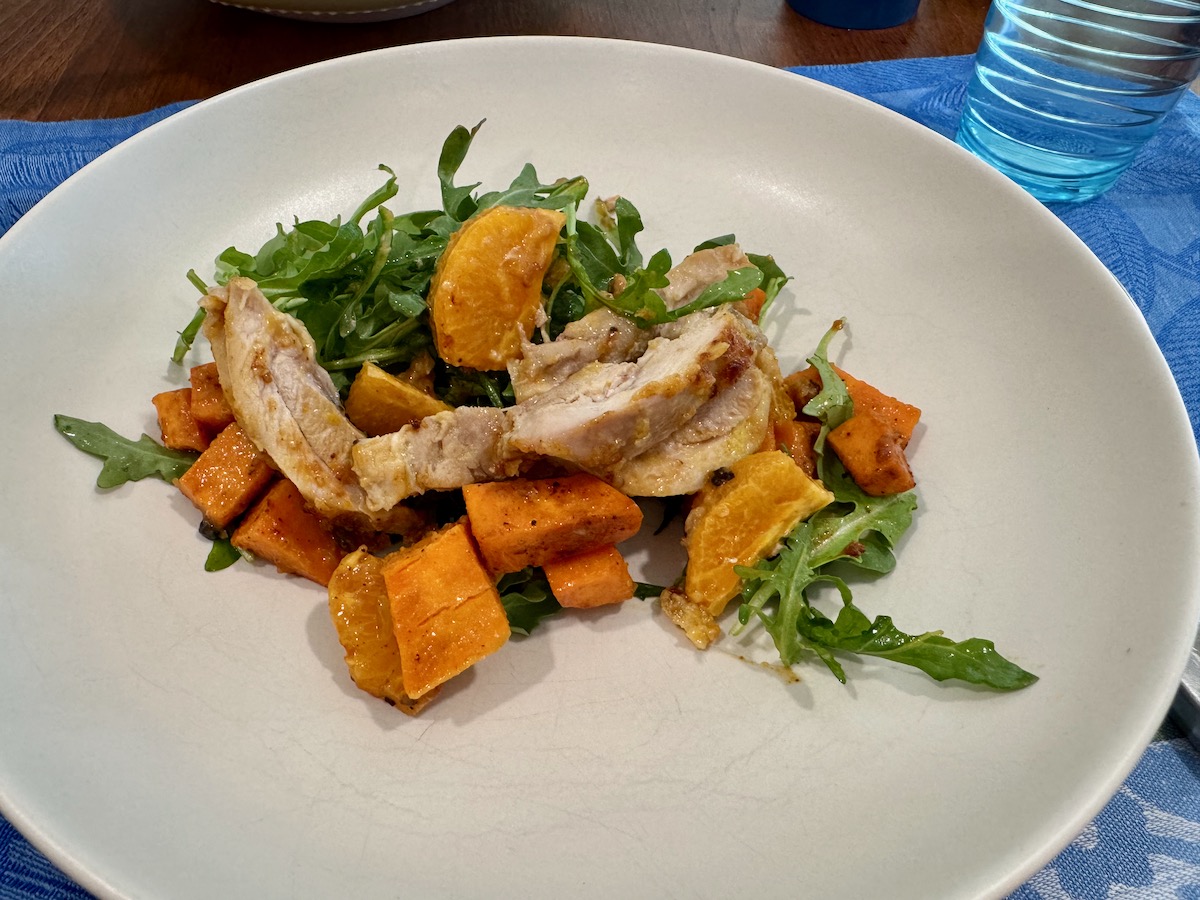
Another great recipe found on the New York Times, and as usual, I changed it up to suit our family. I pulled four mandarin oranges off the tree to make this, and the citrus brightened up the rich flavor of the miso.
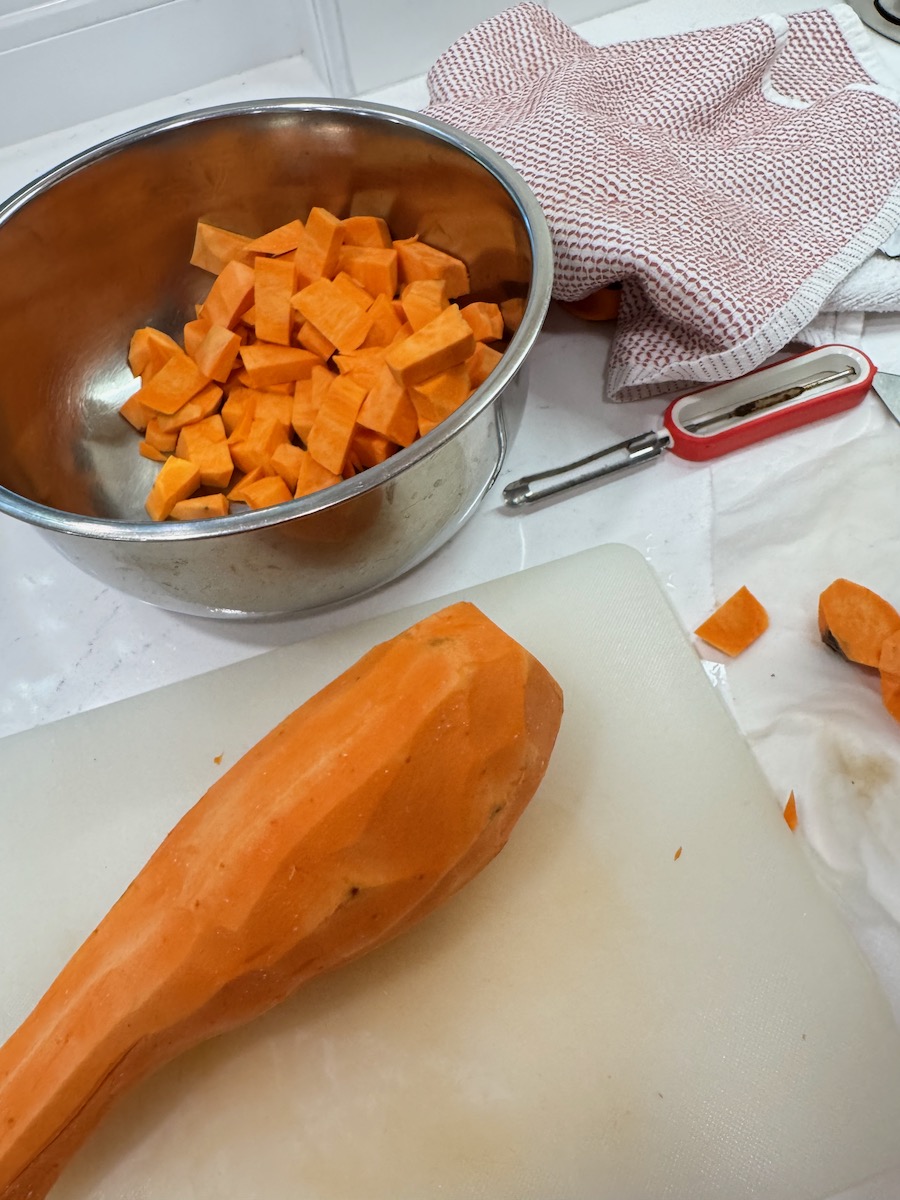
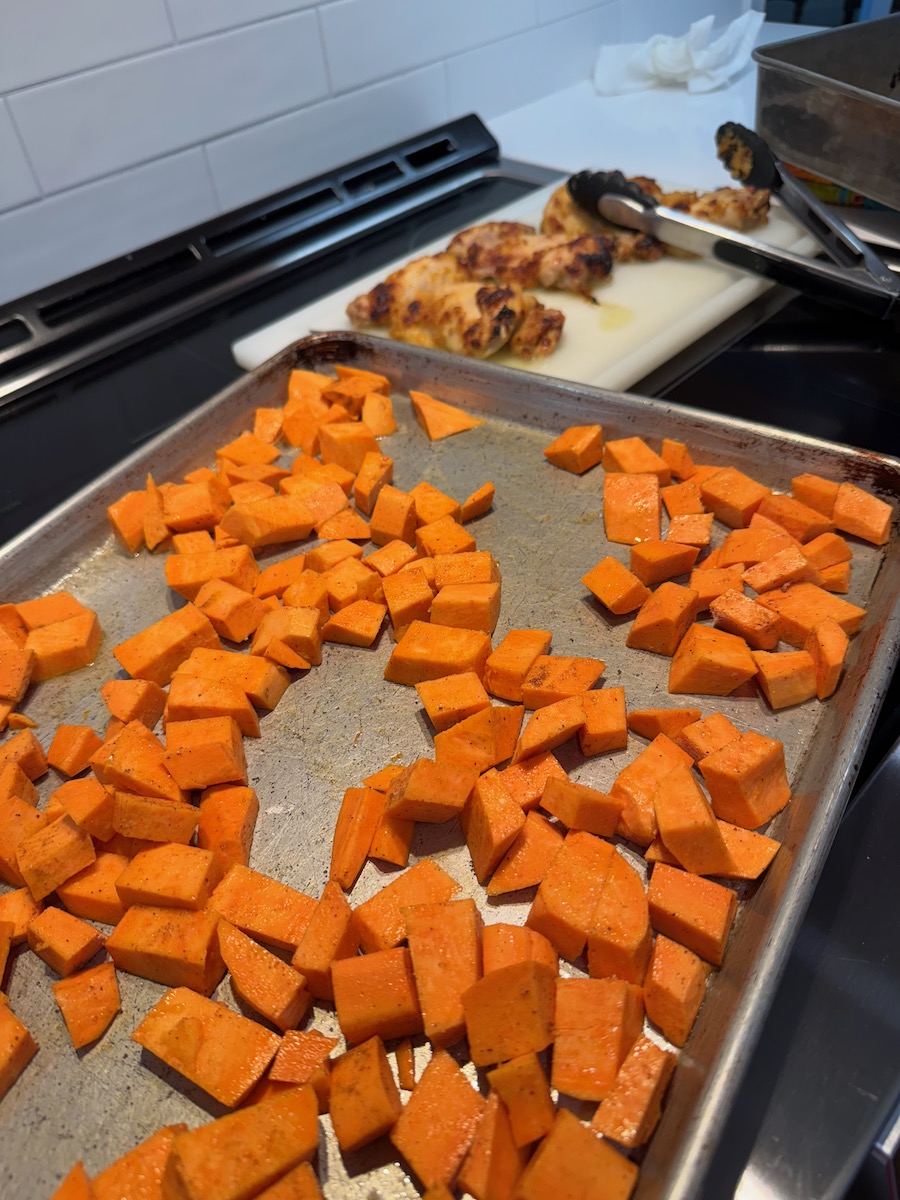
roast sweet potatoes in front, with resting chicken in back
INGREDIENTS
2-4 oranges, or mandarin oranges (we like a lot, but ours were small) 3 Tablespoons butter, melted 3 Tablespoons white miso 2 Tablespoons rice wine vinegar 1 teaspoon brown sugar 1 1/2-2 pounds boneless, skinless chicken thighs salt 2 medium-sized sweet potatoes shake of cumin shake of nutmeg 2 Tablespoons butter for roasting pan drizzle of olive oil for roasting pan 4-5 ounces baby arugula
PREPARATION
Place oven rack in the top third of the oven, then heat to 425 degrees.
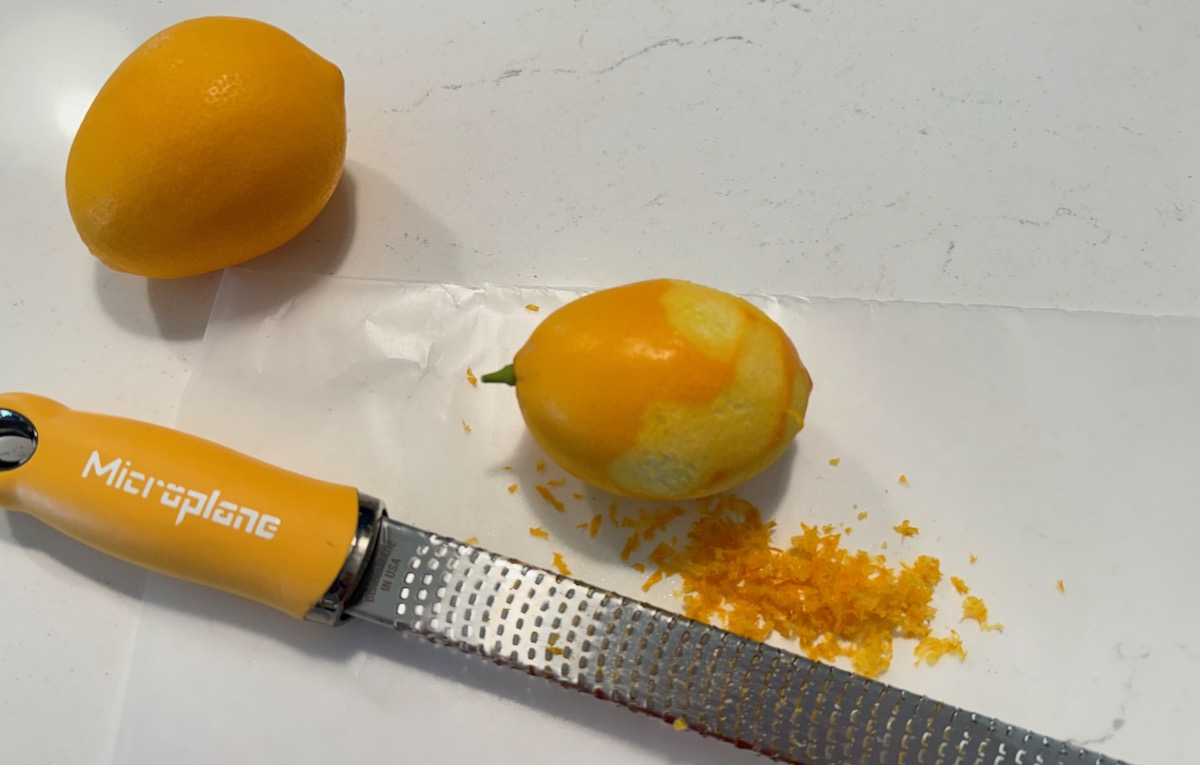
Wash, then finely zest the oranges (can use regular oranges) — about 1 Tablespoon, total — over the melted butter. Add the miso, rice wine vinegar, and brown sugar and stir until well blended.
Place 2 Tablespoons butter and a hefty drizzle of olive oil on rimmed cookie sheet; place in hot oven to get hot, but don’t let butter burn.
Peel two medium-sized sweet potatoes. Cut into 1/2-inch chunks, and toss lightly with olive oil. Sprinkle with a shake of cumin and a shake of nutmeg; toss. Tumble out onto hot cookie sheet, evening it into one layer. Place in oven on lower rack and roast at the same time as chicken, about 20 minutes. Test for doneness, then set aside.
Pat chicken dry, then place in 9 x 13 broiler-safe baking dish and lightly season with salt. Spoon the miso-butter mixture over the chicken and coat all sides of the chicken well (the original recipe suggests using your hands, but I found tongs and a spatula worked quite well). Arrange in a single layer in the baking dish, then roast on the upper rack until cooked through and charred in some spots. I suggest about 20 minutes. If top doesn’t have the char, the broiler could be used for a minute or two. (Likewise, if your chicken is too brown, move it to a middle rack.)
Transfer the chicken to a cutting board; let rest while you finish the prep.
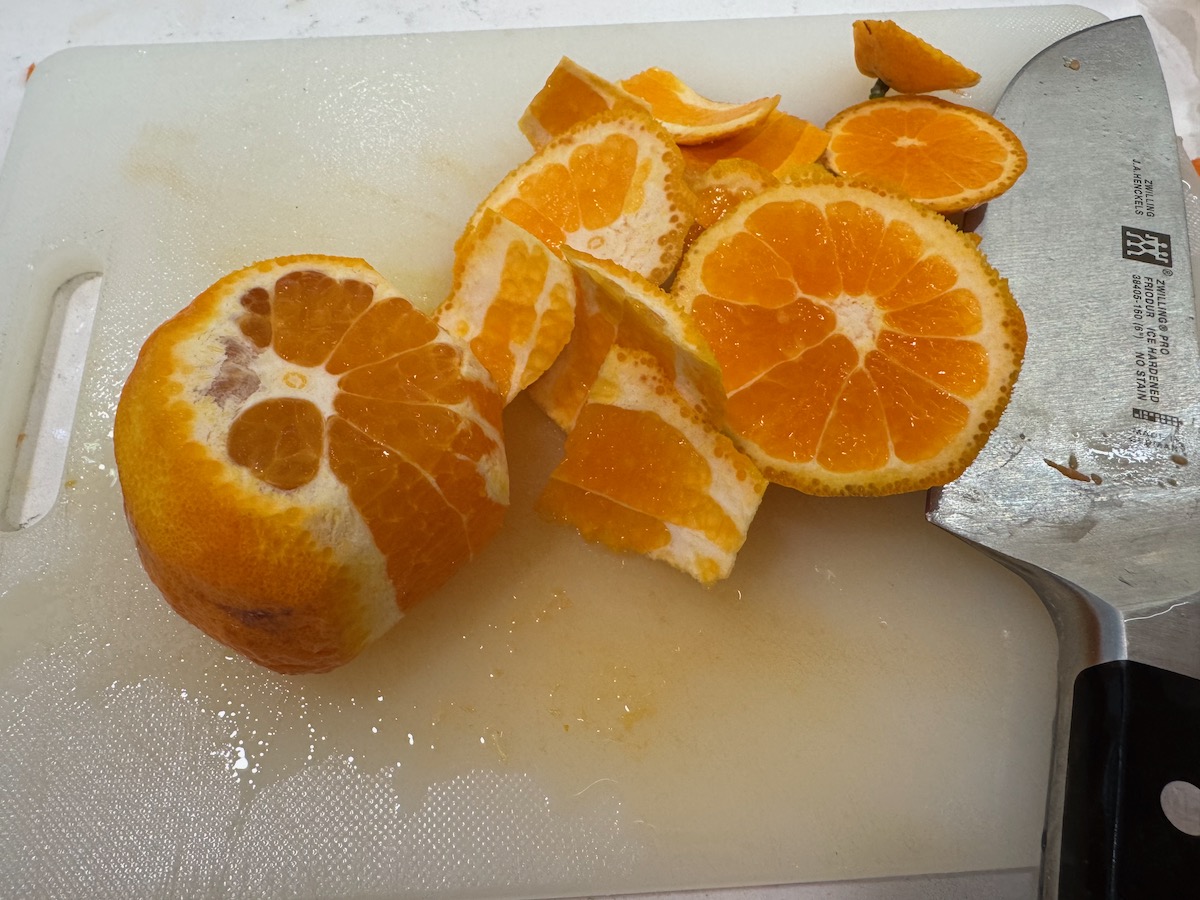
Supreme the oranges: Cut the top and bottom off the oranges, and set it on one cut side. Following the curve of the orange, cut away the pith and the peel, but reserve those peels. Segment the orange into bite-size pieces removing any seeds (if any).
Squeeze the juice from the supremed orange peels into the baking dish, using a spatula to scrape up any browned bits stuck to the pan. Stir in the orange slices.
To serve, slice the chicken. Place the arugula in a large bowl or serving platter. Season with salt, then drizzle on some of the citrus and the juices from the pan. Scoop some roast sweet potato cubes on that, then top with the sliced chicken, followed by the remainder of citrus and juice, and sweet potatoes.
NOTE: We had more sweet potatoes than needed. Judge how much you need to put on the dish. And…my pan juices needed about a minute back in the oven at the end to loosen them up, so I could spoon them onto the arugula for serving.
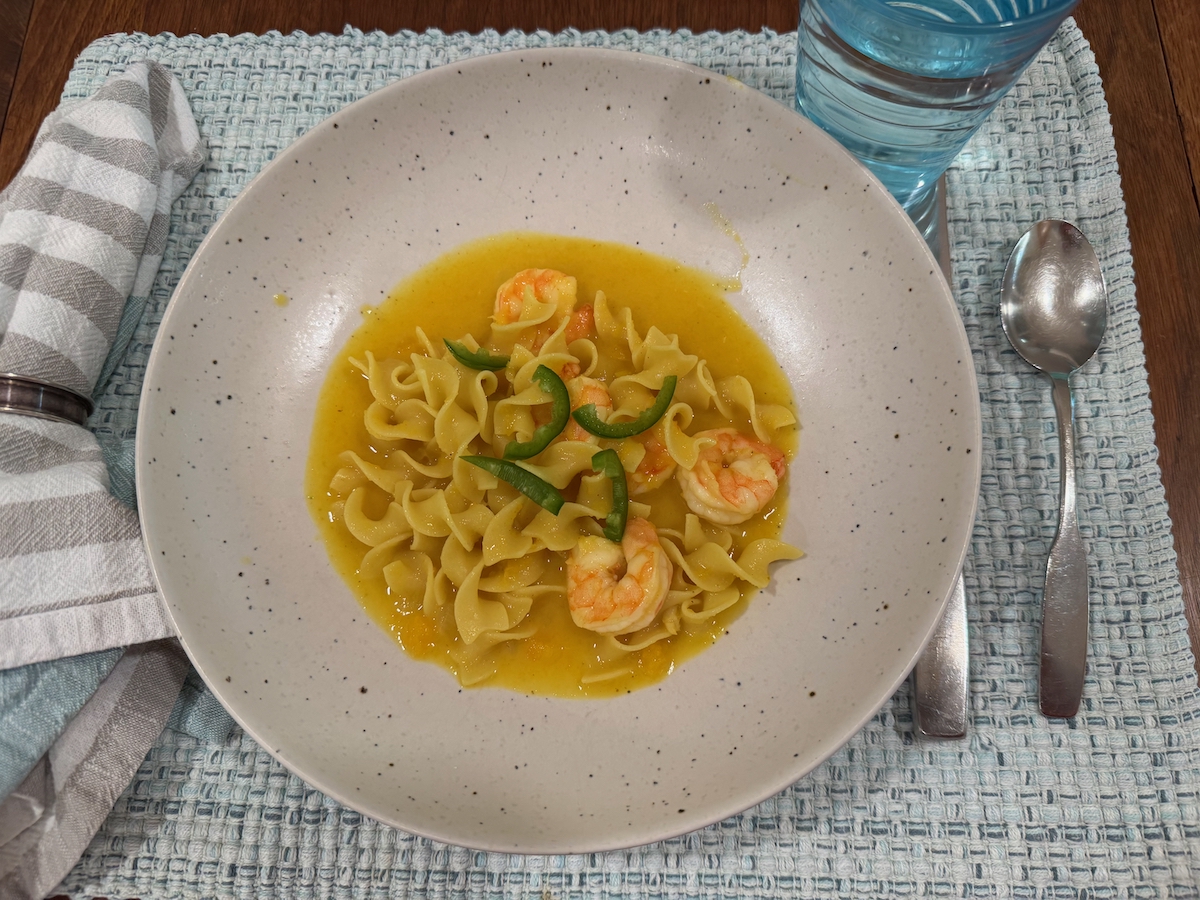
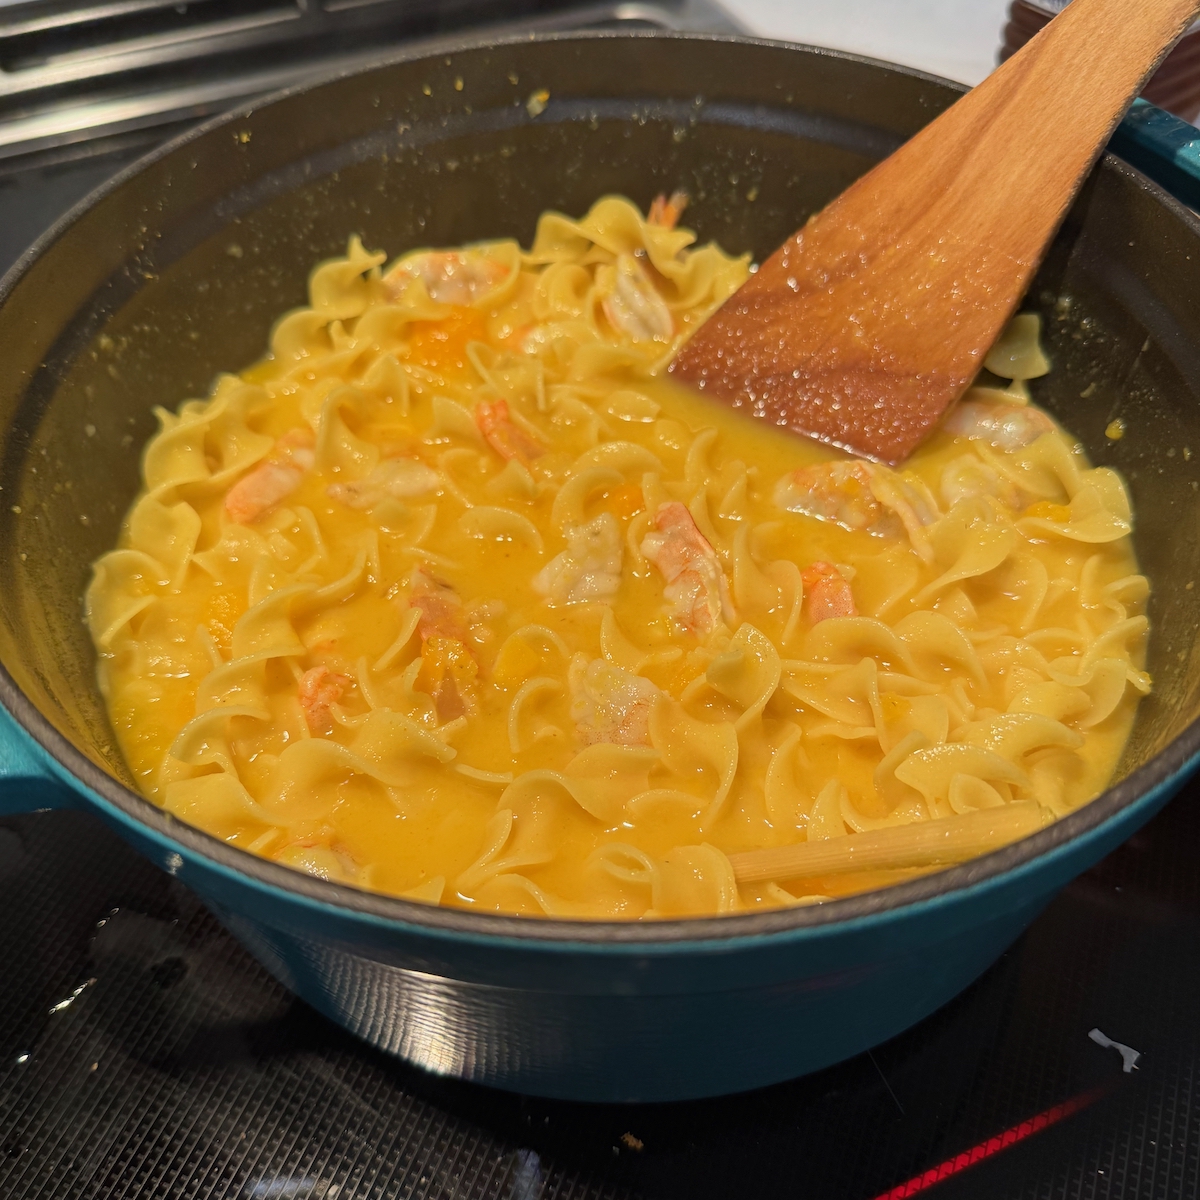
We had shrimp. We had coconut milk. We had ginger. And we even had the jalapeño (used only at the end for garnish.)
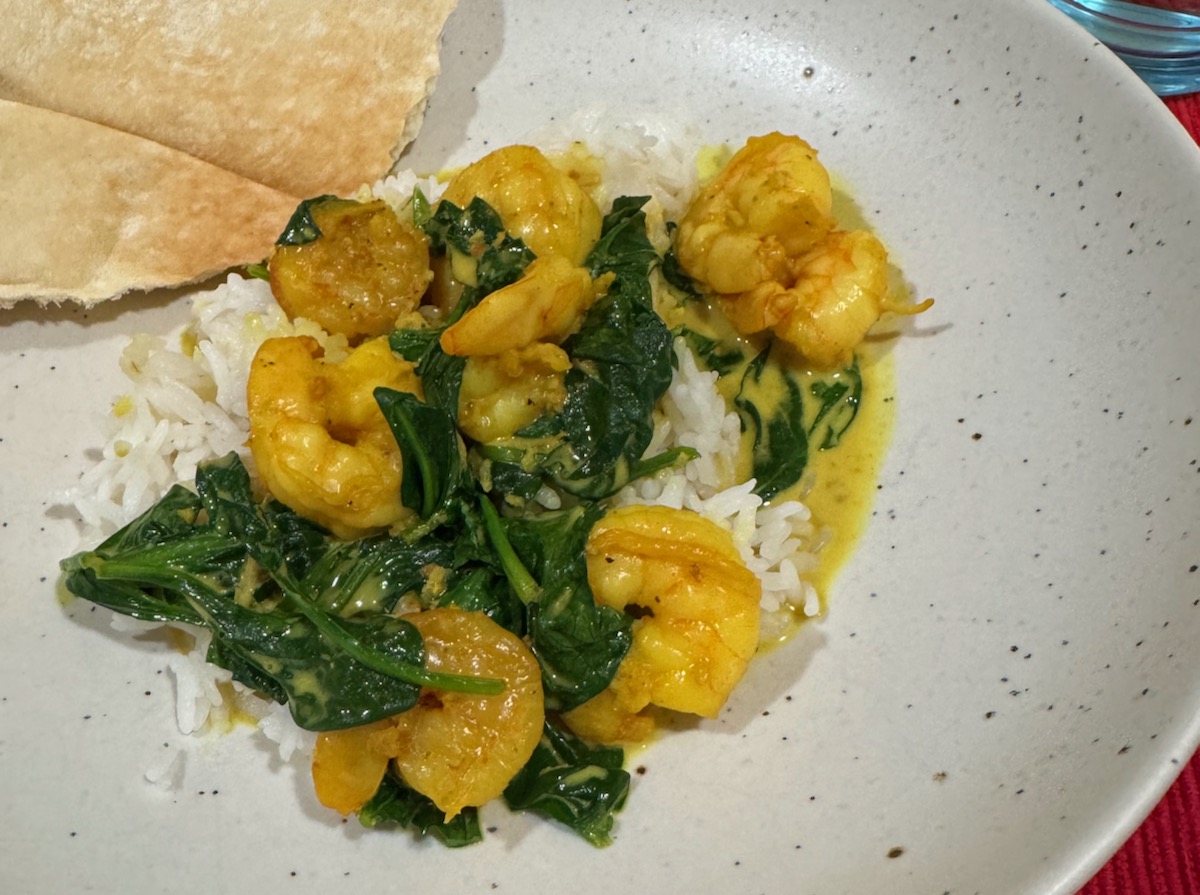
Isn’t that how most meals start, by looking in the cupboard? We didn’t have the spinach, but a quick trip to the grocery store took care of that. Originally published in the New York Times, I read through all of the comments and made some changes, reflected below. We really really liked this; my photo, taken on New Year’s Eve when the light was dim doesn’t do it justice. We used the 31-40 size of shrimp with the tails off. Certainly a bigger size or leaving on the tails would be flashier, but would taste the same.
While the original says serves four, we think more like three: two servings and one to share with an 86-year-old friend.
INGREDIENTS 4 large garlic cloves, grated 2 teaspoons grated ginger 1 teaspoon ground turmeric 2 teaspoons kosher salt (I use Diamond) 1 teaspoon black pepper (I use Penzy’s) 2 tablespoons olive oil 1 pound large shrimp, peeled and deveined, tails off 2 tablespoons vegetable oil 1 (14-ounce) can full-fat coconut milk 1 1/2 tablespoon soy sauce 3 packed cups baby spinach (or bok choy or kale) 1 lime, halved 1 fresno, jalapeño chile, thinly sliced into rings 2 scallions, white and light green parts, thinly sliced
Steamed rice for serving
PREPARATION
In a mixing bowl, mix together the garlic, ginger, turmeric, salt, pepper and the olive oil. Add the shrimp and mix to coat well.
In a large skillet or pot over medium-high heat, add the vegetable oil until it shimmers. Add the shrimp in an even layer and cook, undisturbed, for 2 minutes. Stir the shrimp while adding the coconut milk and soy sauce. Raise the heat to high and adjust it to maintain a simmer (avoid bringing to a boil), and cook until the liquid is slightly thickened and shrimp are almost cooked through, stirring occasionally, about 3 minutes. If you need more time for thickening, remove the shrimp to a bowl so they don’t overcook (I did this). Stir in the spinach in batches until wilted, and then add back in the shrimp, if needed.
Remove from the heat and squeeze in the juice from a lime half. Adjust seasoning with more lime and salt as needed. Top with the chiles, scallions (and if you like, although not mentioned: roughly chopped cilantro and peanuts) and serve with rice, noodles or naan. (We show its with a pita bread, but naan would have been preferred.)
This breakfast casserole is an homage to one Julia Child dreamed up, and known as Râpée Morvandelle. Which means a gratin of grated cheese and potatoes. And other things. There are a million recipes for this, but here’s mine with all the changes I made.
If you are cooking this for our ward Christmas Party, please make it that morning, and bring it — covered in foil — HOT to the church by about 9:30 a.m.
We will provide the cubed ham, the butter, and a chunk of cheese. The other ingredients you will need to provide. Below are some photos from food prep. The recipe begins below them.
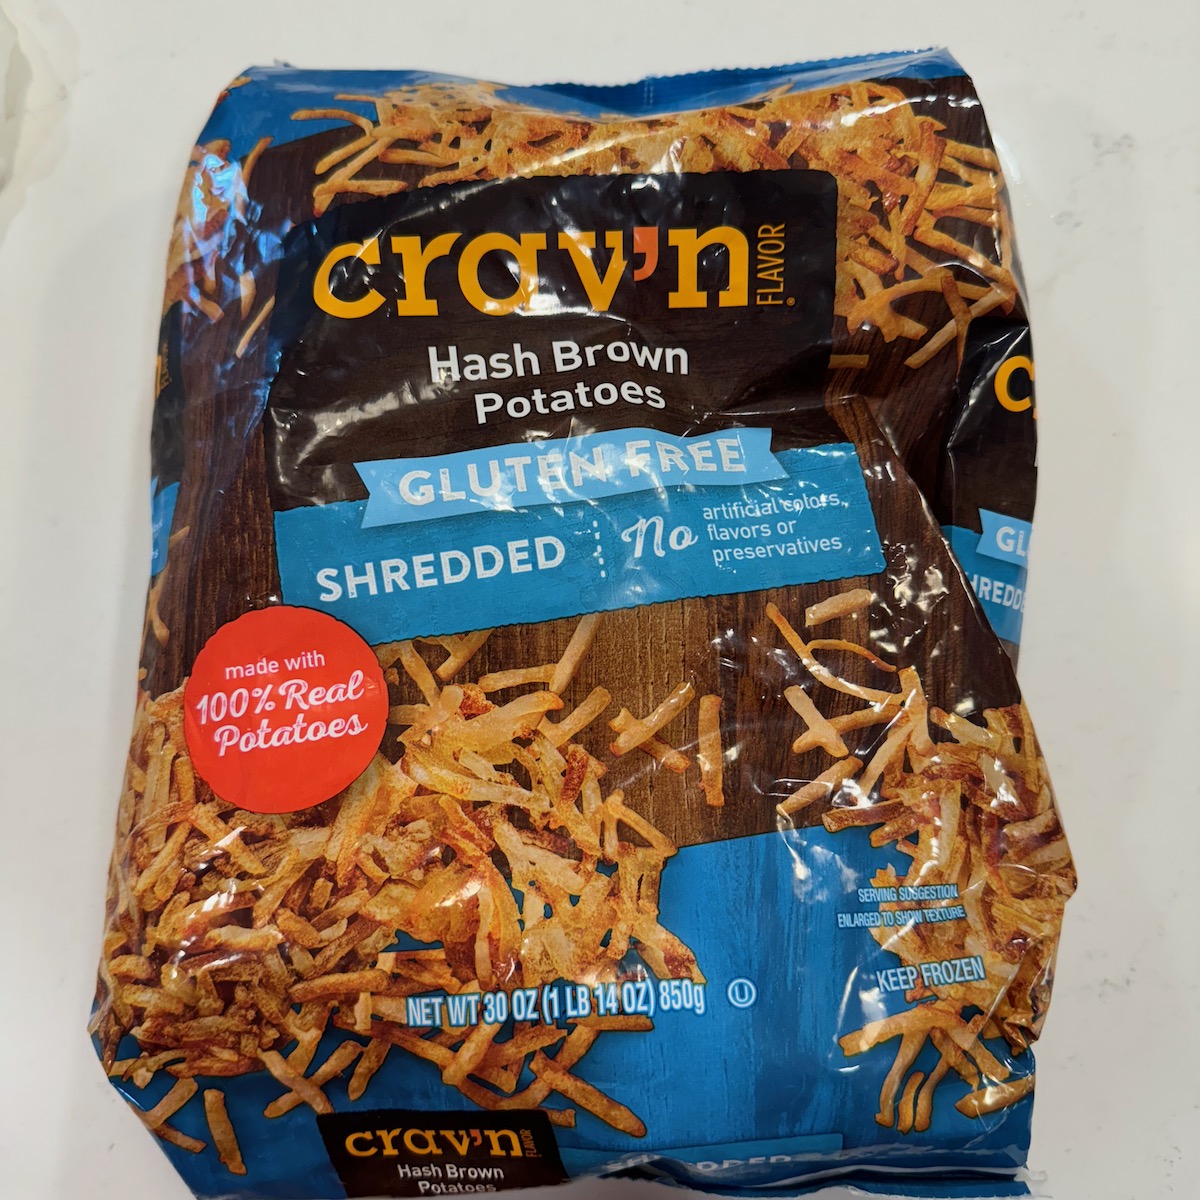
Bought at Stater’s 30 ounces
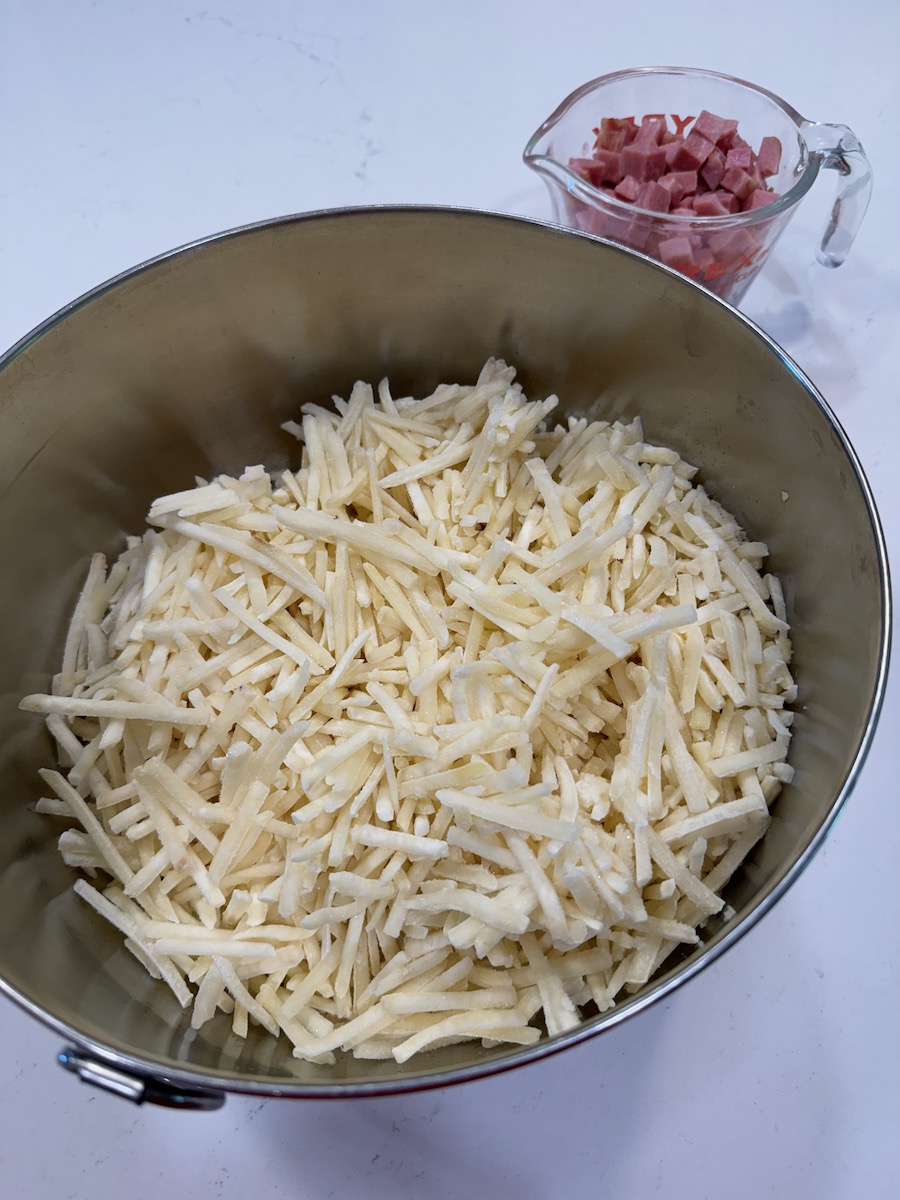
Dump into big bowl.
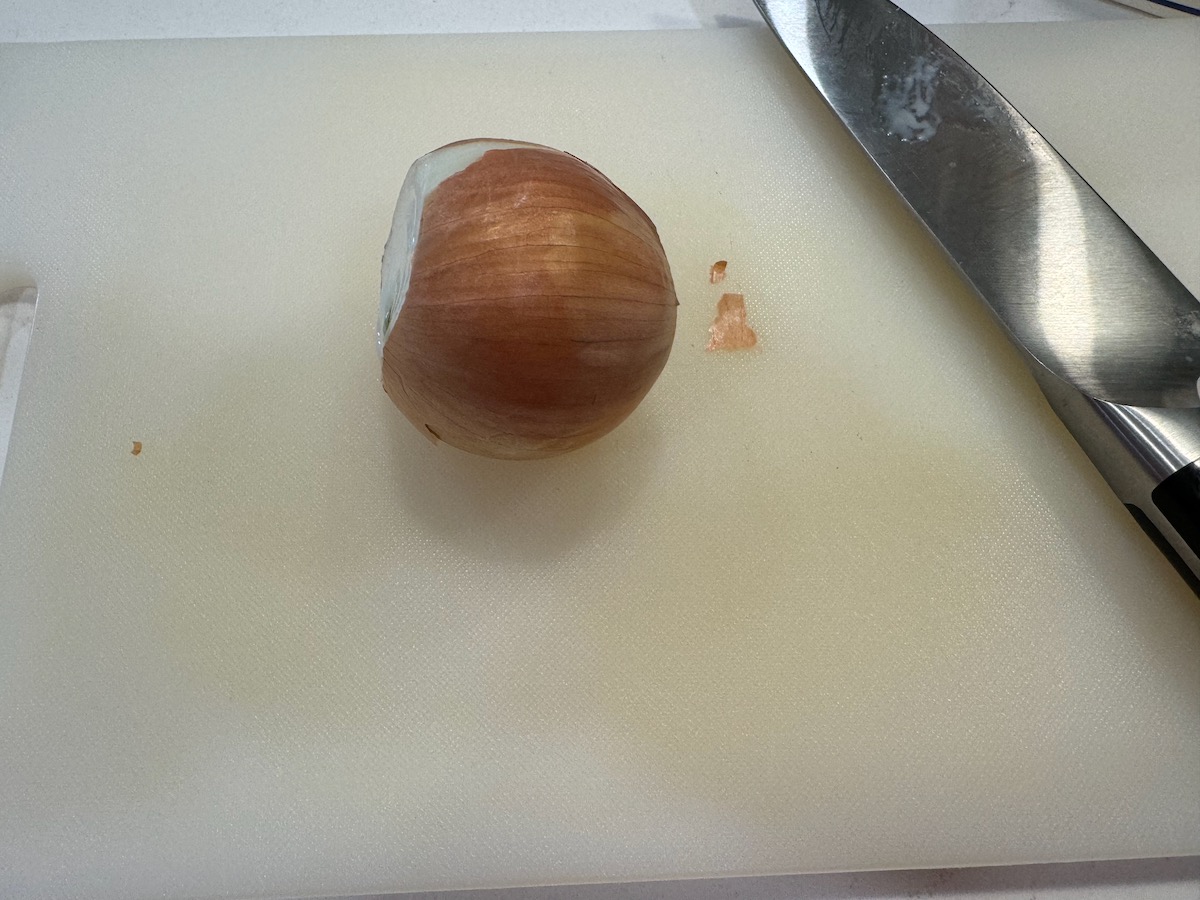
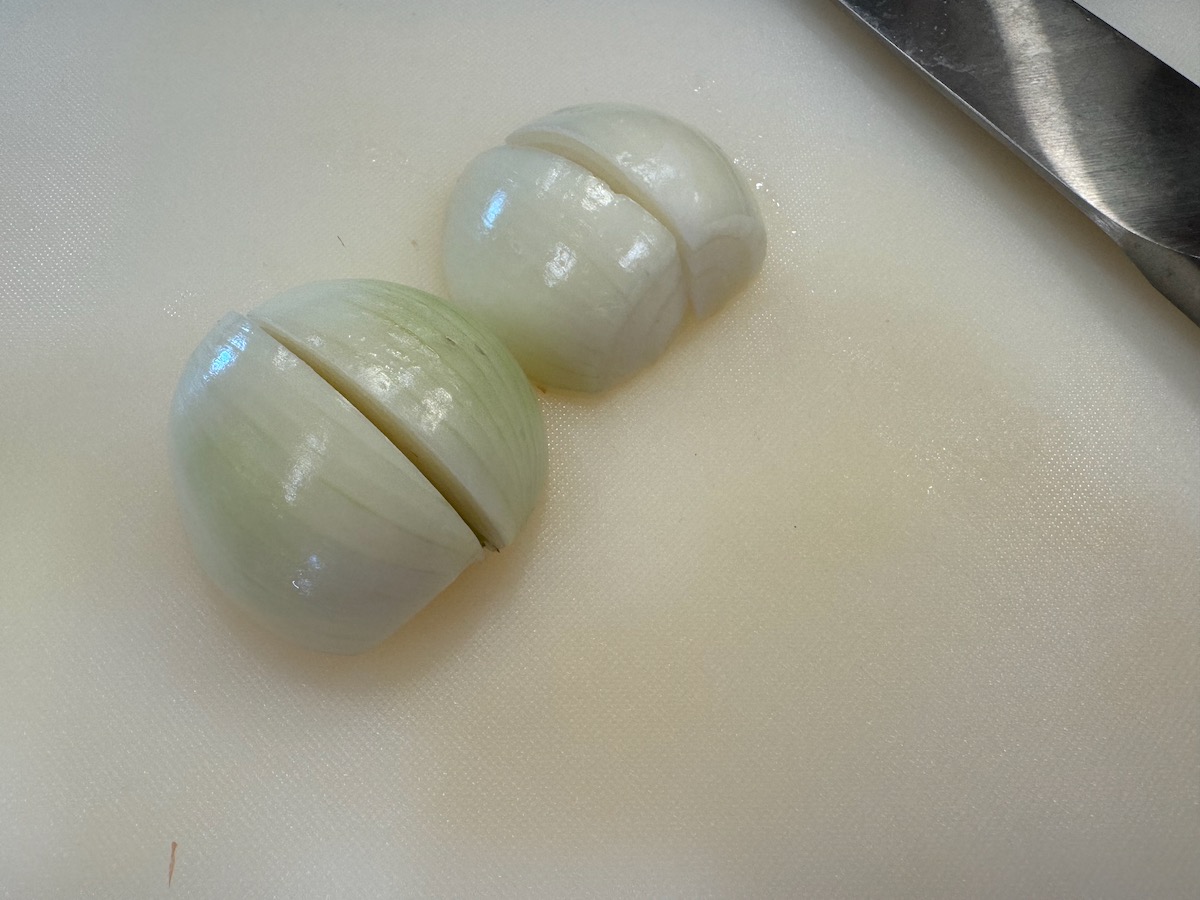
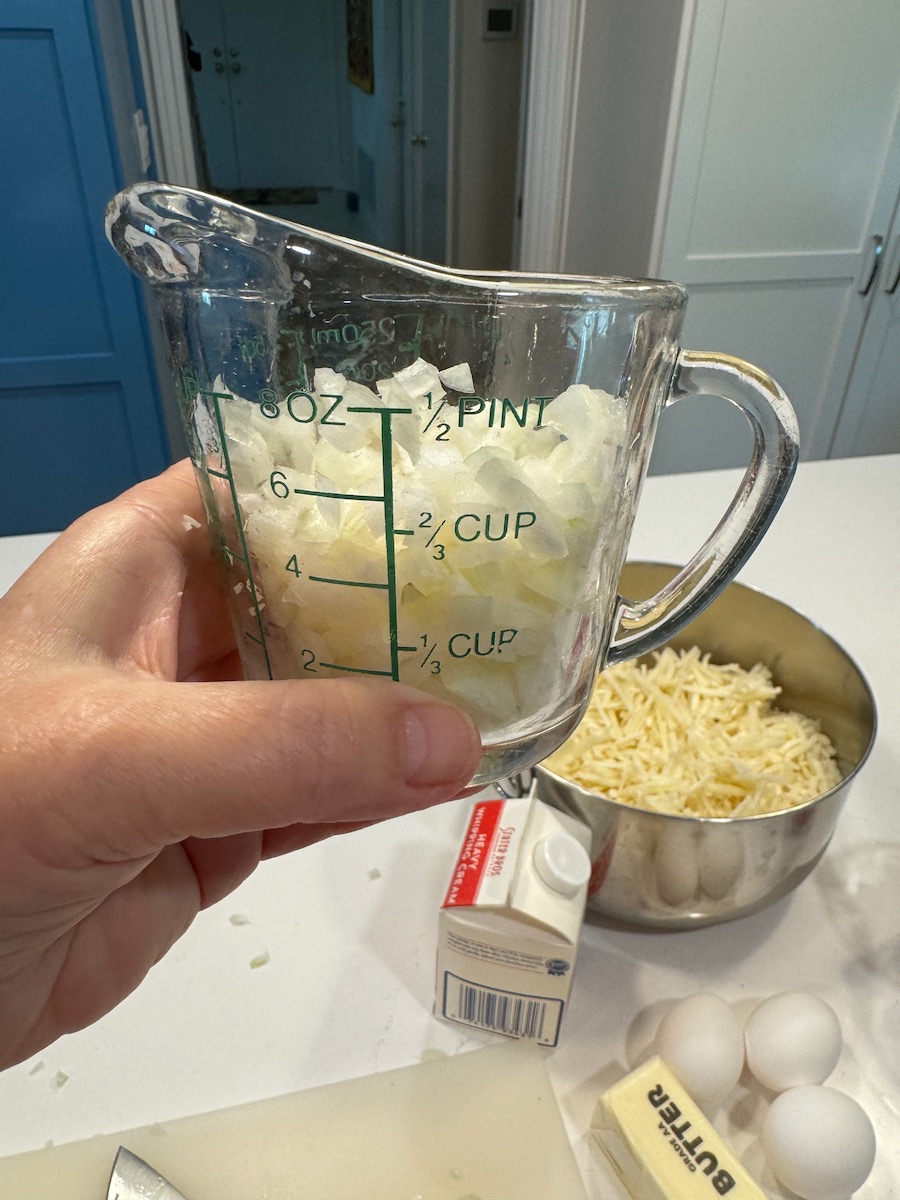
onion!
A small diced size
A bit more than a half, but that’s okay.
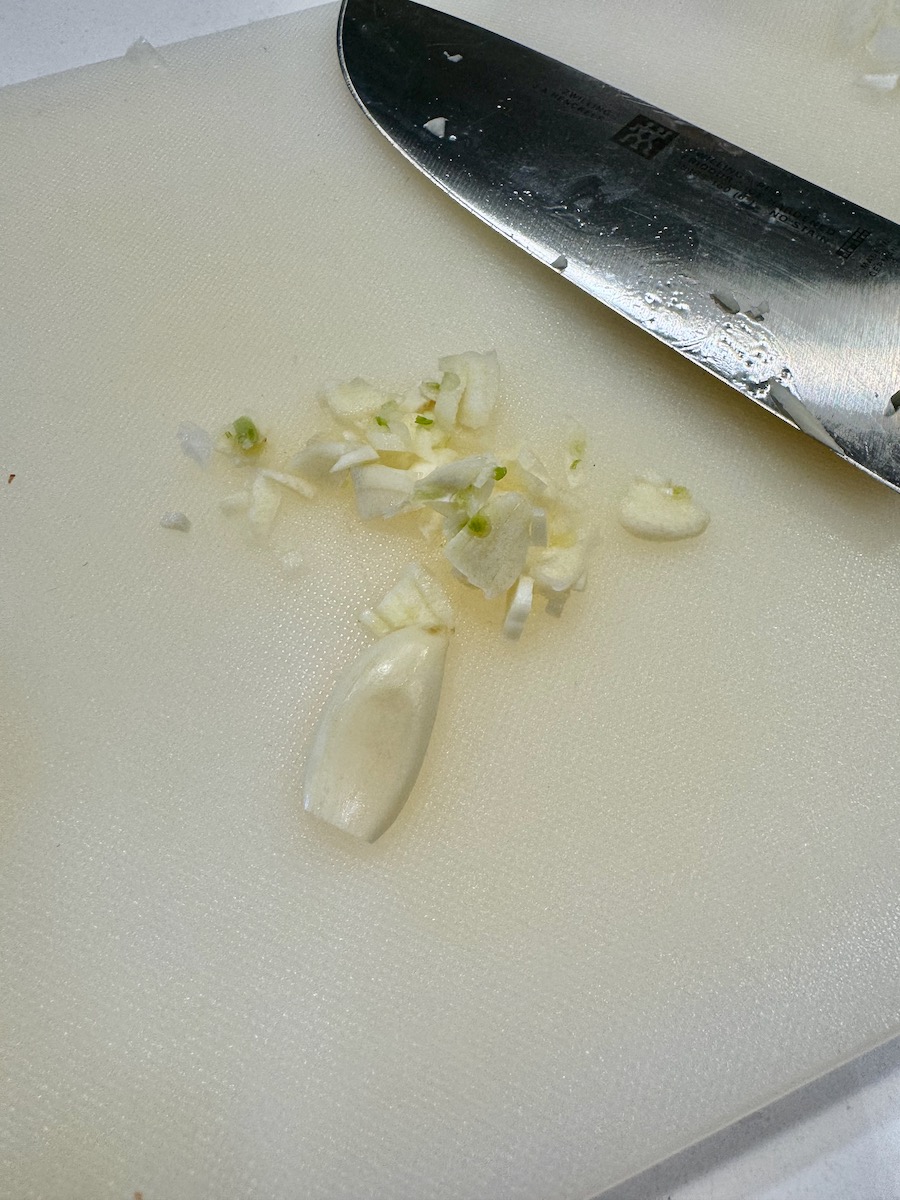
Mince garlic, set aside
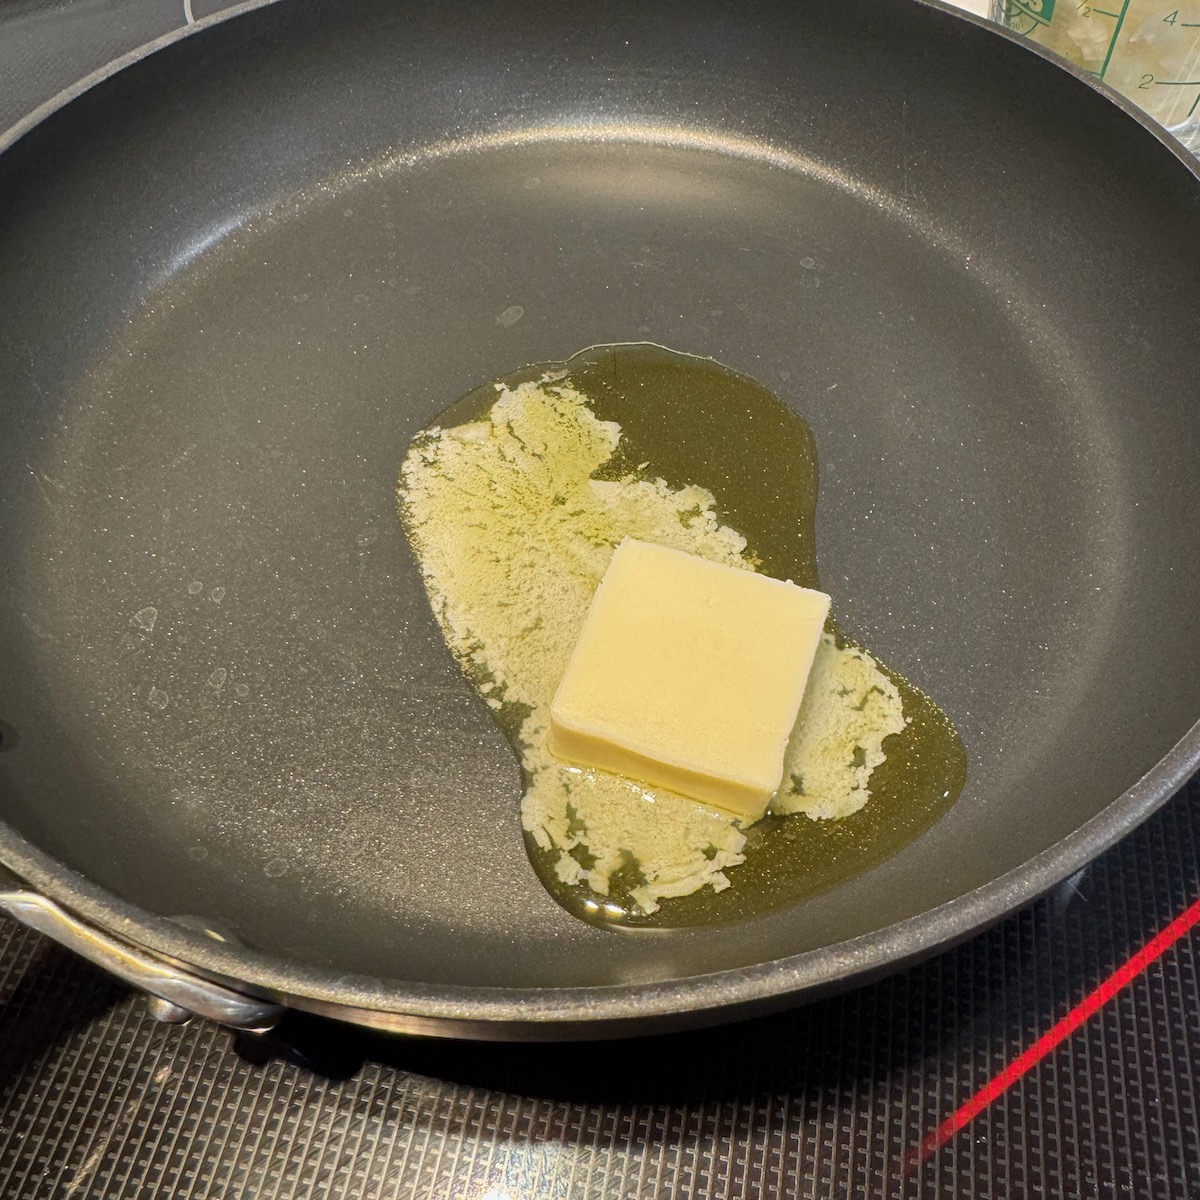
Butter and Olive Oil
Low heat to keep from browning. Add garlic at end.
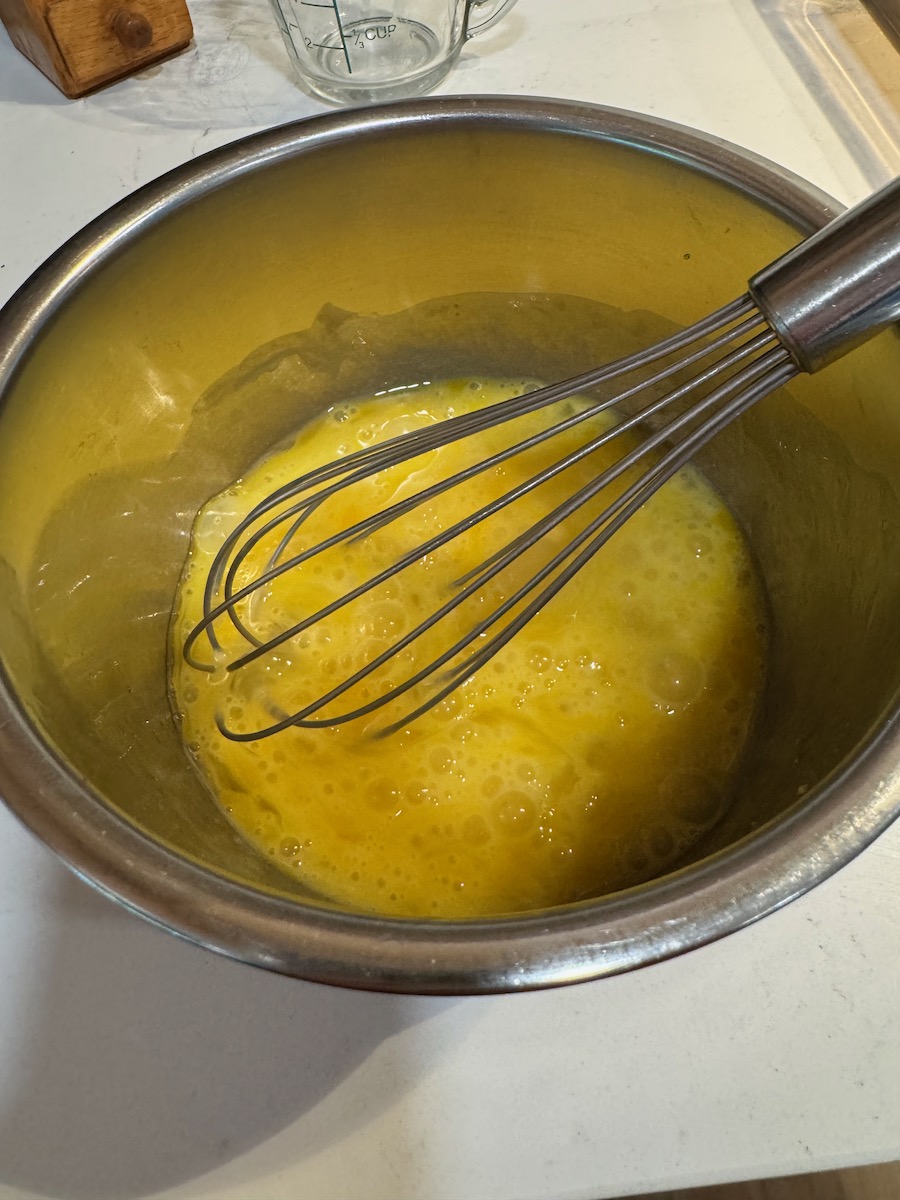
Beat eggs.
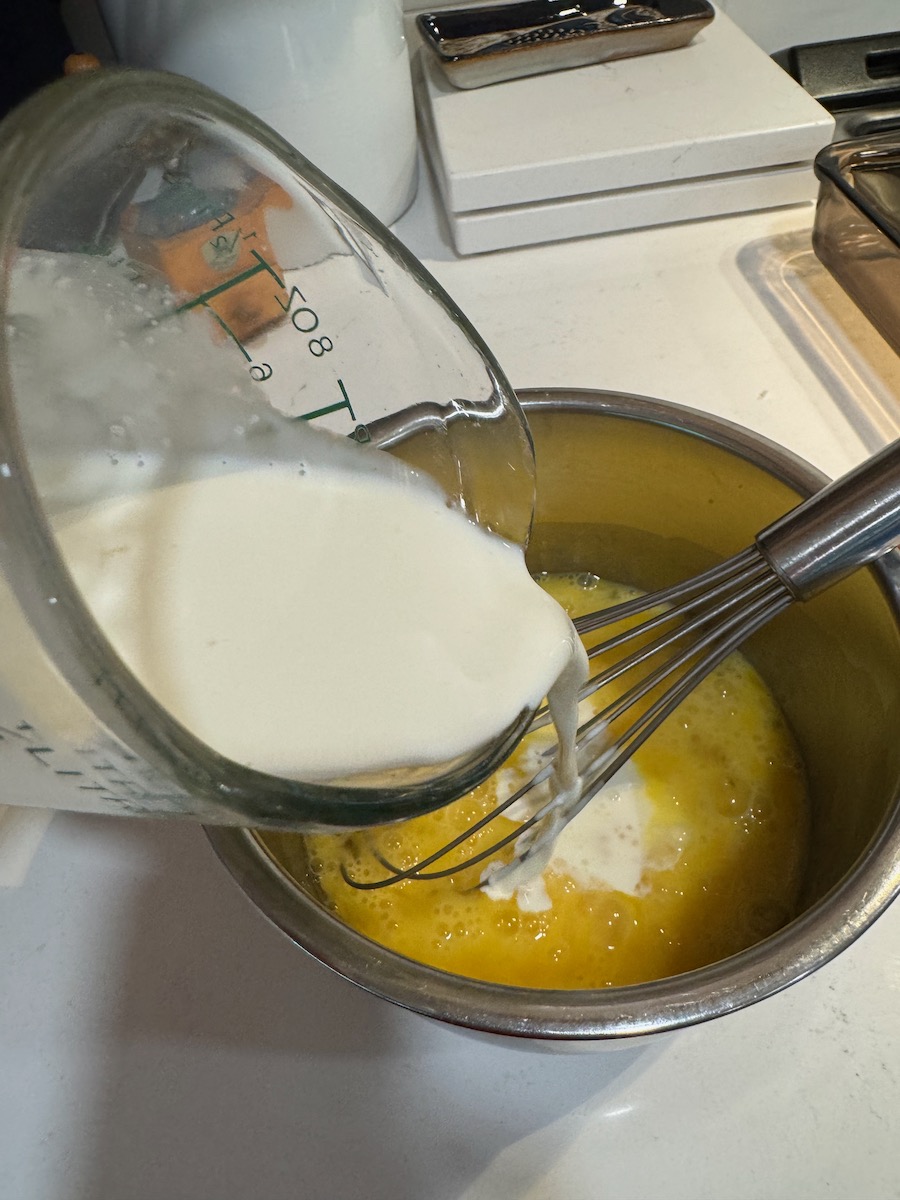
Add cream.
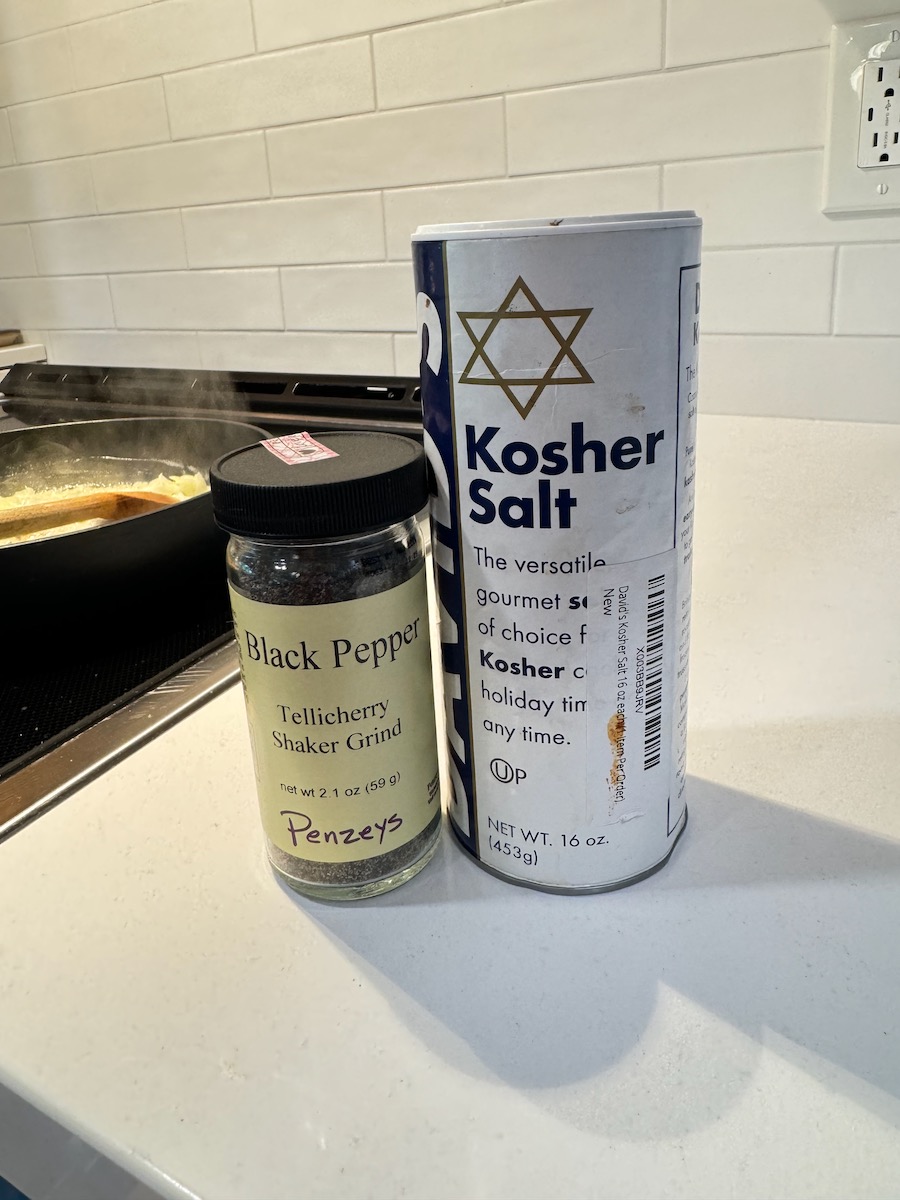
Add salt and pepper.
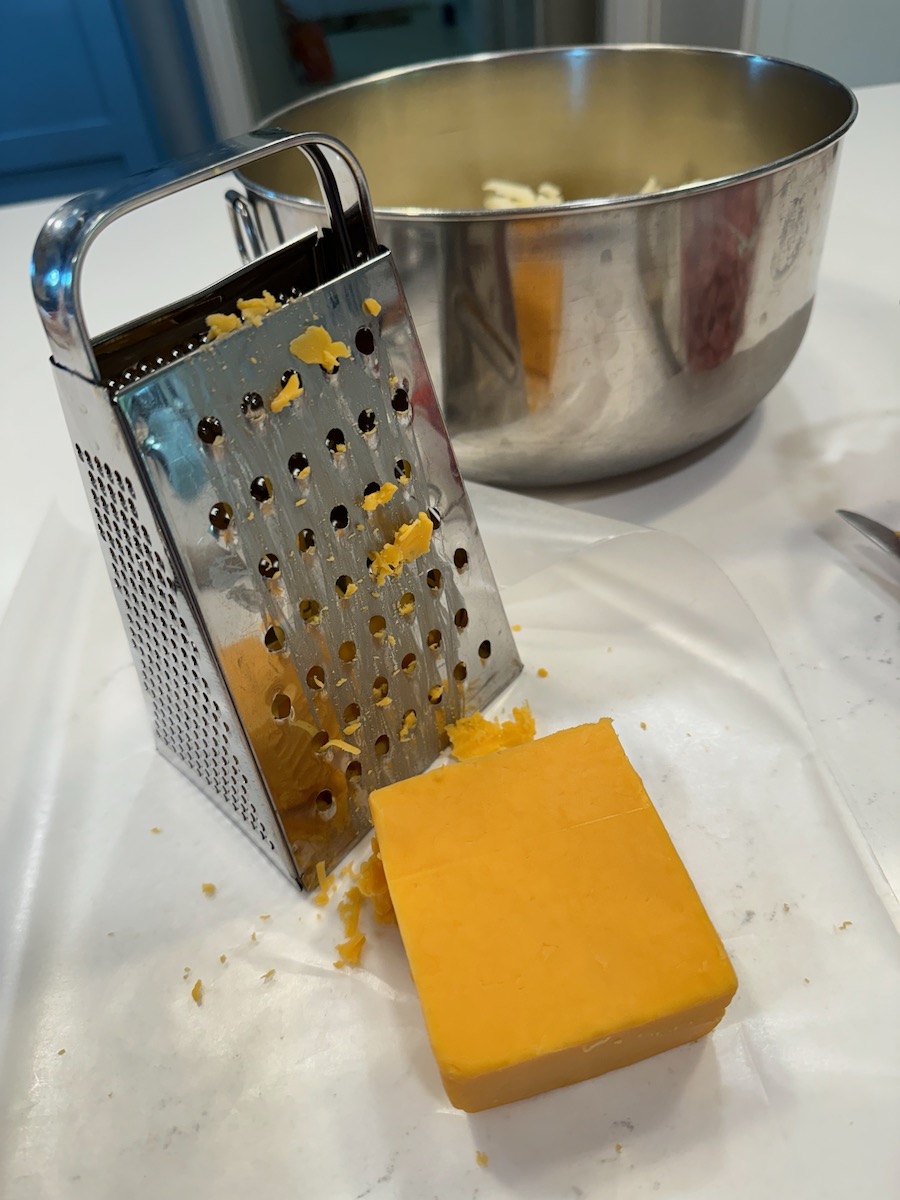
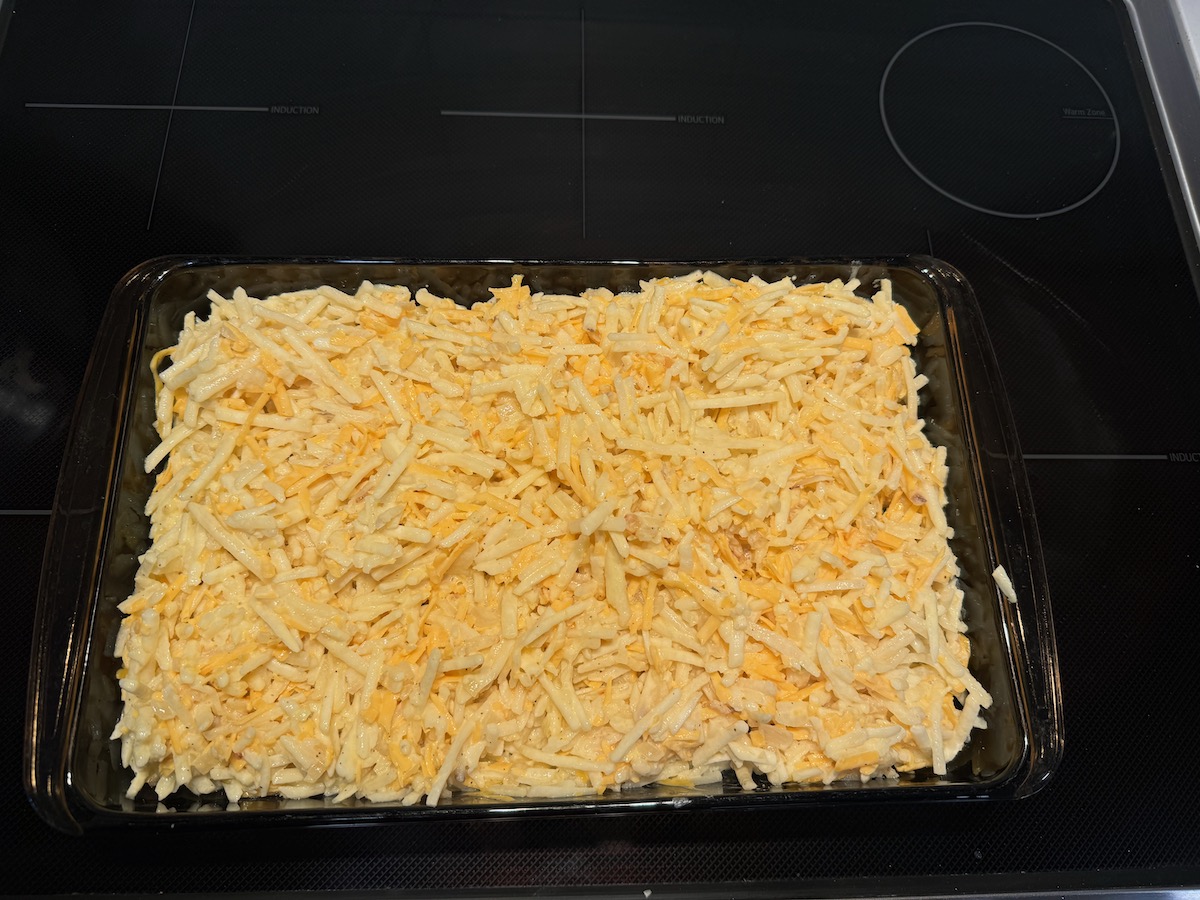
Don’t use pre-grated cheese!
Most will go in the bowl; hold back a handful or two.
Set glass pan with butter into oven to get hot. Don’t let it burn.
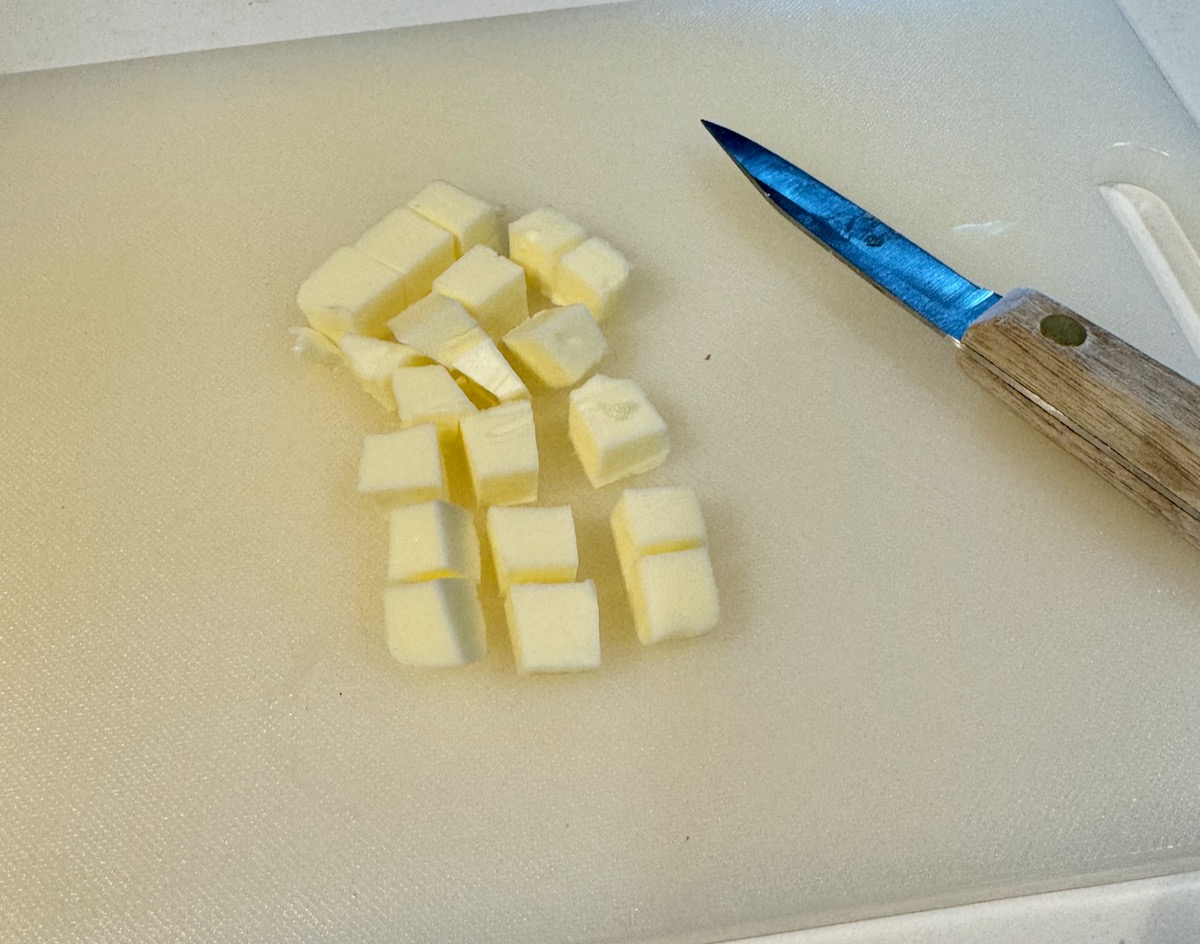
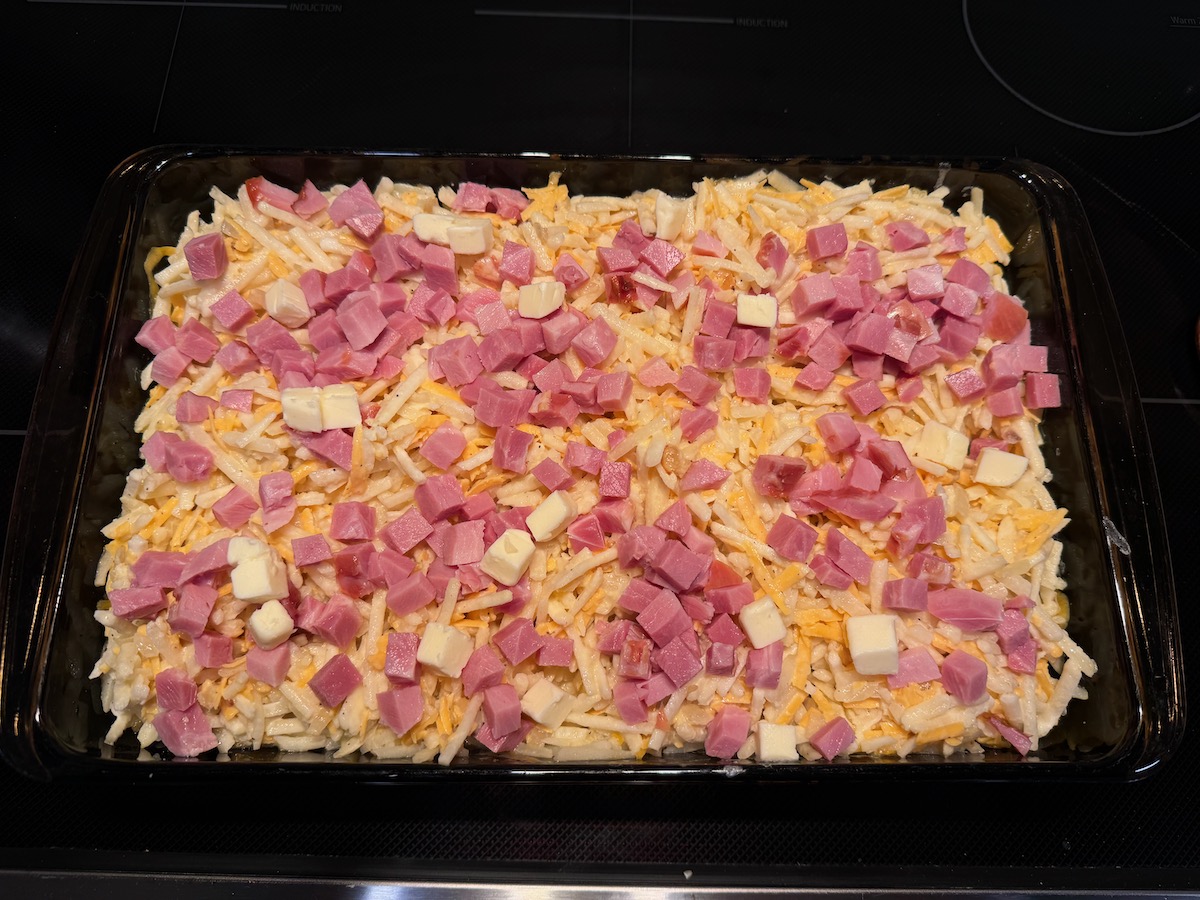
Cut remaining butter into small bits.
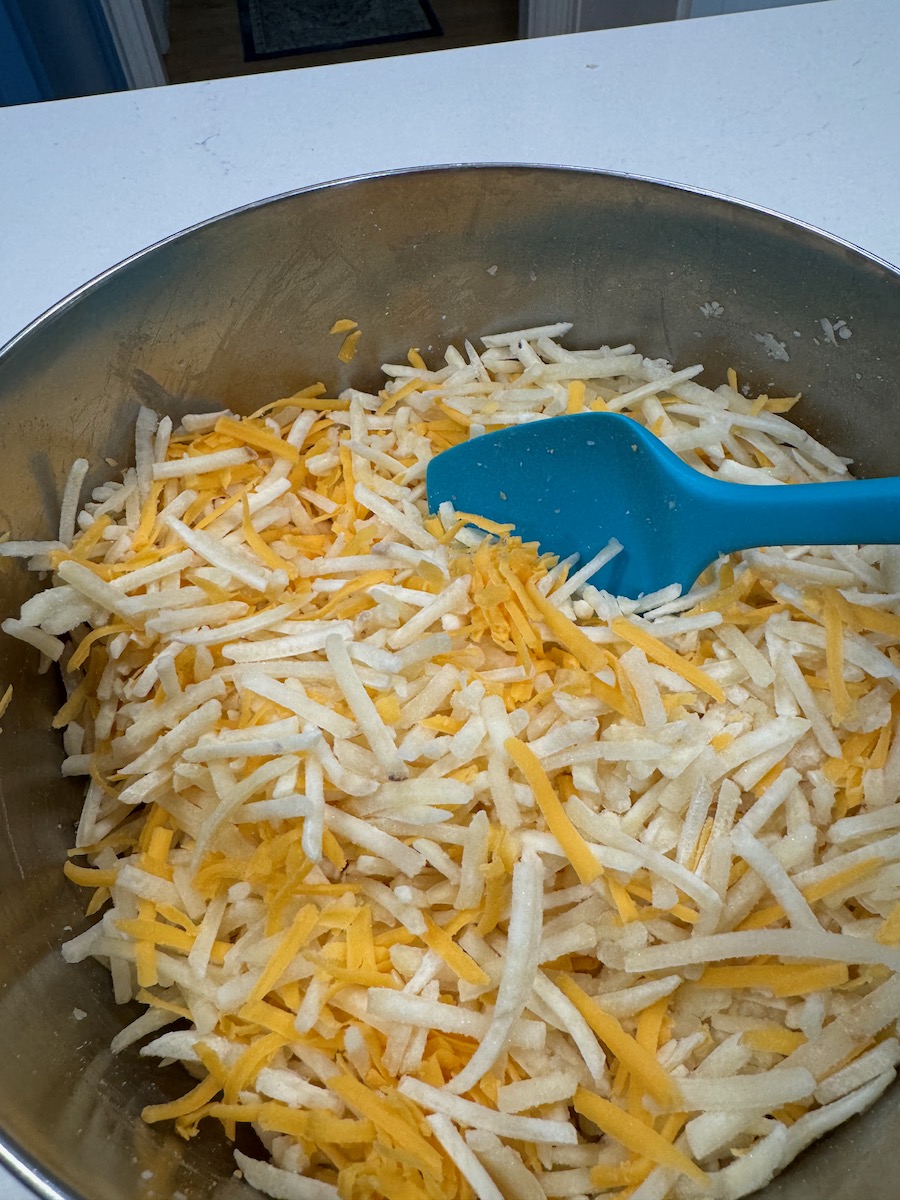
Mix grated cheese and potatoes
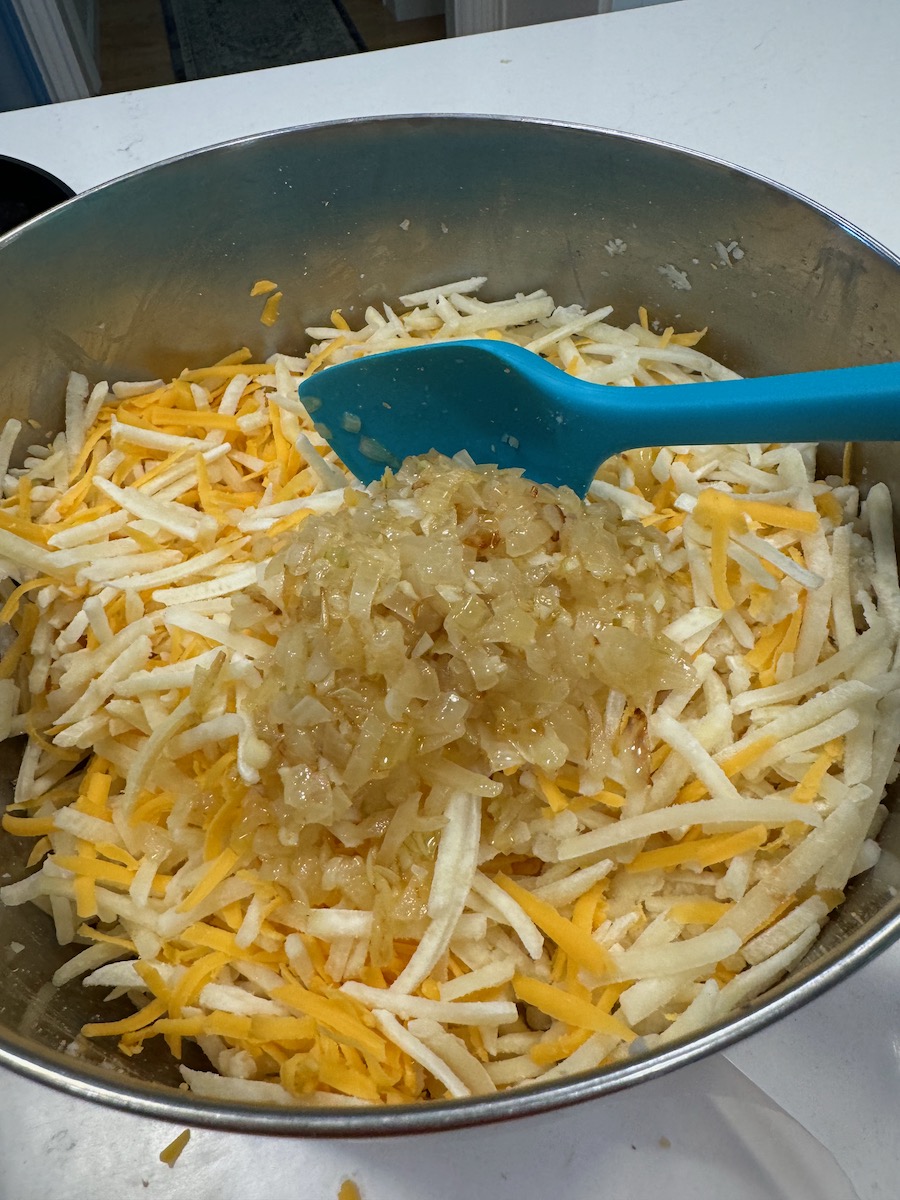
Mix in onions/garlic.
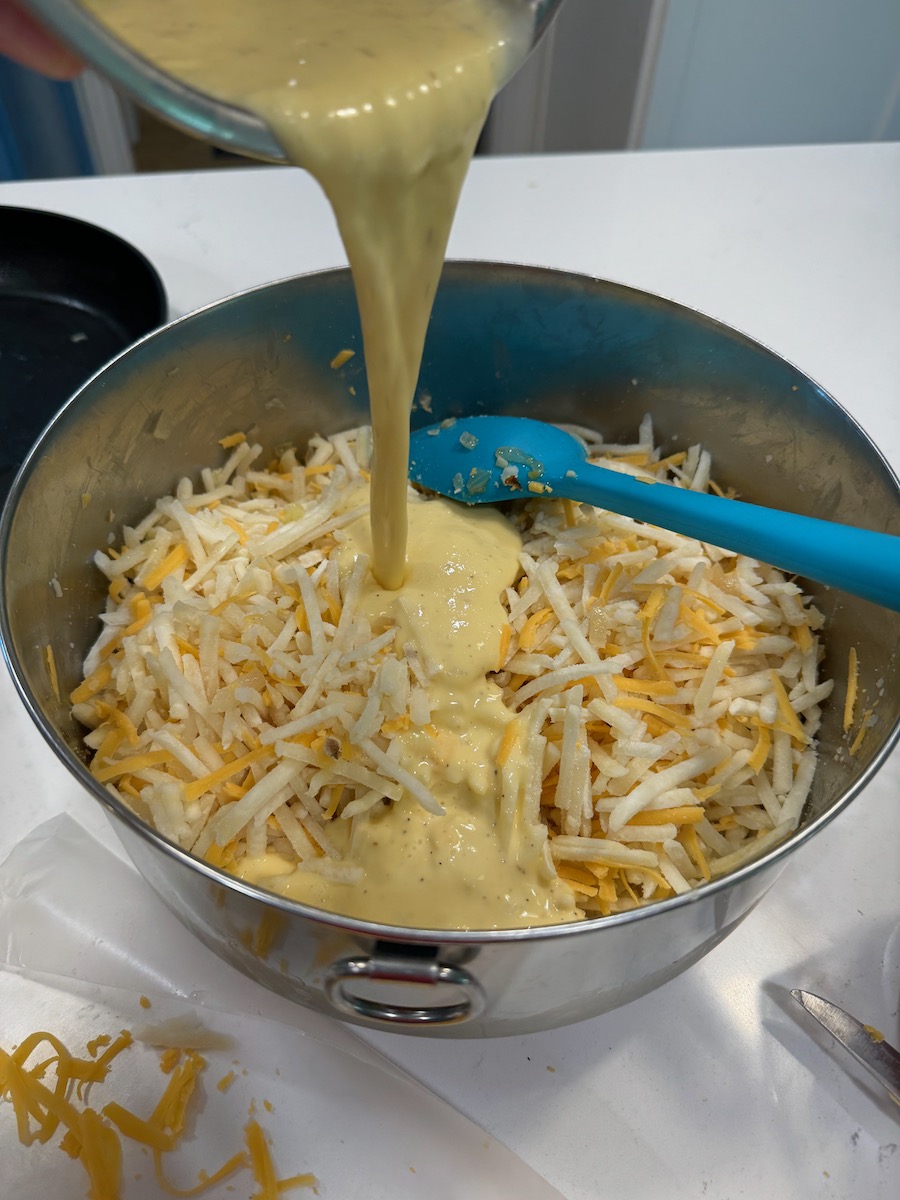
Mix in eggs/cream.
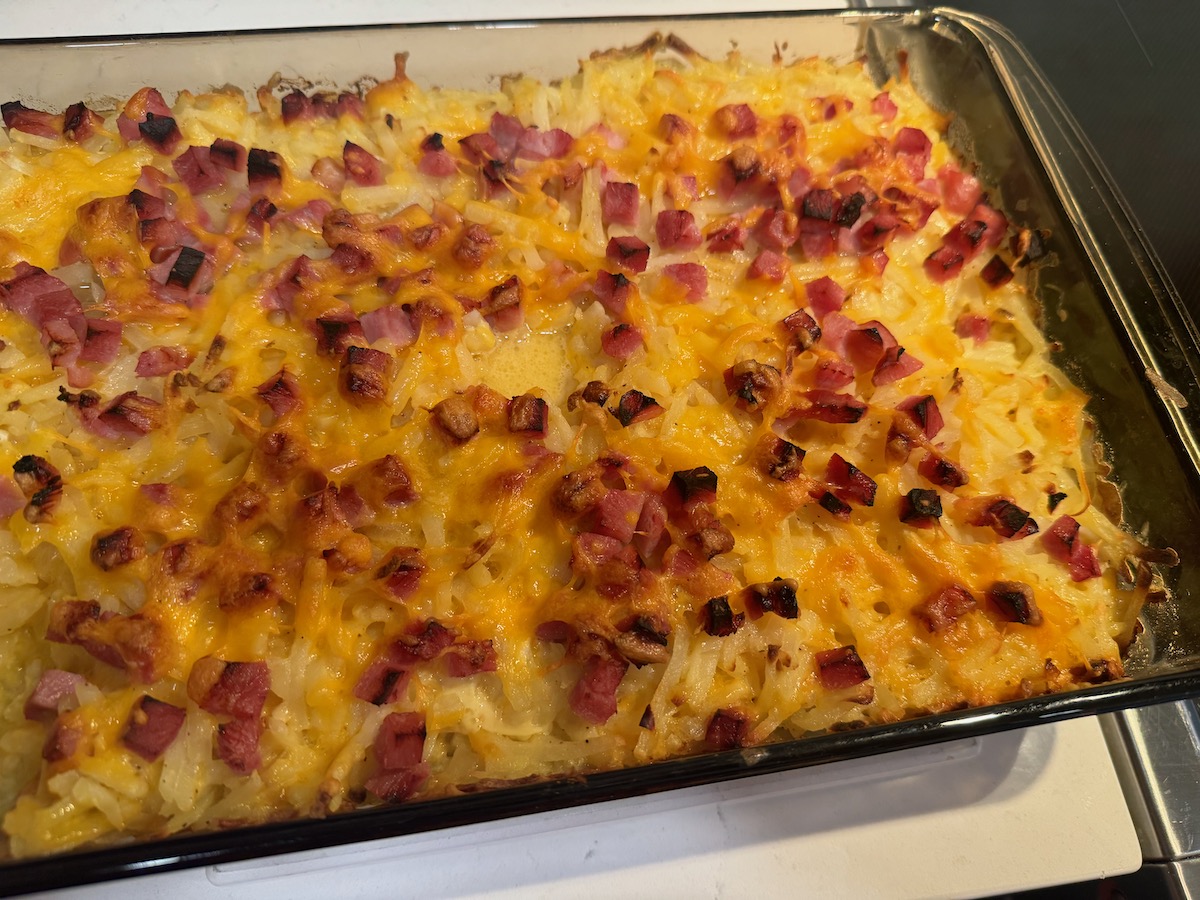
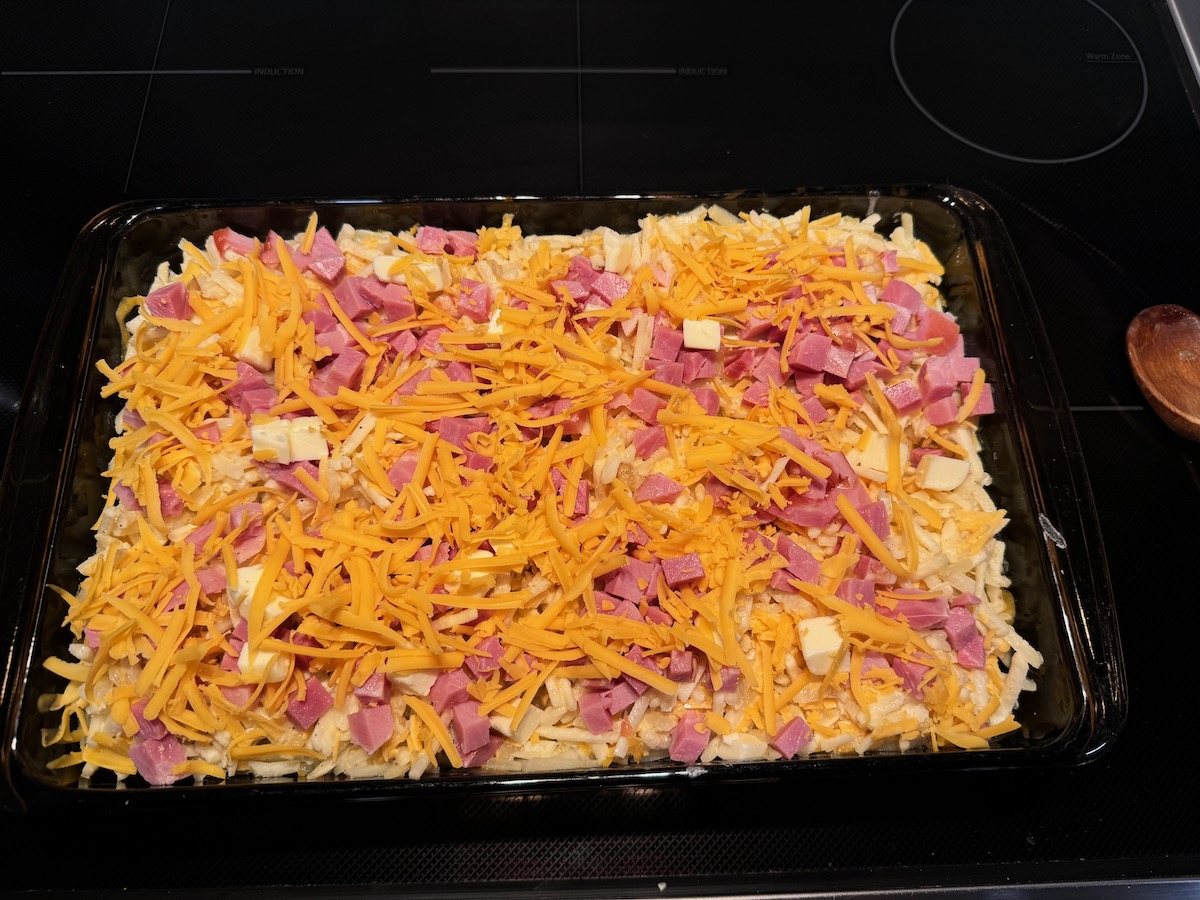
Pour mixture into glass pan, and smooth out. We’re not kidding about the pan being glass, as if you use the disposable foil pans, the recipe won’t turn out properly.Distribute cubes of ham, then bits of butter.Last, spread remaining grated cheese over the top and bake.
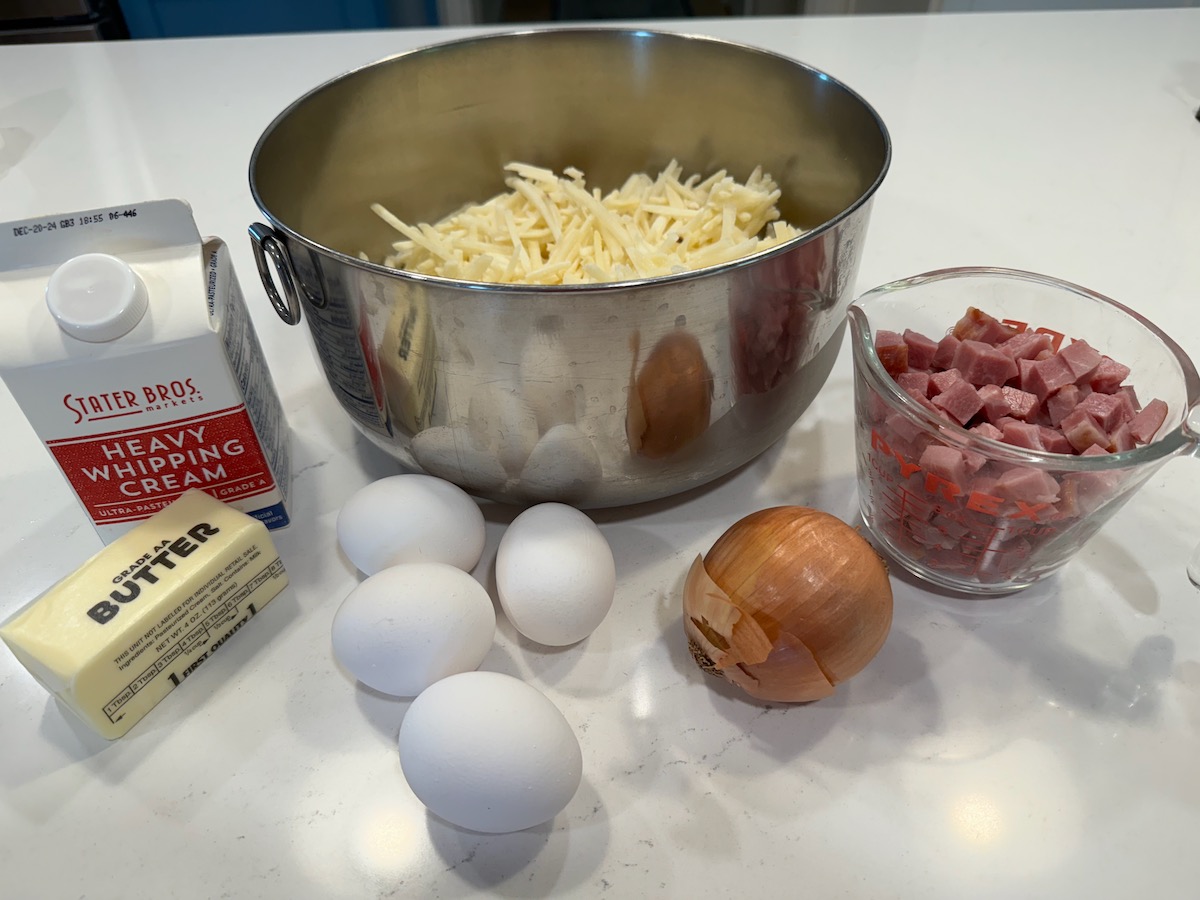
Ingredients
1 small yellow onion, small dice (about 1/2 to 2/3 cup) 2 cloves garlic, grated or minced–but not crushed 2 Tbs. extra virgin olive oil 6 Tbs. butter, divided into three parts of 2 Tbs each 4 eggs 1/2 cup heavy cream 8 ounces grated mild Cheddar cheese, divided 1/2 teaspoon ground pepper 2 tsp Kosher salt [NOTE: if you are using table salt, cut back slightly on the amount, say 1 3/4 teaspoons.] 1 30-ounce bag frozen shredded hash brown potatoes 8 ounces cubed good-quality ham
NOTE: Please use a glass oblong pan; disposable foil pans don’t give a good result (undercooked, no lovely crust on the bottom).
Directions
Preheat your oven to 375 degrees while you get everything else prepped up.
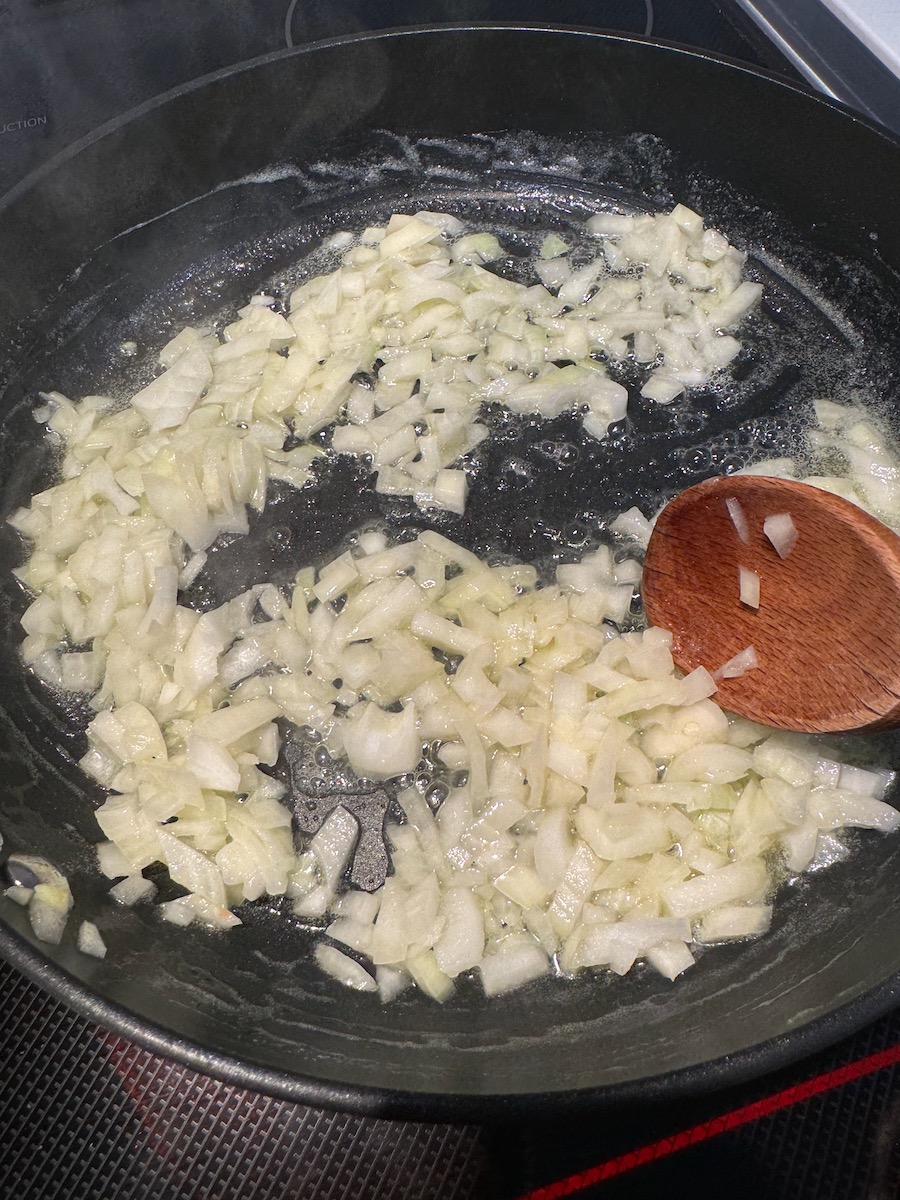
Sauté the onion in 2 Tbsp. olive oil and 2 Tbsp butter, over medium heat for about 5 minutes, until tender but not browned. Remove from heat and add the grated/minced garlic. Stir it and allow it to sit in the warm pan with the onion. Set aside.
Whisk together the egg, cream, salt, and pepper.
Place your glass baking dish in the oven with 2 Tbsp of butter and let the butter melt and the pan get hot while you combine everything. Keep an eye on the butter so it doesn’t burn.
In a large bowl add the potato shreds and 6 ounces of the grated cheddar cheese and toss. (You are saving back a couple of handfuls of cheese for the top.)
Add in the onion and garlic mixture and toss it again.
Pour the cream and egg mixture over the potato mixture, and toss well to coat every potato shred.
Place the potato mixture into your hot glass baking dish and top with the cubes of ham.
Cut 2 Tbs. butter into small bits, then dot the casserole with butter.
Over the top of everything, add the remaining grated cheese (a couple of handfuls, or roughly 2 ounces).
Bake for 35 minutes or until lightly browned in places.
Cover with foil and BRING TO CHURCH AT 9:30 A.M. while it’s HOT!
NOTE: It is not recommended to make this ahead, as the cook time will need to be adjusted (maybe even doubled) for a cold pan. However all ingredients can be prepped in advance. The casserole takes only about 10-15 minutes to throw together if ingredients are prepped. Putting it in the hot glass pan with melted butter will yield a more satisfying crust on the bottom.
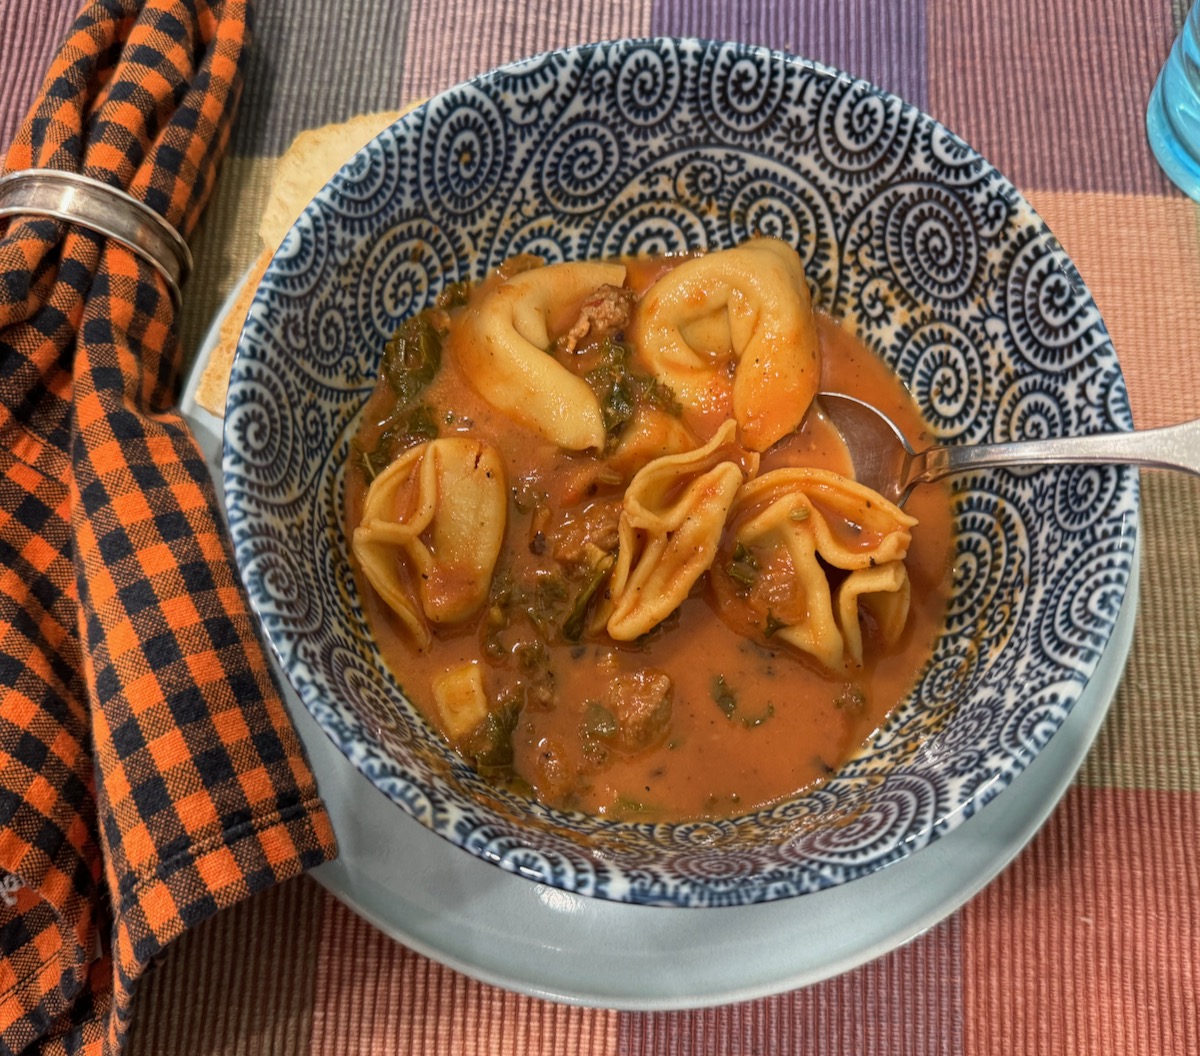
This soup, originally by Dan Pelosi, was first seen in the cooking section of the New York Times. I read through the ingredients, mentally checking them off, and thought — I have everything. I don’t have to go the grocery store. This was a hit–loved it. I made a few changes (as always), and they are reflected in the recipe below.
INGREDIENTS
1 tablespoon olive oil
1 pound loose sweet Italian sausage or sausage links, casings removed
1 medium white or yellow onion, finely diced
6 garlic cloves, minced
1 teaspoon paprika
½ teaspoon dried fennel seeds
Salt and black pepper
Crushed red pepper
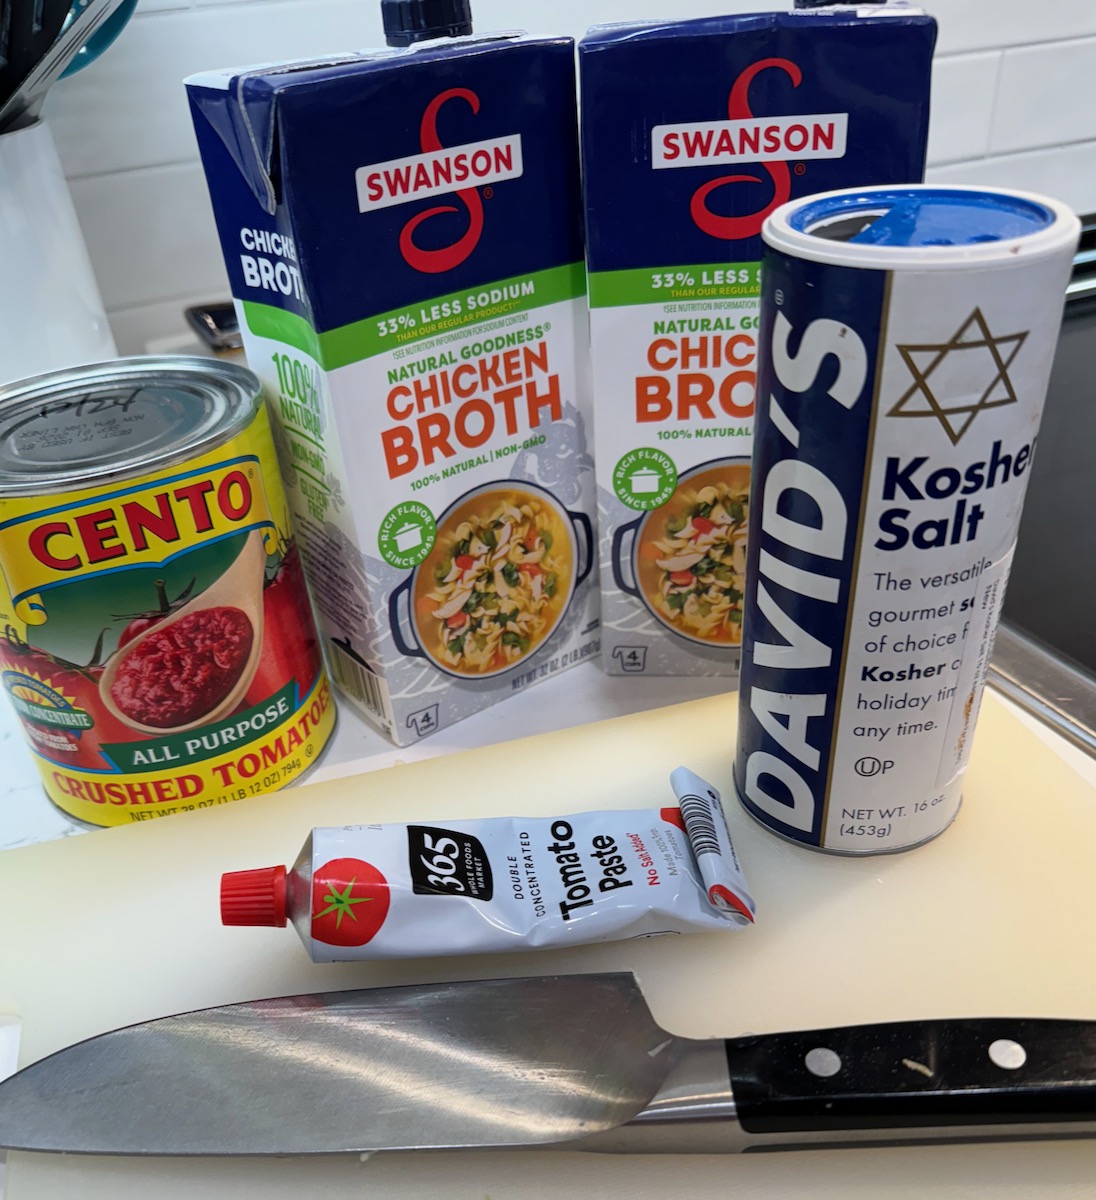
2 tablespoons tomato paste (I use the kind from the tube)
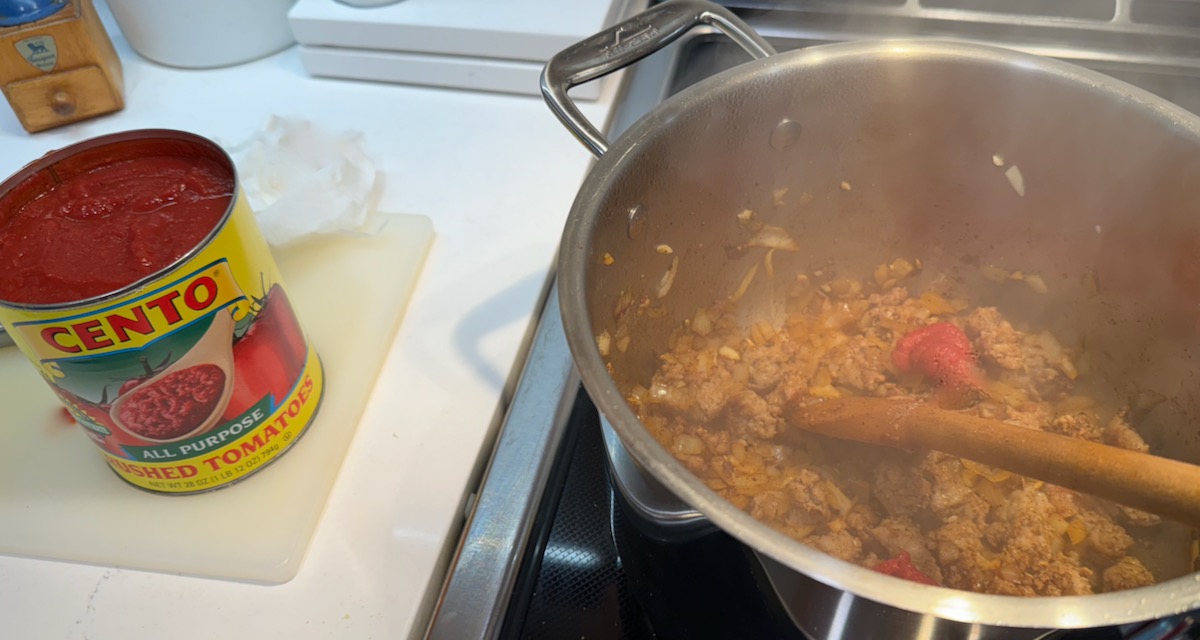
1 (28-ounce) can crushed tomatoes (Cento is my favorite, but the puréed version of other brands can be used)
8 cups (64 ounces) vegetable or chicken stock
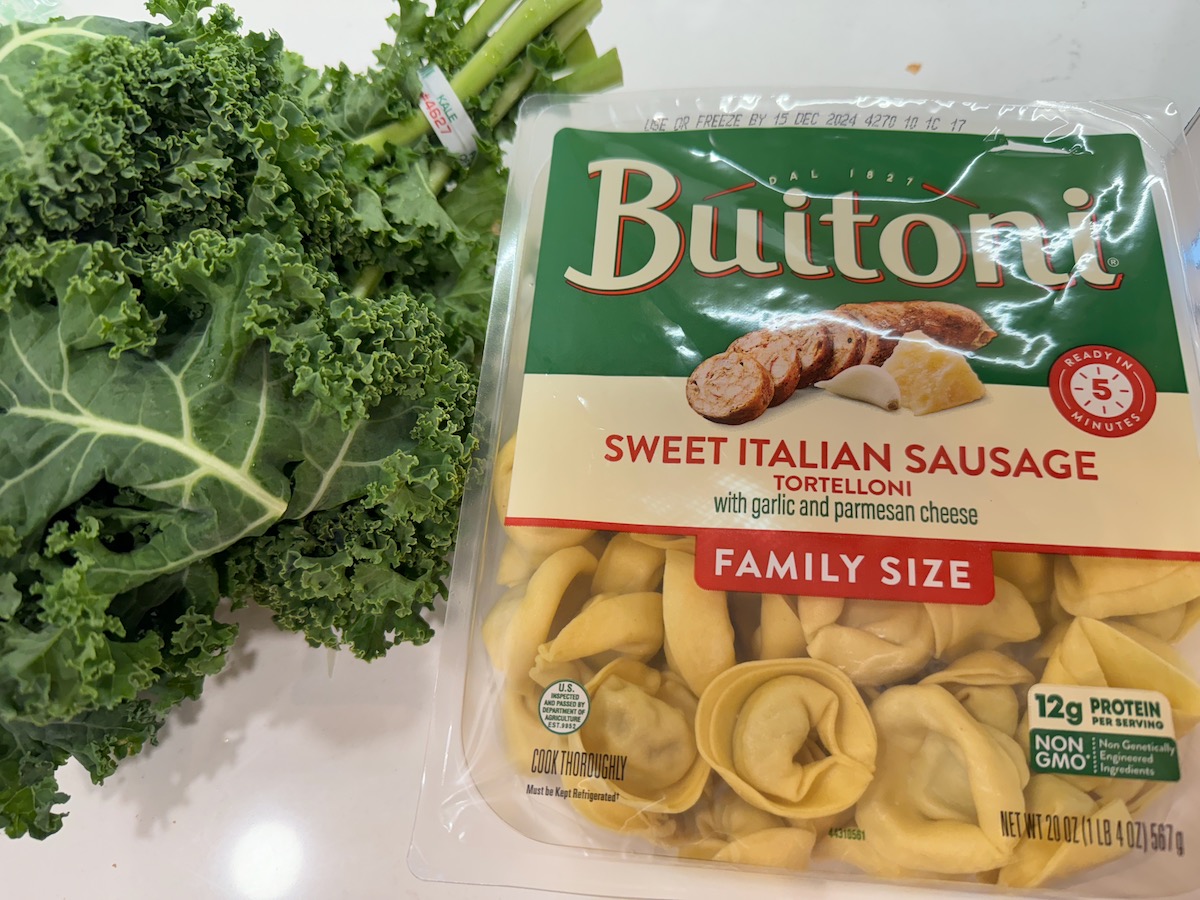
1 (20-ounce) package refrigerated tortellini, any variety (but I went with a sausage tortelloni to echo the flavors) NOTE: One time I used a 16 oz package; it was fine.
1/2 cup heavy cream
1 bunch Tuscan (lacinato) or regular kale, leaves stripped and chopped (I have used the regular curly kale, and it works fine)
½ cup roughly chopped fresh basil
1 lemon, juiced
Grated Parmesan, for serving
PREPARATION
If using the sausage, heat the olive oil in a large pot or Dutch oven over medium-high. Add the sausage in bite sized pieces and cook, breaking it up with a spoon as you go, until it is browned, 5 to 9 minutes. Push the sausage to one side of the pot and spoon out any excess grease, leaving about 2 tablespoons behind.
If necessary, adjust heat to medium, then add onion, garlic, paprika, fennel, 1½ teaspoons each salt and black pepper, and a pinch of crushed red pepper, and cook, stirring, for 2 minutes, until the onion is just softened and everything is fragrant. Add the tomato paste and cook, stirring, until it darkens, 2 to 3 minutes. Adjust heat to high, stir in crushed tomatoes and stock, cover the pot and bring to a gentle boil.
Add the tortellini and cook until tender, 4-5 minutes.
Add the heavy cream, kale and basil, and cook, stirring, until warmed through and the kale and basil are just wilted, 2 minutes more. Remove from heat and add the lemon juice. Stir to incorporate, then taste and season with salt and pepper as needed.
Serve warm topped with grated Parmesan. Soup can be refrigerated for up to 5 days or frozen for up to 3 months.
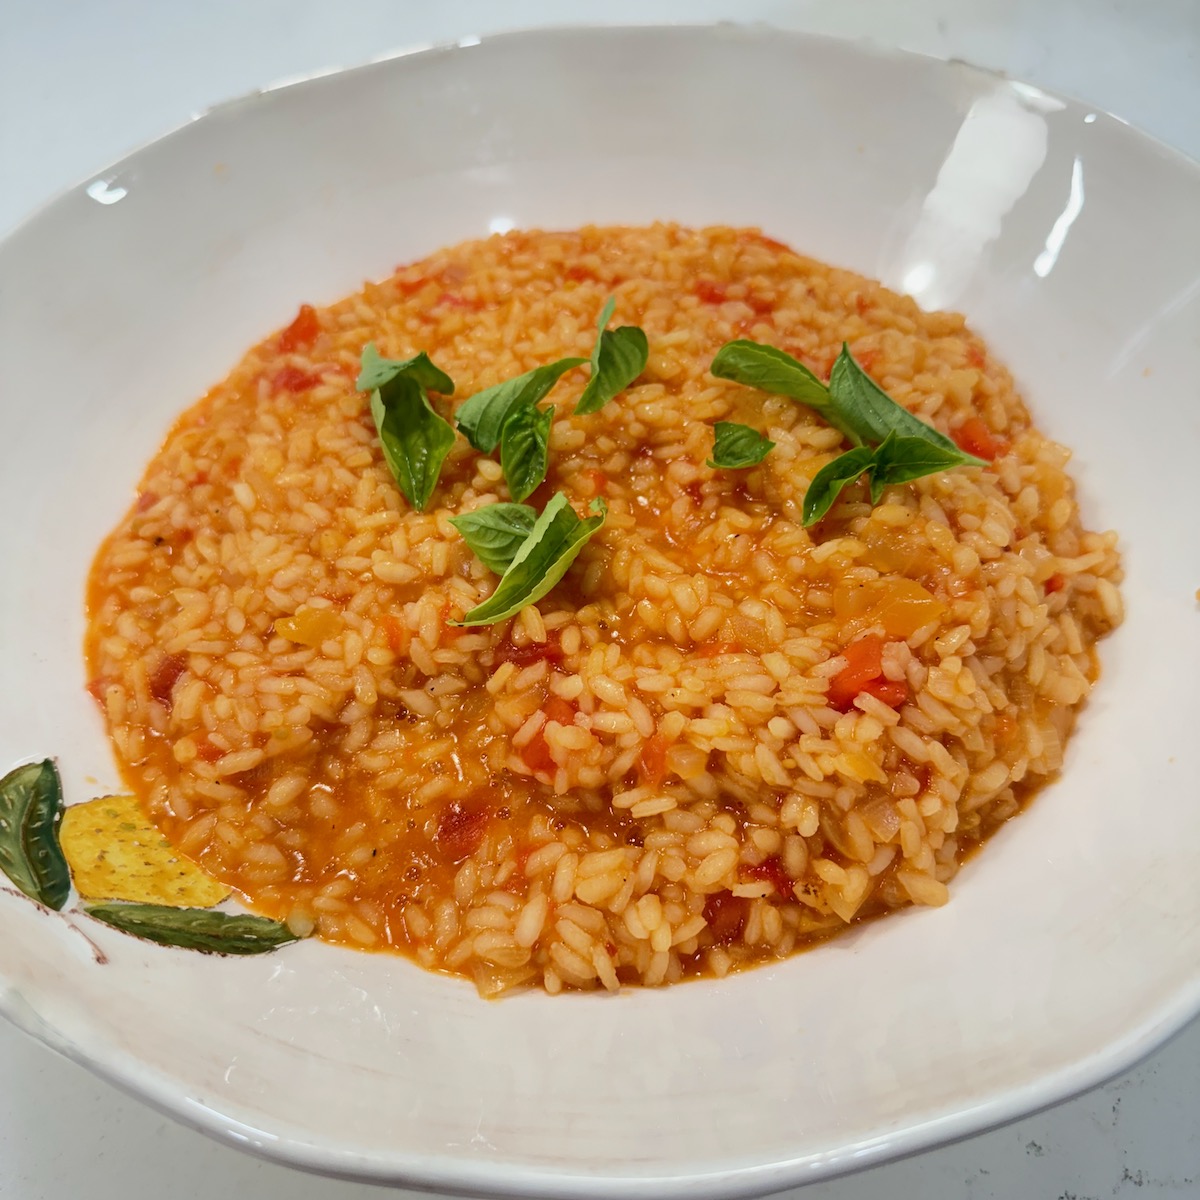
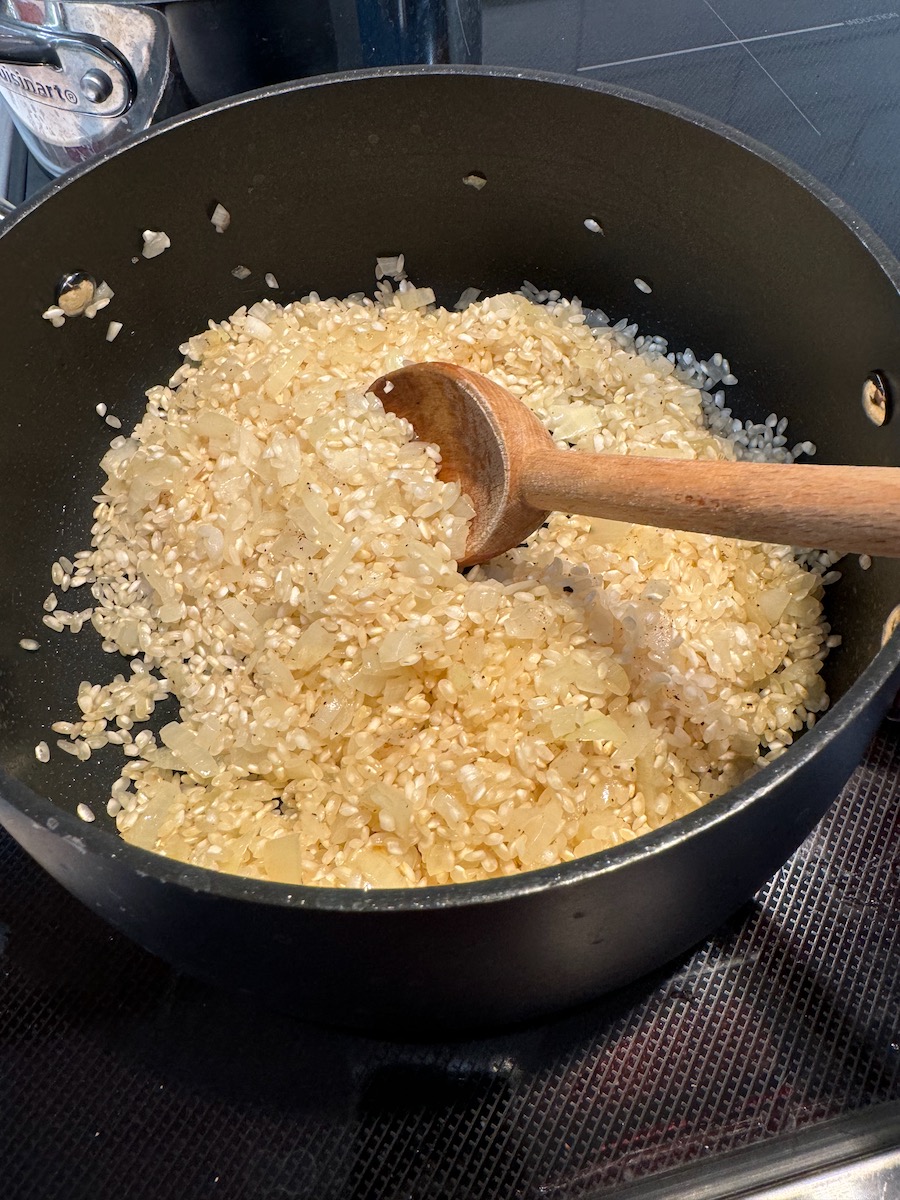
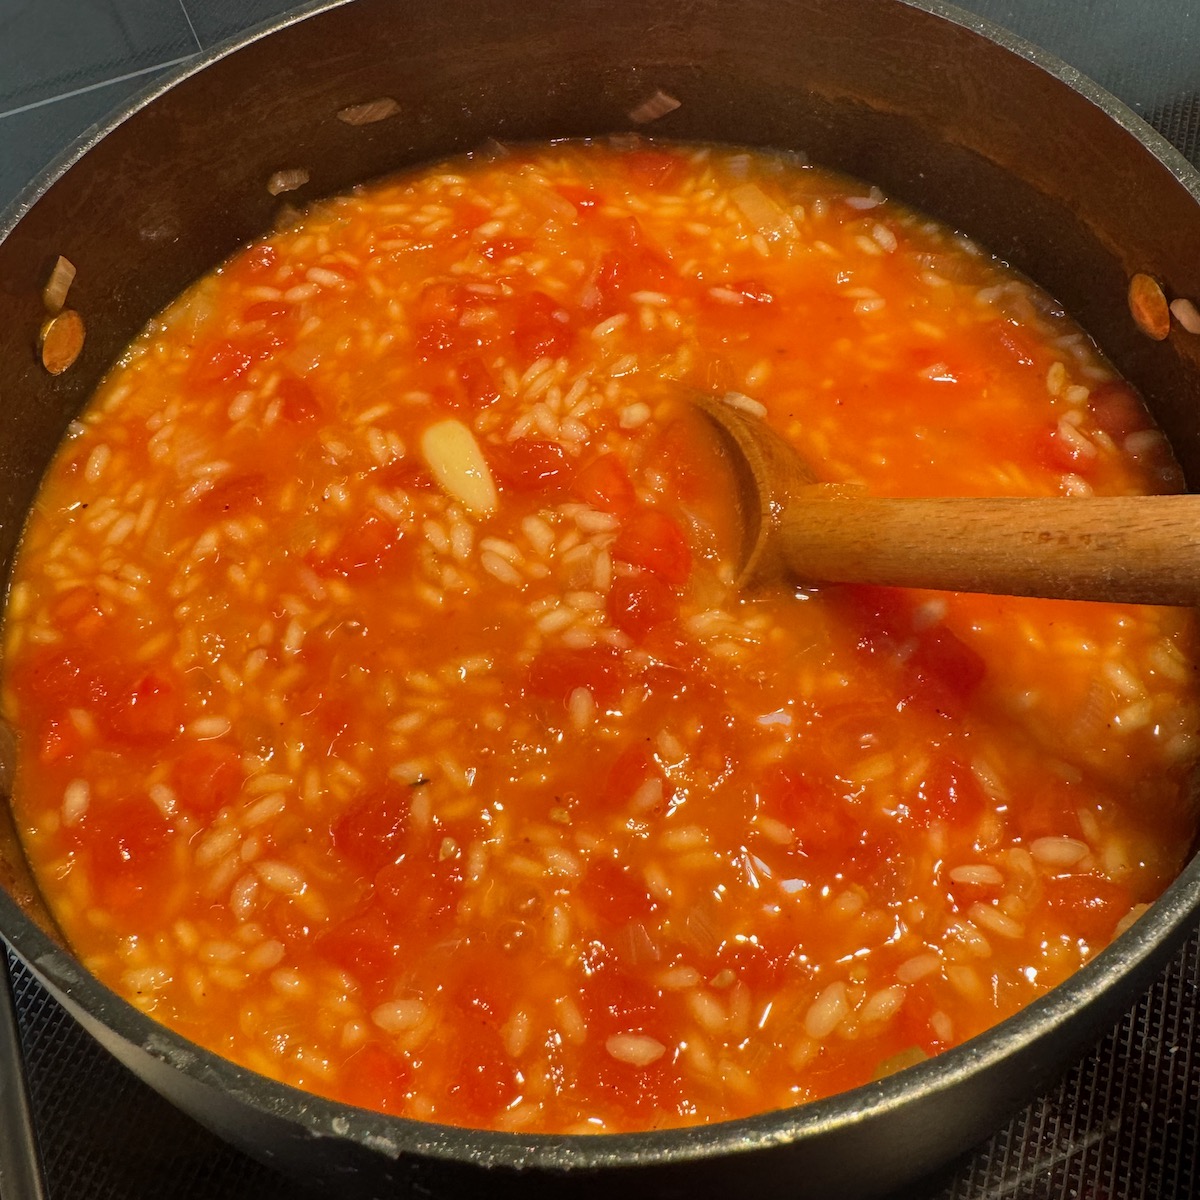
Originally published in the New York Times, it was a perfect dish to take care of too many tomatoes, and an overabundance of arborio packages in the cupboard. My changes are incorporated below. Note: This does not freeze well, so eat it all up, or share it.
(boiling broth on back burner)
Ingredients
Extra-virgin olive oil 1 large onion, diced (about 1½ cups) Salt and pepper 1½ cups arborio rice Pinch of red-pepper flakes 2 garlic cloves (I left them whole) ½ cup apple juice Large splash of rice wine vinegar 2 cups diced ripe red tomatoes (about 5-6 medium) 3 cups boiling chicken broth ½ cup grated pecorino or Parmesan, plus more for serving 4 medium tomatoes, in different colors, sliced Snipped basil, for garnish
Preparation
Pour 3 tablespoons olive oil in a saucepan over medium-high heat, then add the chopped onion, generously seasoning with salt. Add a few grinds of pepper, and cook until softened, about 5 minutes.
Add the rice and cook, stirring, until the onions are barely brown, about 2 minutes. Add red-pepper flakes, garlic, white wine and diced tomatoes, and cook until most of the liquid has evaporated, about 5 minutes more.
Pour in 2 cups boiling broth and adjust the heat to a brisk simmer. Cook for 5 to 6 minutes, stirring well with a wooden spoon every minute or so.
When the liquid is absorbed, add remaining 1 cup broth and continue to cook for another 5 minutes, until the rice is cooked, but the grains are still firm. Taste and adjust the seasoning, adding another splash of water if necessary to loosen the mixture. Turn off the heat, stir in the pecorino and 2 more tablespoons olive oil.
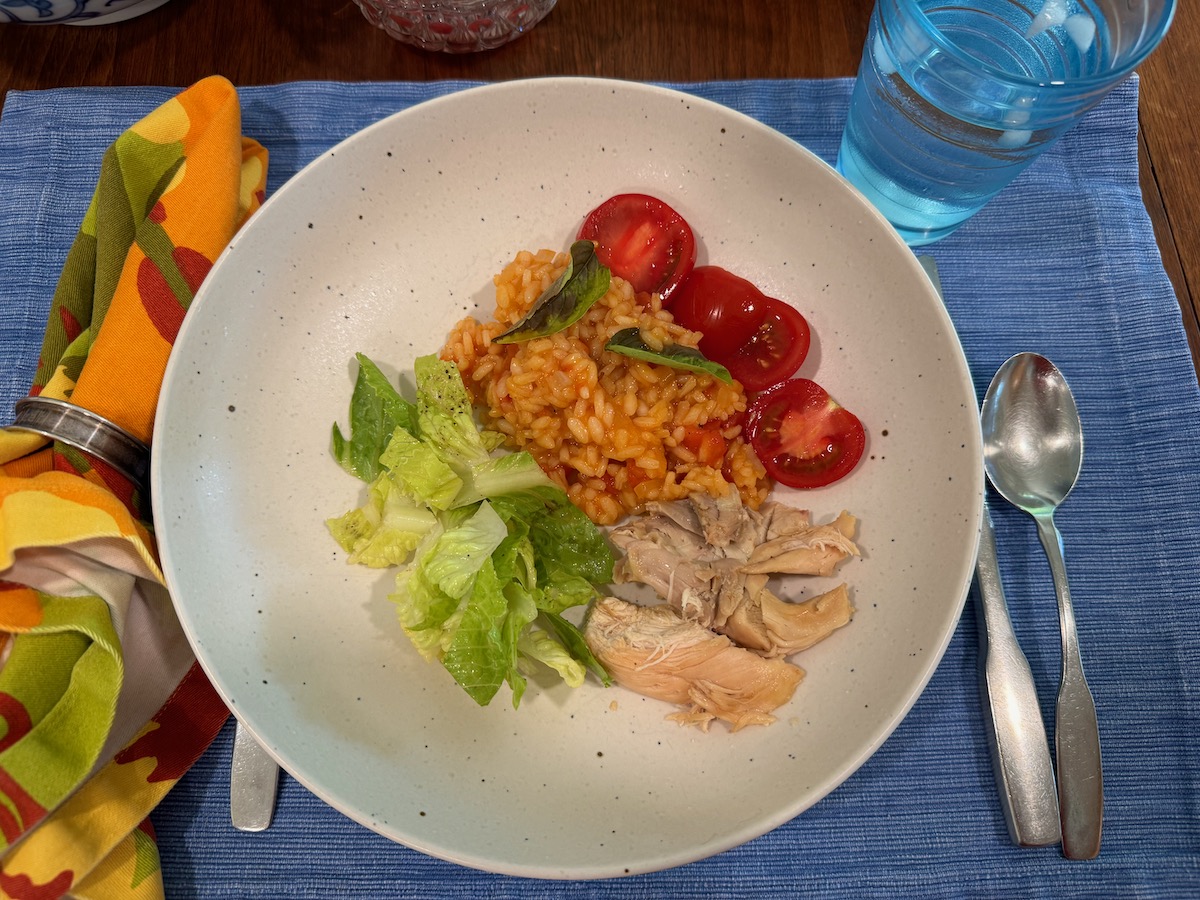
Serve in a low, wide serving bowl. Surround the rice with tomato slices and season them with salt and pepper. Sprinkle with basil.
We served ours with some lightly tossed greens and rotisserie chicken.
I like the first corn chowder version on here, but I also like this second one; it’s a bit more brothy and the corn really stands out. I added a drizzle of cream to the above, but it was unnecessary. Just go with the recipe.
The only unusual ingredient here is Better Than Bullion, a type of flavoring base. I sometimes use it to ramp up the flavor, especially if I’ve used water as part of the equation (which I do).
Ingredients
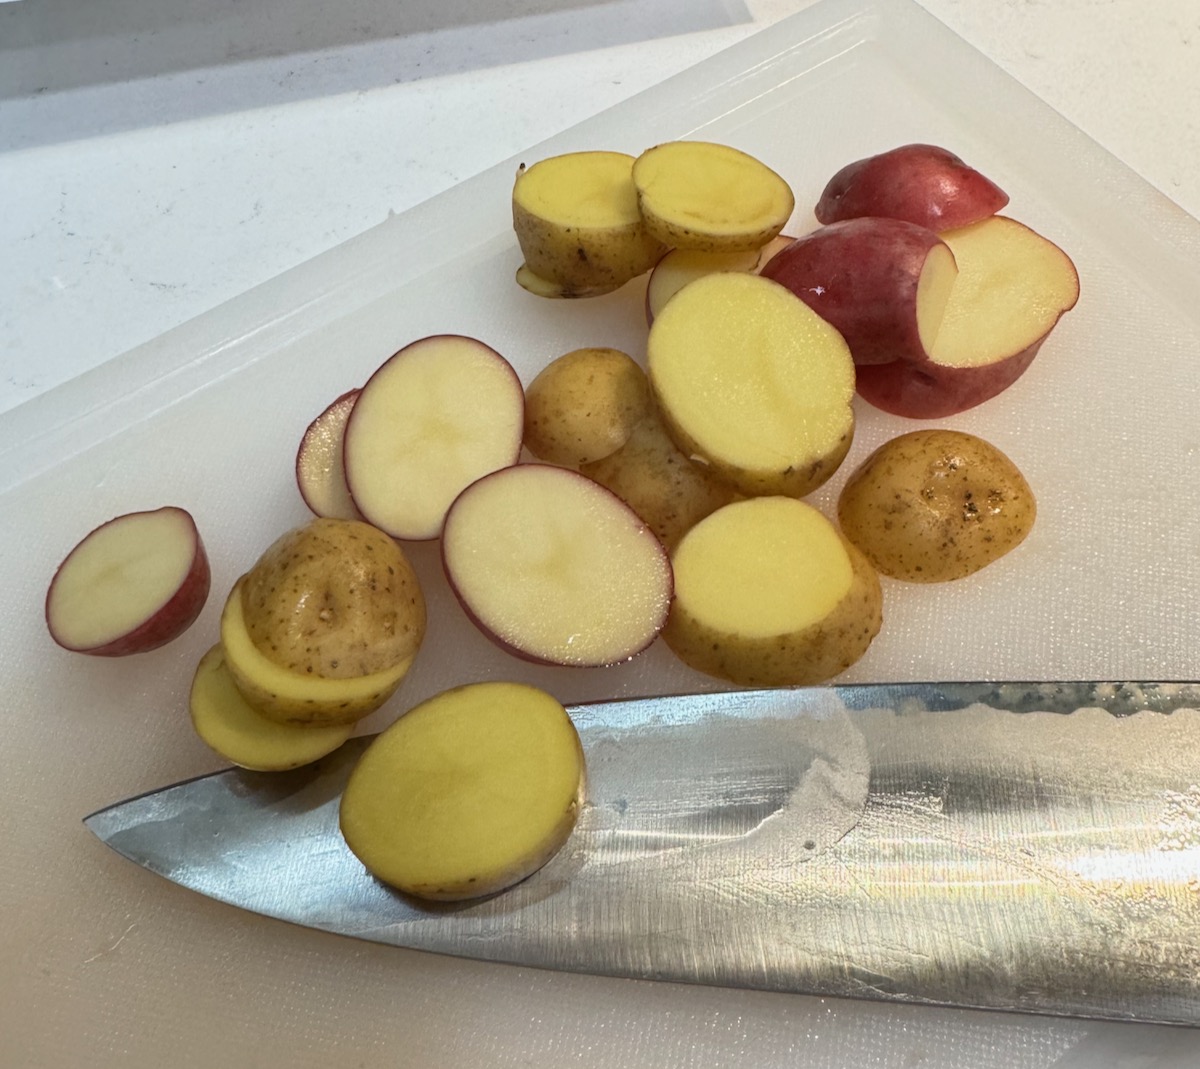
8 small ears of fresh corn, or 4-6 large ears 4 cups chicken broth 4 cups water 2 teaspoons Better Than Bullion Roast Chicken flavor 2 4-ounce packages of Trader Joe’s pancetta 1 large white onion, finely diced 2 large carrots (or 4 small ones), finely diced 1 lb. Yukon or equivalent potatoes, cut into 1/4″ slices (I used the small creamer potatoes, and was fine with that) 2 teaspoons salt — or to taste several grinds of black pepper medium pinch of red pepper flakes chopped chives, for garnish
Instructions
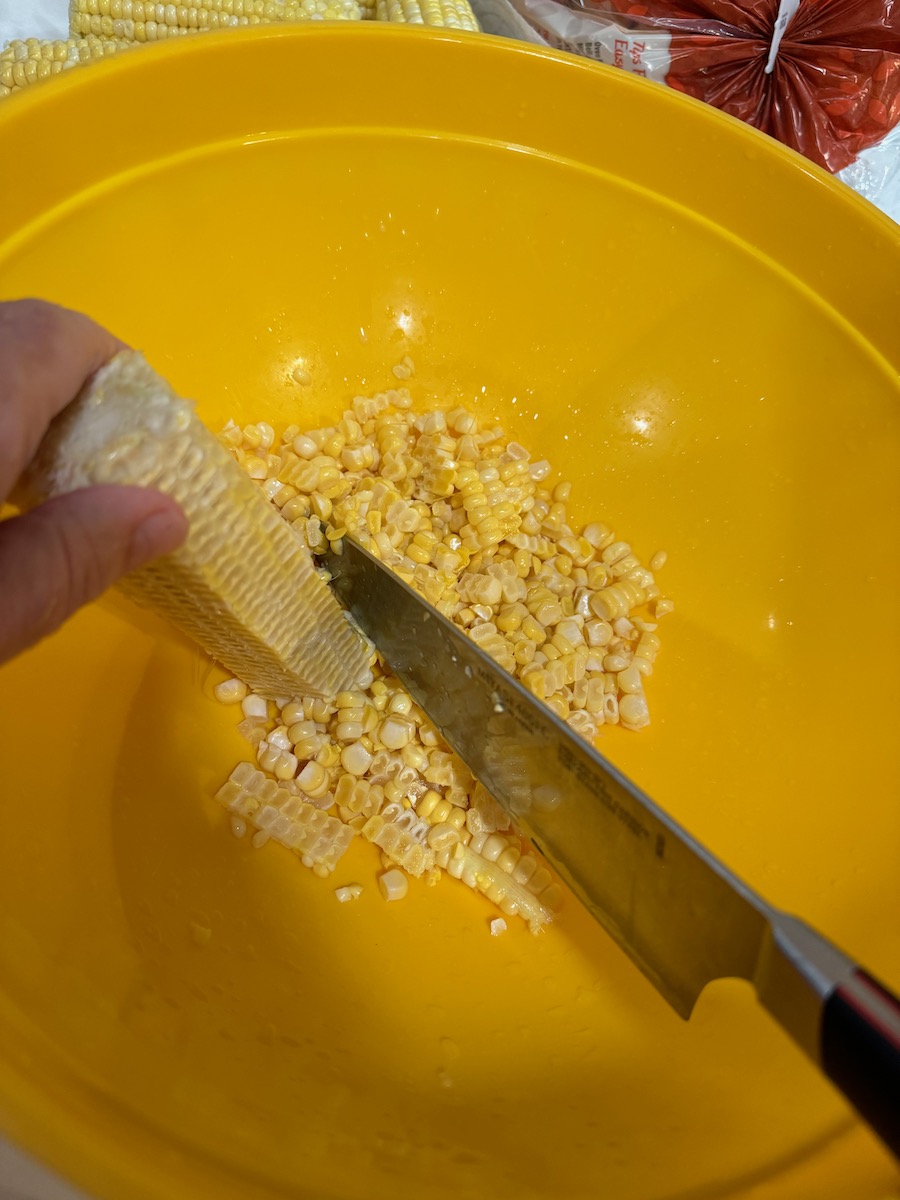
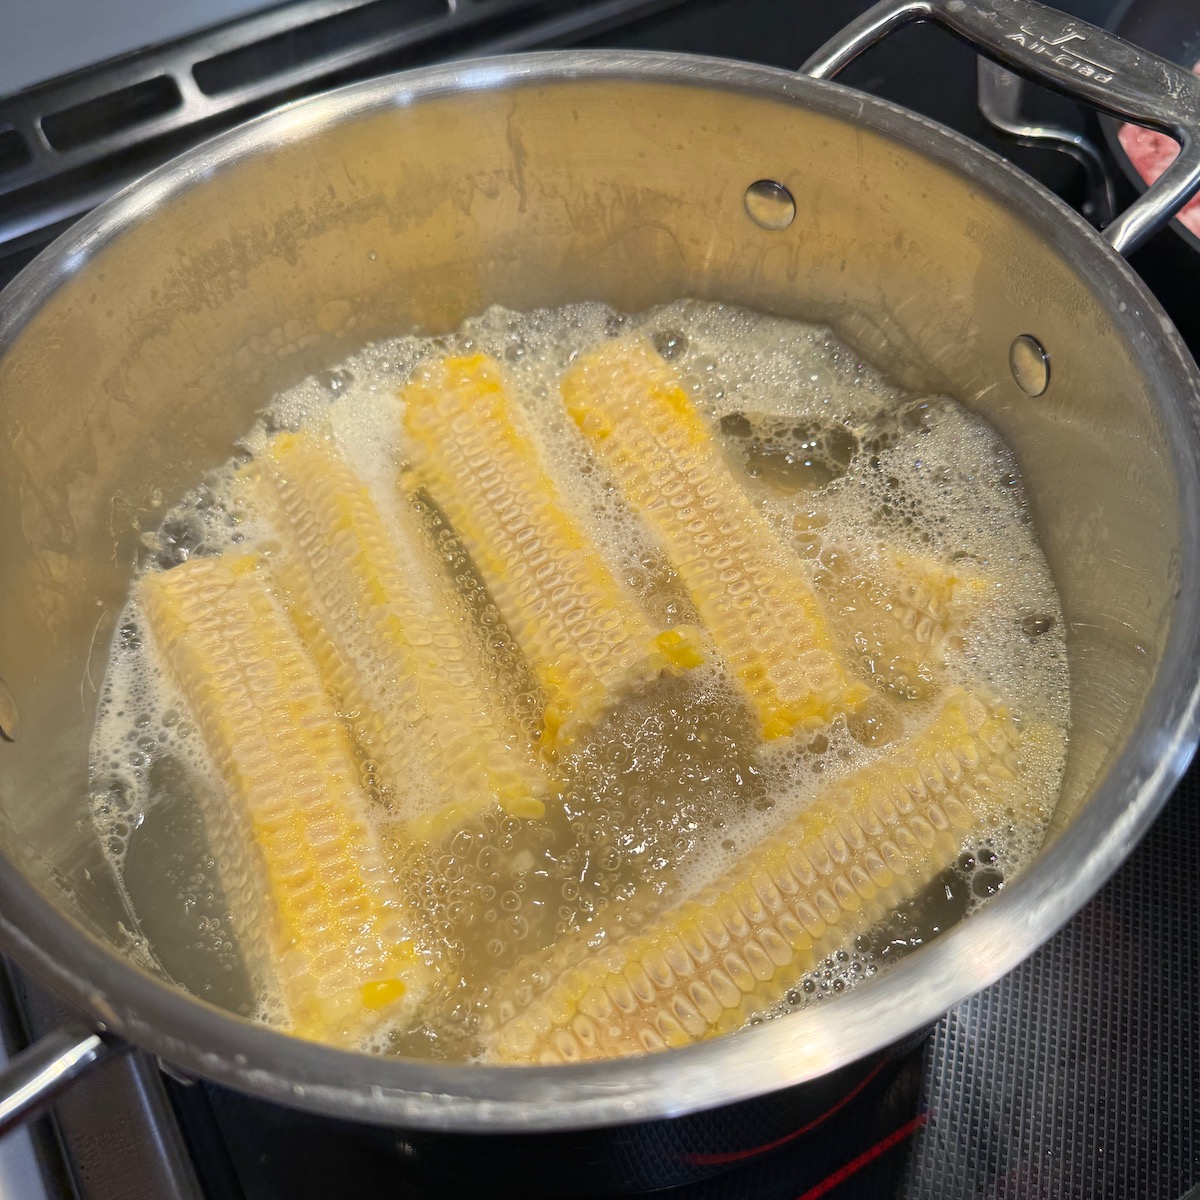
One by one, place an ear of corn in a large bowl, and cut off kernels. Reserve kernels.
Place the chicken broth in a large pot, and add the corn cobs. Add water until the cobs are almost submerged; don’t use more than 4 cups of water. Bring to a boil and cook uncovered for about 20 minutes, while making the rest of the chowder.
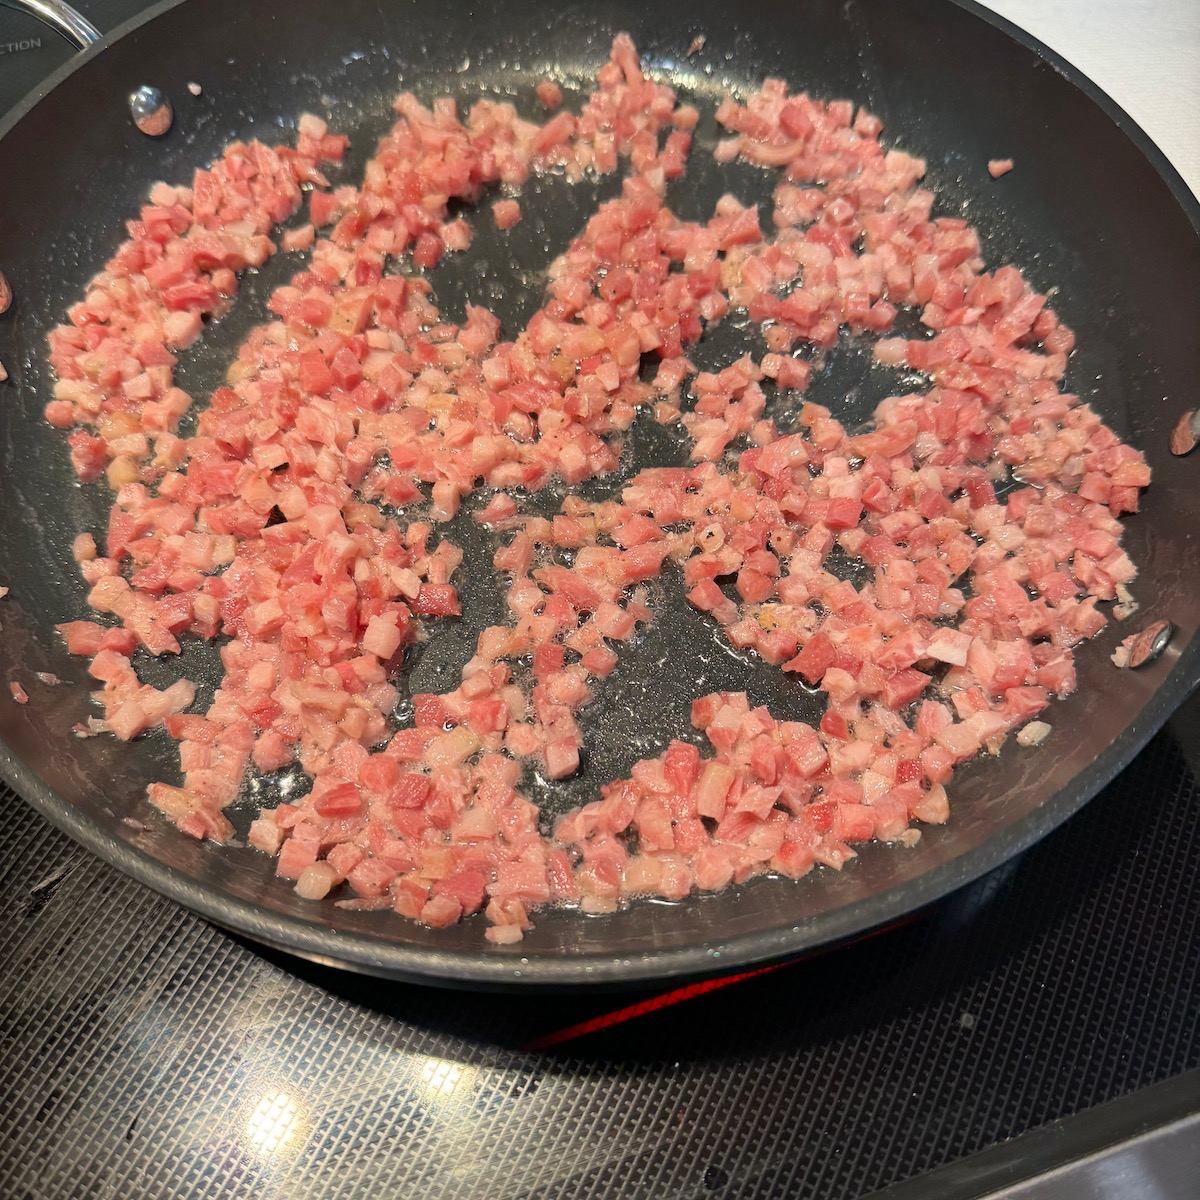
In a large saucepan, brown the pancetta until crispy, but not burned. Using a slotted spoon, remove pancetta to a bowl lined with a paper towel, and set aside for later.
To the pancetta fat, add the diced vegetables, stirring occasionally until they are soft, about 8 minutes over medium-low heat.
Now…back to the corn cobs. Using tongs, lift the cobs out of the large pot into a bowl, and then pour the broth/water through a strainer into a large clean bowl. Don’t throw away the cobs just yet.
Wipe out the large pot, and scrape the diced vegetables into the pot. Add the reserved corn kernels, sliced potatoes, corn broth/water, 2 teaspoons of Better Than Bullion Roast Chicken flavor, pinch of red pepper flakes, and the salt and pepper.
Stir well, and let simmer until the potatoes are tender (about 12 minutes). Meanwhile, go back to your cobs, and [if desired] scrape down the edges to extract the bits of the corn kernels that remain. Add to soup.
When potatoes are tender, and using a potato masher, crush the potatoes a few times to break them down and to thicken the soup slightly. (If the soup gets too thick, you can add more water or broth if needed.)
Season to taste, then add in the pancetta. Let simmer for 1-2 minutes.
Serve in wide bowls, topped with the chopped chives and ground black pepper. My focaccia also goes well with this soup. This recipe makes a bunch — probably 8-10 servings — enough to share with a friend!
First, the photos that inspired my search for a decent focaccia (unhappy as I was with the version that used to be on here).
We spent some time recently in Bologna, and most all the focaccia bread we ate was light, moist and spongey. The mortadella, tender and flavorful, was a perfect filling, and at one place, the maker spread fig jam on the sandwich. Divine!
So I’ve looked at roughly 15 different recipes, and the one that comes closest is the one from Cucina by Elena. She does a great job of explaining everything, and you’ll want to linger on her blog to taste all her other recipes.
But, as usual, I started tinkering with it, and now I have the one I want to make, inspired by, and a derivation of hers (which, in turn, was a derivation of another baker’s). This is how it works in focaccia land.
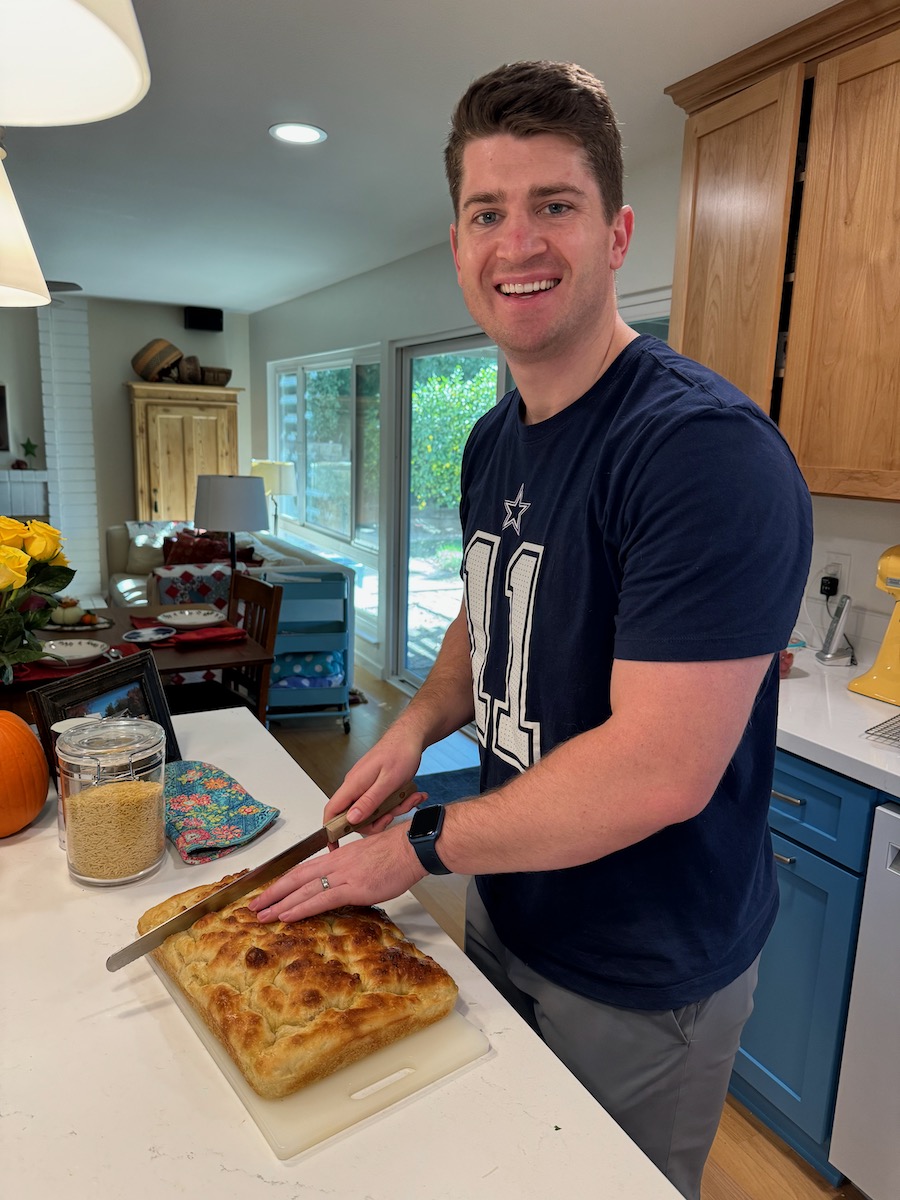
(our friend, Landon)
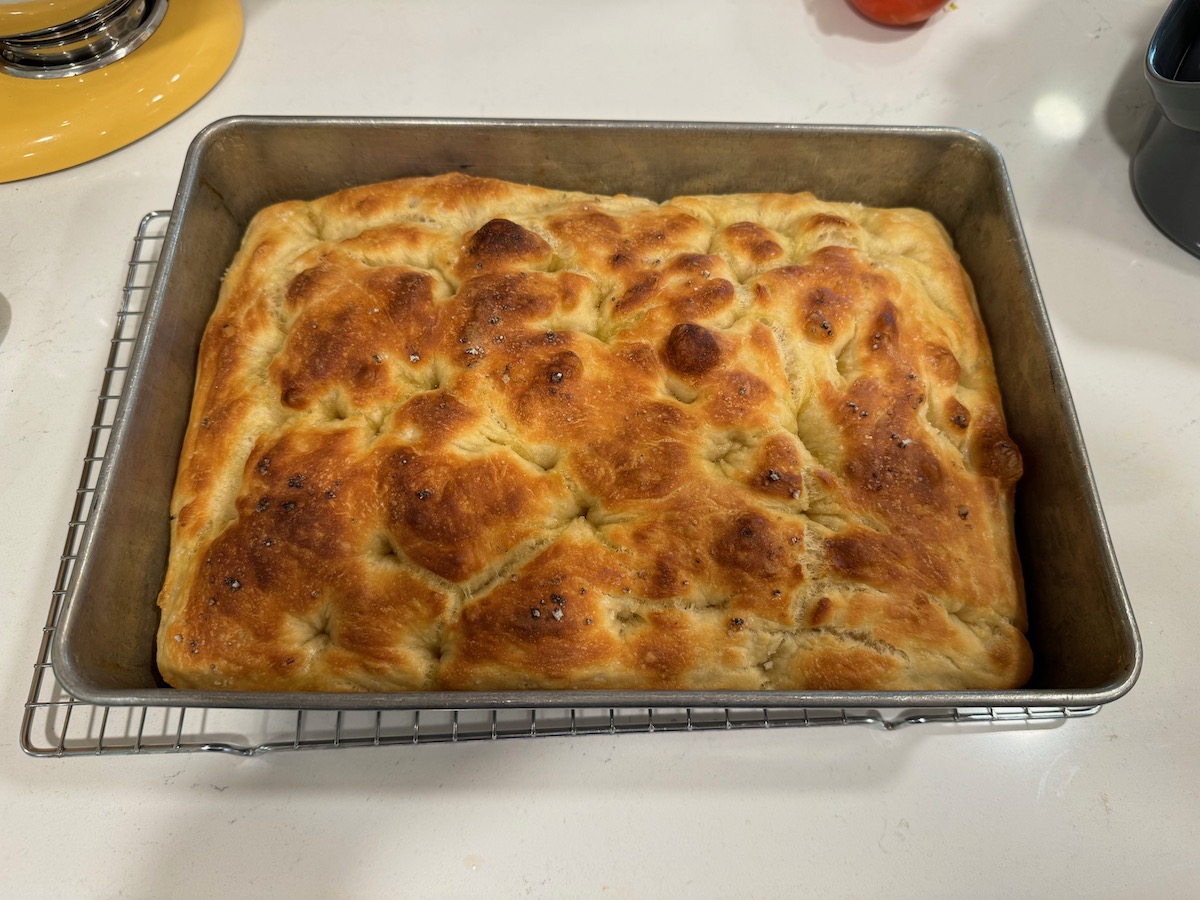
The timing is this is simple: Stir up the basic ingredients in the evening. Cover with plastic wrap and let sit all night in the fridge. In the morning, prepare the pan, plop the dough into it, let rise 2-4 hours, depending on the temperature of your kitchen. You’ll be eating focaccia by lunch. Which I recommend.
625 grams all-purpose flour (approx 5 cups) 1 scant tablespoon sugar 1 package, or 2 1/4 teaspoons regular dry yeast 1 Tablespoon kosher salt 2 1/3 cups warm water (105- 110 degrees Fahrenheit; no hotter or you will kill the yeast) *NOTE: I have sometimes used as much as 2 1/2 cups of water; no problem, but your dough will be wetter and your bread squishier and softer. 6 tablespoons good-quality olive oil a couple of pinches of flaky salt, about 3/4 teaspoon, for the top after baking
Method
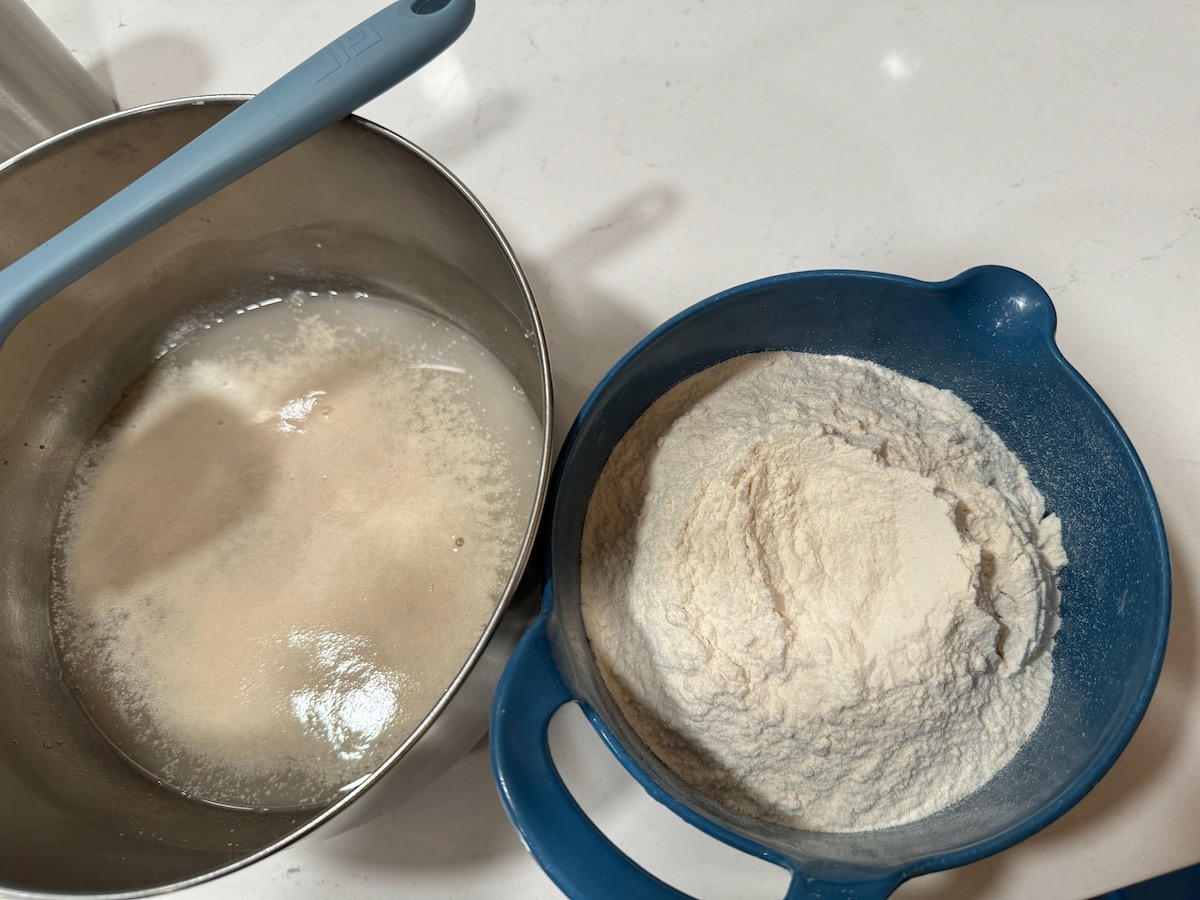
In a medium sized bowl (blue one, shown above), measure out 625 grams of flour, using a scale (approximately 5 cups). Set aside.
In a larger bowl (silver), add 1 scant tablespoon table sugar (12 grams), the 2 1/3 cups of water and 2 1/4 teaspoons yeast (1 package or 7 grams). Give it a small stir. Then let yeast/water/sugar mixture take time to proof. The brew should bubble up, and look cloudy, as in the bowl on the left.
When ready, add 1 Tablespoon kosher salt (if using table salt, no…just don’t) to the water/yeast mixture, then all of the flour. Mix until all the water is incorporated. If needed, add another tablespoon or two of water. Don’t overmix, but make sure there are no dry spots.
In a separate large bowl, pour in about 4 tablespoons good-quality olive oil. I just swirl in four circles of olive oil, that look close to a tablespoon Scrape in your focaccia dough, turning to coat all sides. (This bowl needs to be at least double the size of your dough.)
Cover with plastic wrap and put into refrigerator for at least 8 hours, preferably overnight. When you take out the dough, it looks lively and wet. This is a high hydration bread dough (about 77%); you want that. One focaccia maker that I read uses a folding technique in the early stages of her bread. I skipped that: I’m all about easy.
In the morning (or many hours later), and using real butter, grease a metal 9 x 13 pan on the bottom and sides. (I peel back the paper on a stick of butter and use that to stroke the pan.) Then add about a tablespoon or two of good-quality olive oil to the pan and brush on the sides and bottom. (Set brush aside for use at the end.)
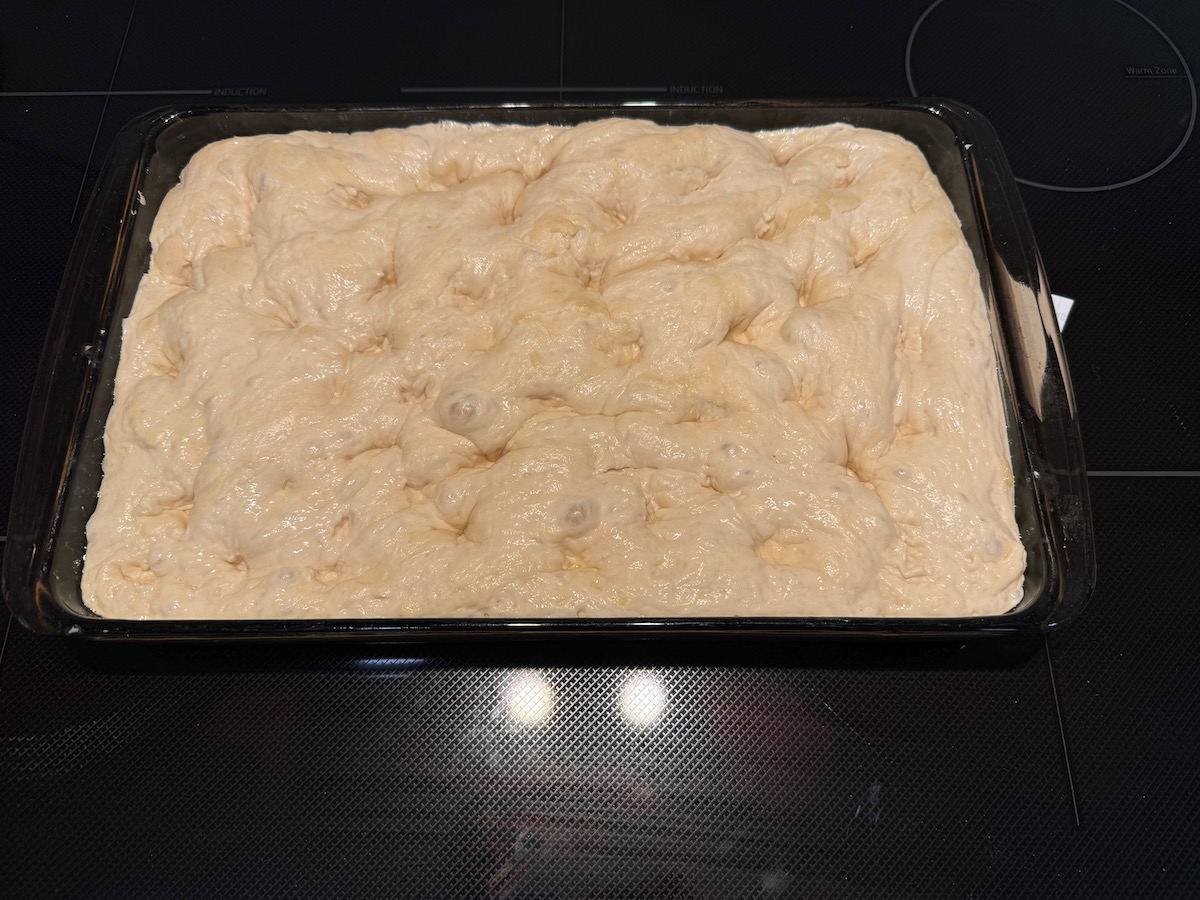
Ease dough into prepared pan, and kind of poke and stretch it to fit, but not worrying if it doesn’t. Let rise, uncovered, for 2-4 hours. [I took mine out at 8 a.m. and by 11:00 a.m. it was ready to bake.] It will have nearly doubled in size, and the dough will fill the pan and corners. You might see some bubbles, too.
Preheat oven to 450 degrees Farenheit. Pour a little olive oil onto clean fingers, and coat with the oil. Now with all fingers in action, poke the dough, leaving small divots. Cover surface evenly with pokes.
10. Bake for 16 minutes. Check. If not brown enough, bake 1-2 minutes more.
11. Pull from oven, and using the brush from an earlier step, brush olive oil over the surface. Sprinkle with flaky salt. After five minutes, loosen focaccia with a spatula, and transfer to rack for cooling.
12. Cut into 16 pieces (larger) or 20-25 (smaller).
This freezes very well: place in heavy-duty plastic zipper bag. To rejuvenate, we let sit out for a few minutes (or microwave *very* briefly) then cut in half and toast in a table-top oven for 2-3 minutes, or until warm.
Last Notes: It takes me about 6 minutes to mix it up at the beginning. Add in the 10 minutes the next morning, and you’ll find this is very easy. Just let it sleep overnight in the fridge.
These photos were taken from the very first batch I made, where it said to sprinkle the salt over the top before baking. They turned really dark so I changed the recipe to put the salt on afterwards.
I also cheat a little on the mixing: After getting the water incorporated into the dough, I scrape the dough into the small (blue) bowl where the flour was. Then I pour 3 Tablespoons of oil into the large (silver) mixing bowl, dump the dough back into that, and turn to coat the bread with oil. This way, I only use two bowls for mixing. It doesn’t matter if there are bits on the bowl from the mixing. No stress.
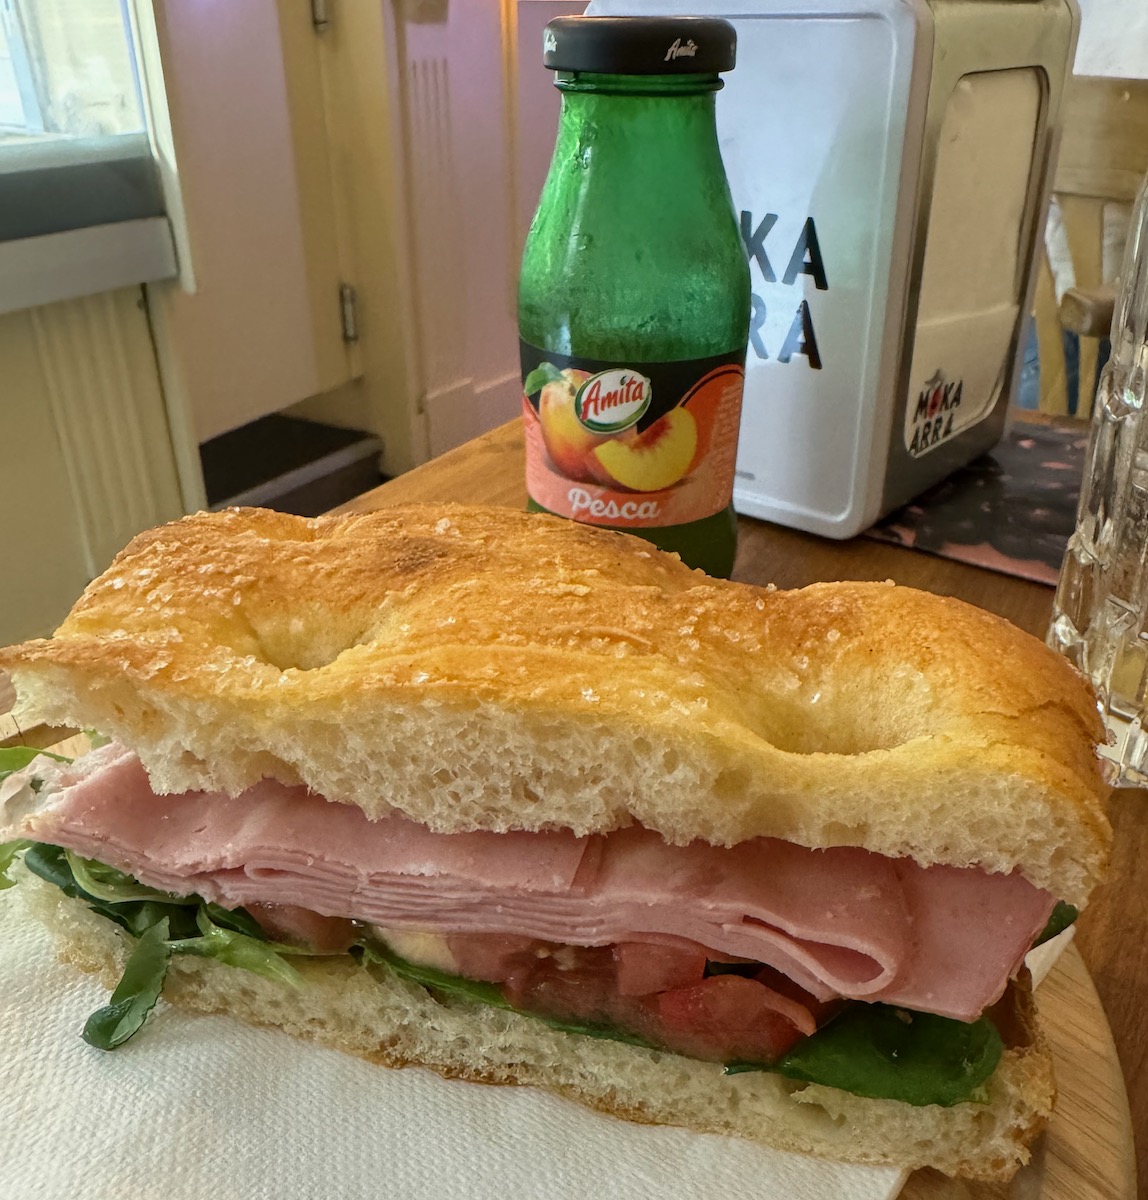
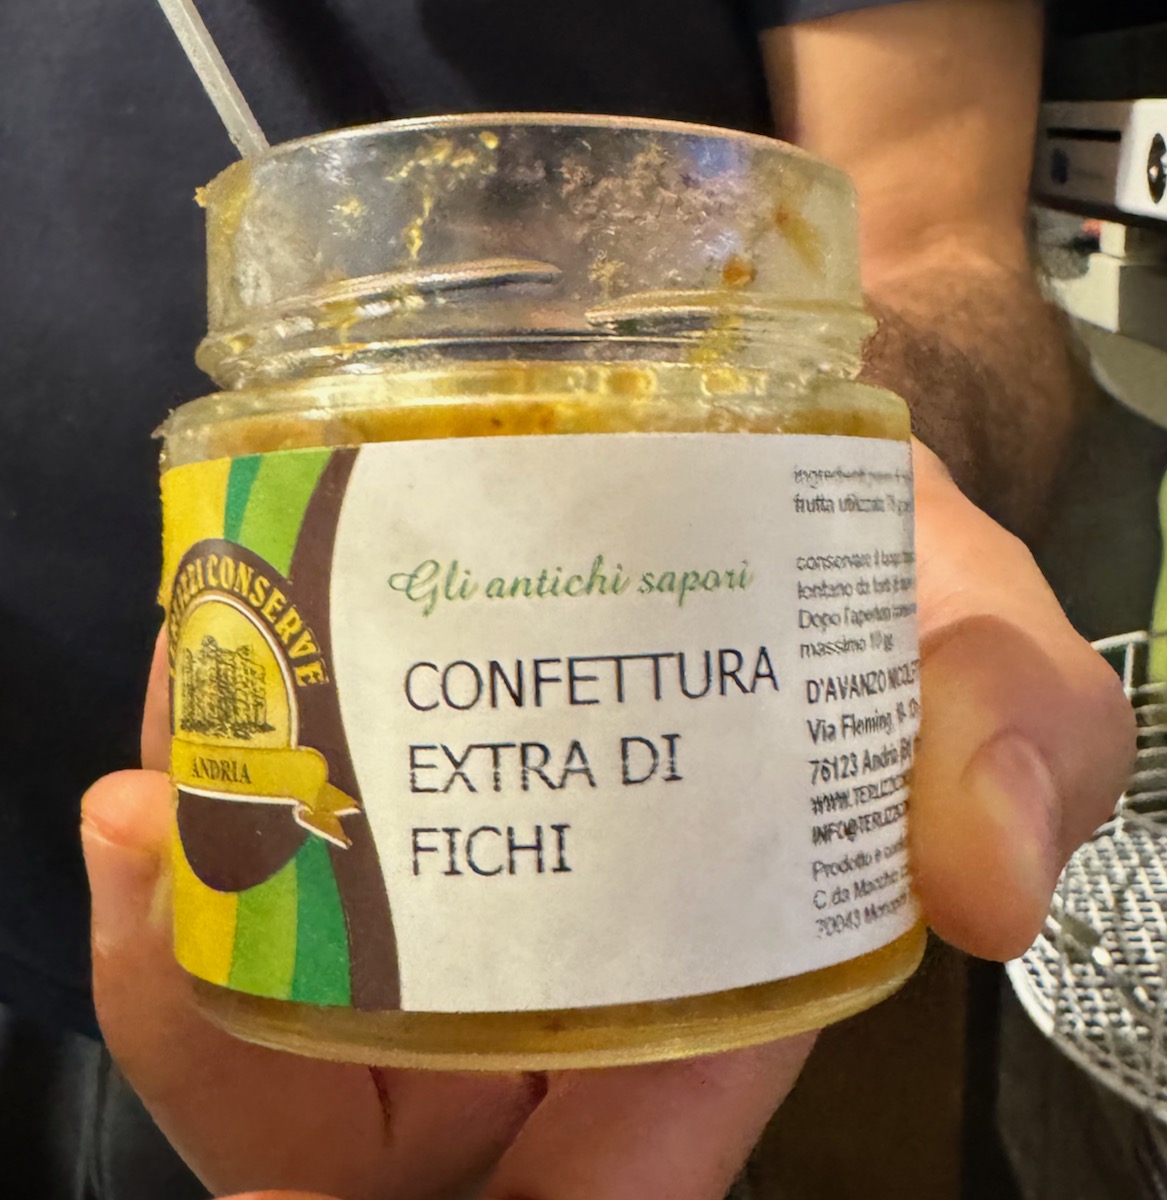
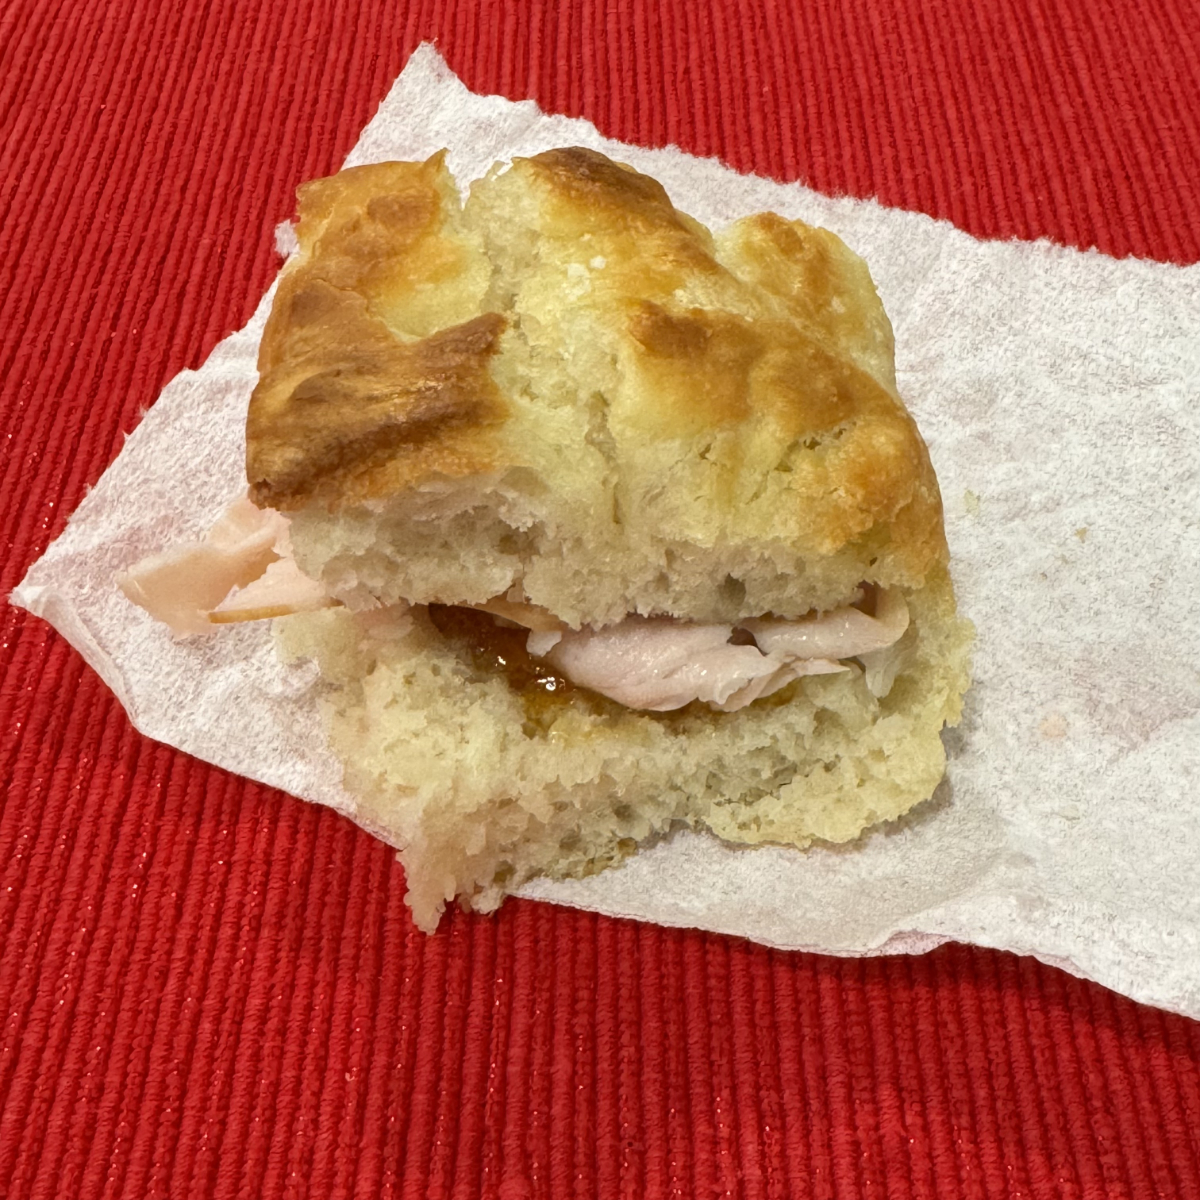
The Second Best Sandwich in the World uses the focaccia bread, spread with a little fig jam (not fig butter), then thinly sliced turkey. A good-tasting tomato will put it over the top.
The Very Best Sandwich in the World, is made as above, but with high quality mortadella, and is eaten in Italy. (See the top of the post.)