Peppermint-Chocolate Layered Dessert

This uses three ingredients.  Now that’s a quick dessert.  However, it does need to spend some time in the freezer.
So, please, begin this the night before your event, in order to let this freeze solid.

Ingredients
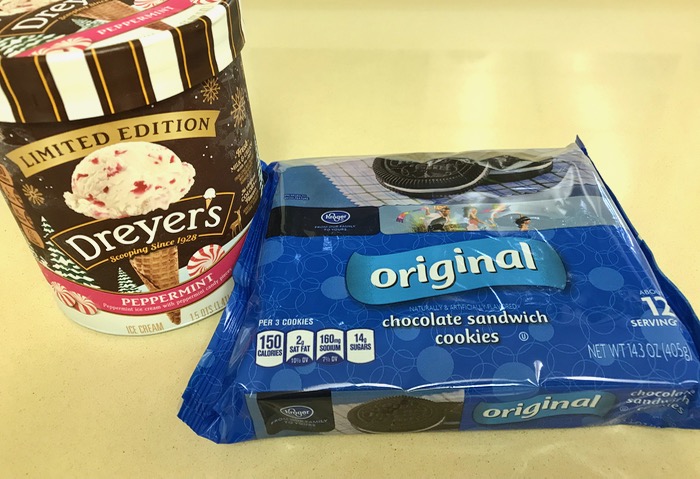
One 14 oz. package chocolate sandwich cookies (Oreo type)
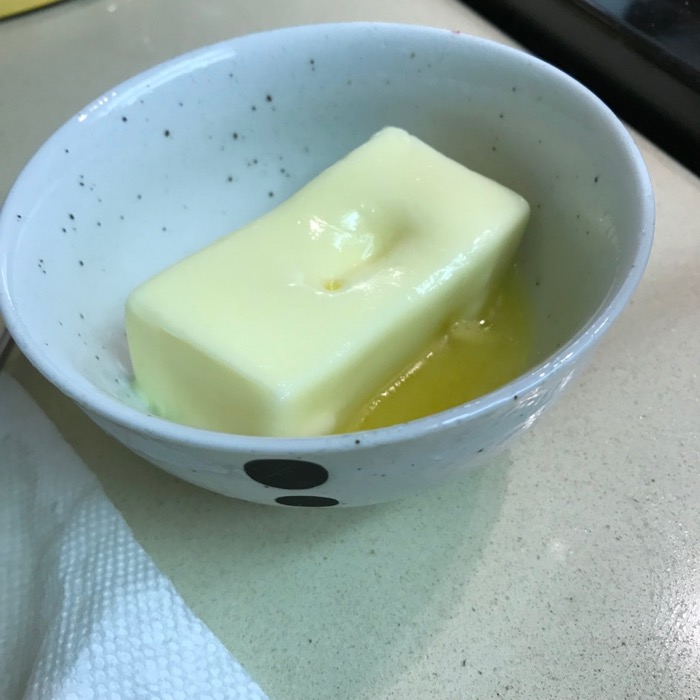
1/2 cube (4 ounces) melted butter
One 1-1/2 quart container of peppermint ice cream

Preparation

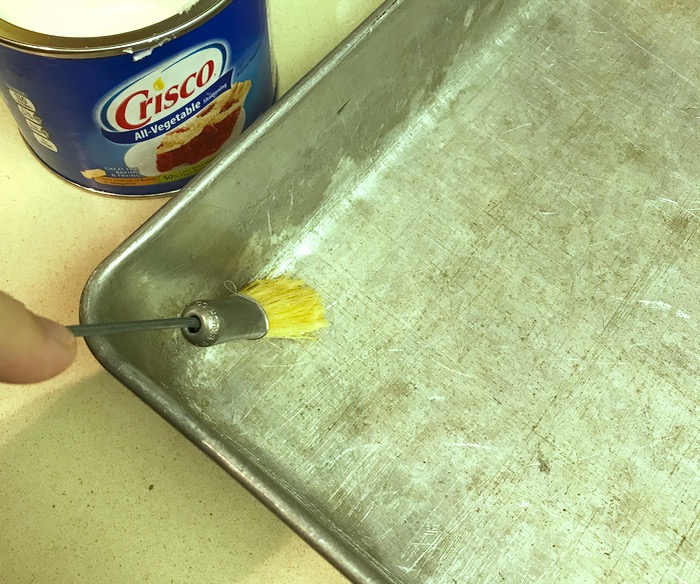
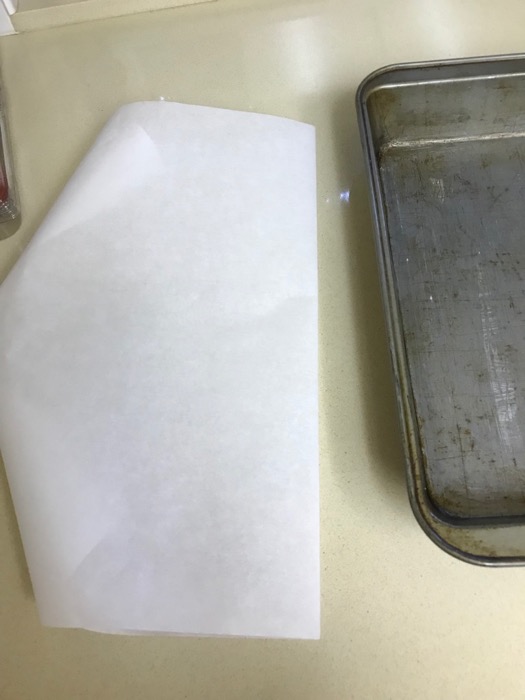
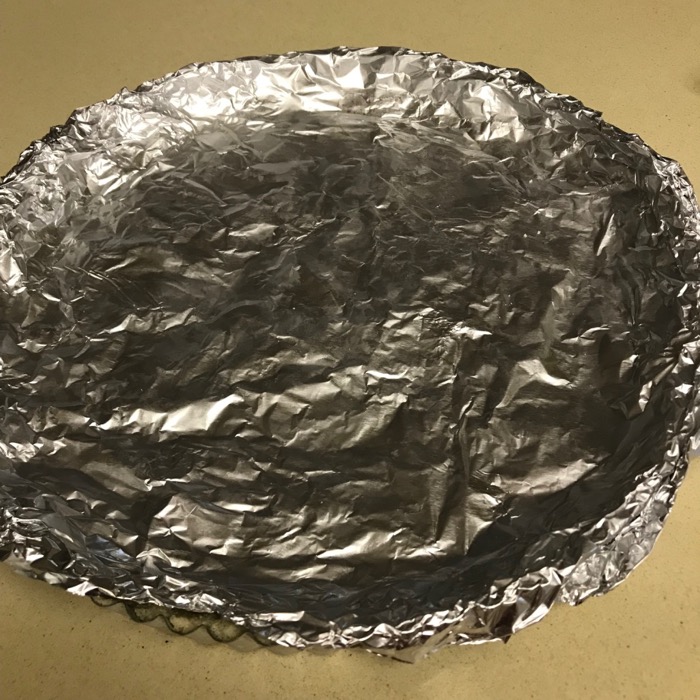
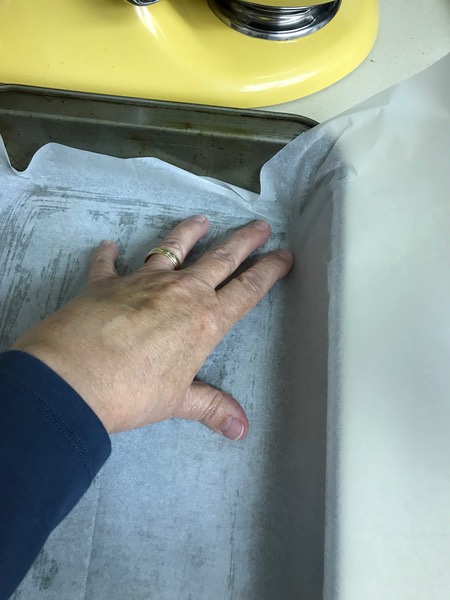
Prepare the pan by lightly greasing the bottom only of a 9 x 13 inch pan.  Fold a length of parchment paper in half, creasing well.  Use that crease to center the parchment paper, then smooth out, letting the paper overhang the long edges by about 2-3.”  Set aside.

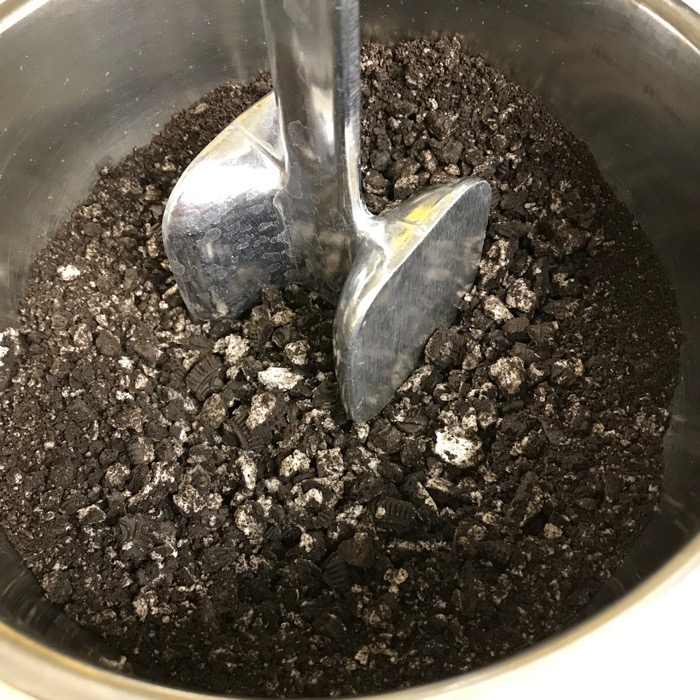
I’m crushing them more!

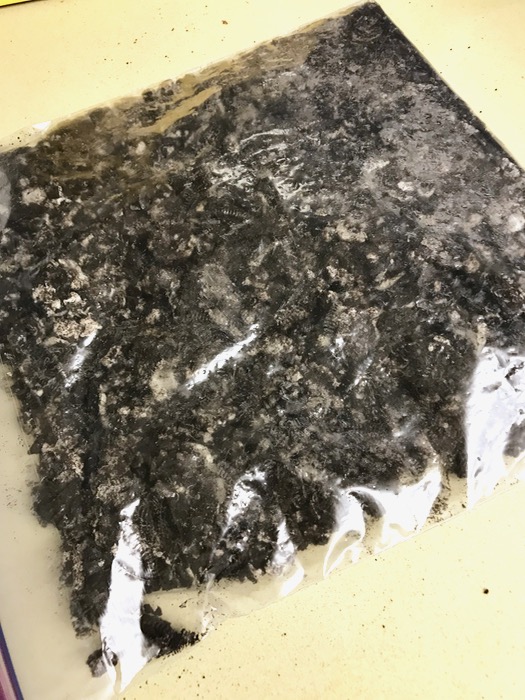
Put all the cookies into a zipper plastic bag, OR into a bowl OR into your food processor (easiest).  Crush them thoroughly, or if you have a food processor, pulse until the texture of fine gravel, or chunky sand.  The crumbs should be small, with no obvious big chunks of cookie.

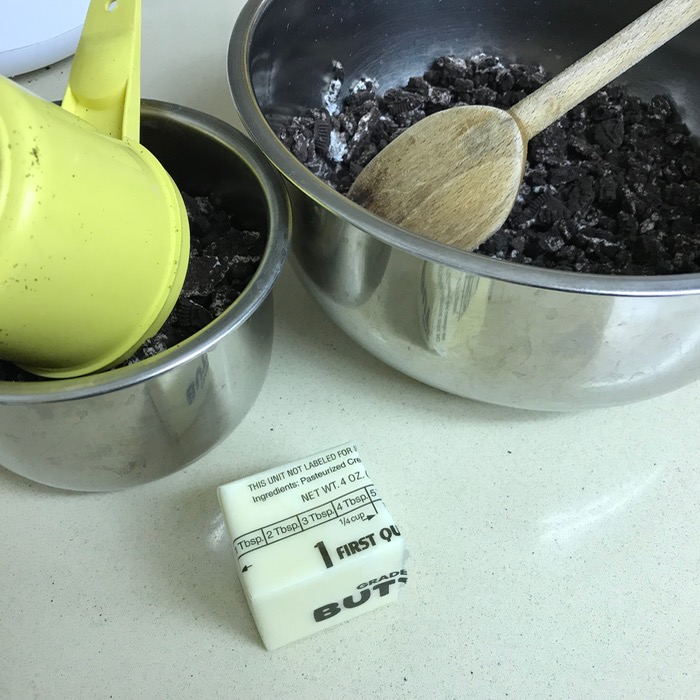
Reserve one cup of the this pulverized mixture for the crumble topping, and if it’s not really fine, do some more crushing.  Set aside.

Place the remainder of the crushed cookies into a mixing bowl, and add 1/4 cup melted butter.  (I like the real thing.)  Mix well.

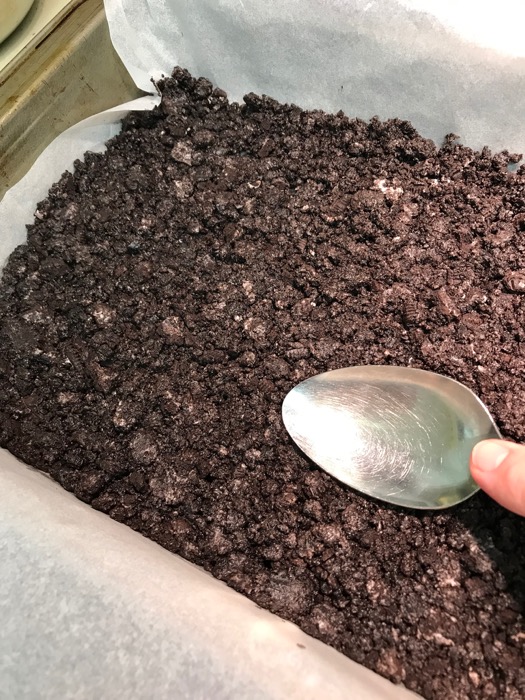
Pour into the prepared pan, and press firmly with the back of a spoon to even out the crushed cookies.  Place in freezer until solid, about 2 hours.

Set out one carton of ice cream on the counter for about 15 minutes, or until the carton yields slightly when squeezed.  Dump (squirt, sort of ) into a mixing bowl fitted with the paddle beater, let sit for about another 10 minutes.  Turn on mixer slowly, then up to medium, while you beat the ice cream into a creamy mixture.  If you don’t have a mixer with a paddle attachment, use a bowl and a sturdy spoon.  You don’t want the mixture to melt; it should be creamy, not runny.  Work fast if you are doing it by hand.

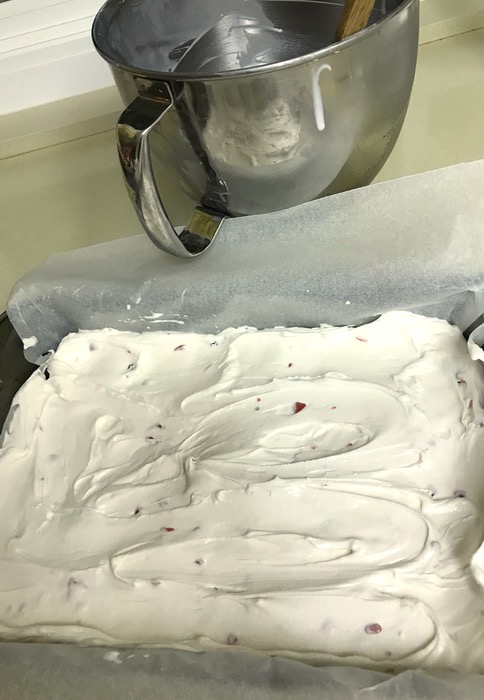
Spoon it out onto the frozen layer of crushed cookie in glops; spread evenly.

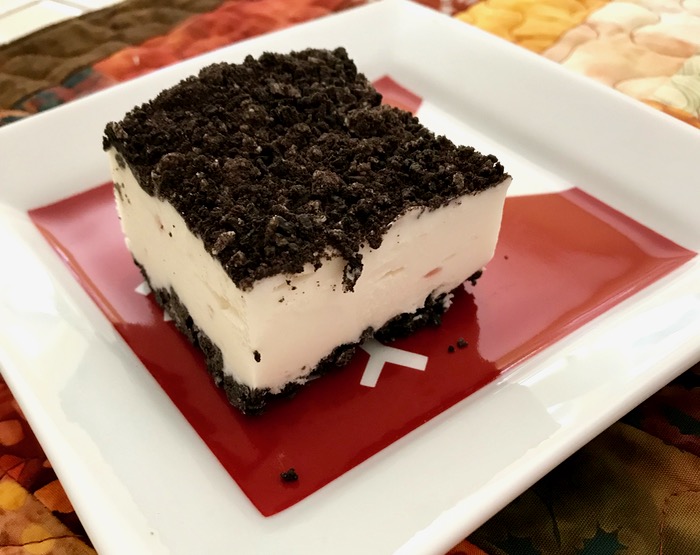
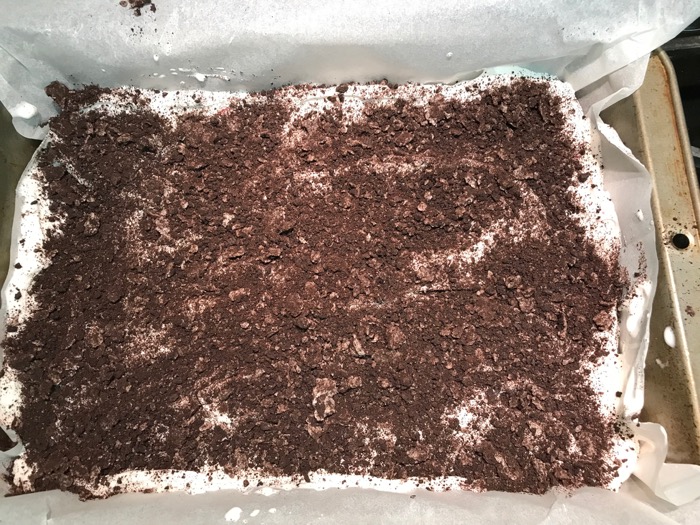
Sprinkle with the reserved cookie crumbs, and refreeze.  It will take at least four to six hours for the ice cream to freeze properly.

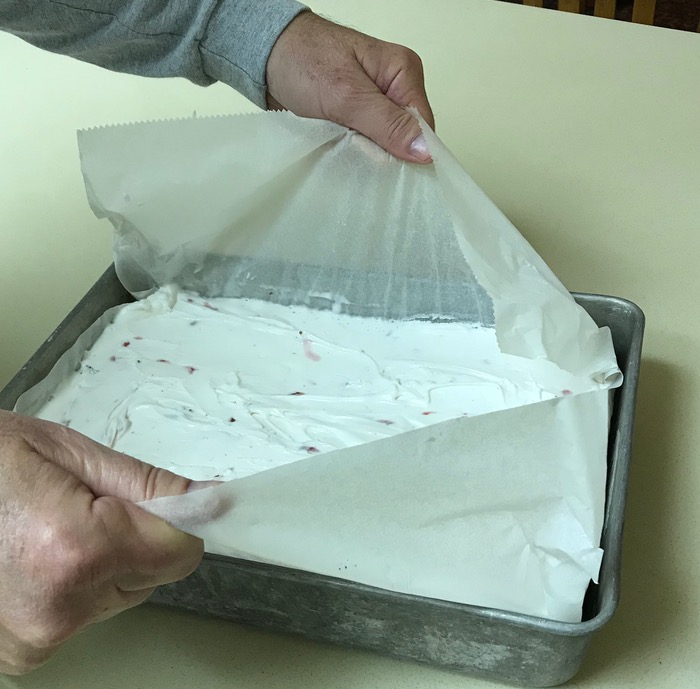
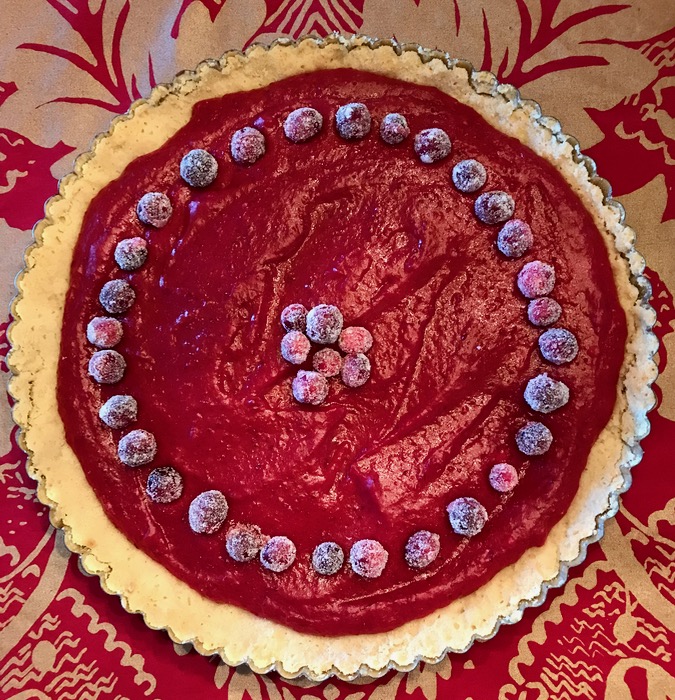
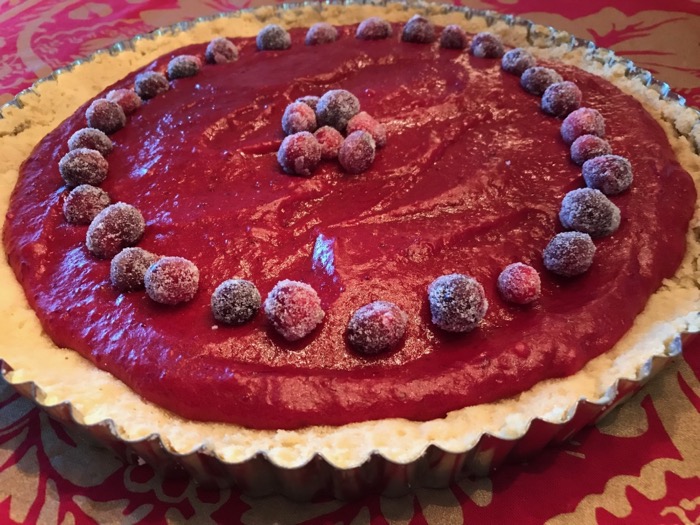
Why the overhanging parchment paper?  When you are ready to serve, lift it out onto a board, cut with a knife, then replace remainder back into the pan. Store dessert in the freezer, either with the lid to your 9 x 13, or with foil.  (This is shown just before it received its crumb topping.)

Pork Tenderloin wrapped in Prosciutto


Pork:
2 tablespoons minced fresh rosemary
4 teaspoons herbes de Provence
4 teaspoons olive oil
2 pork tenderloins (about 2 pounds)
Kosher salt, freshly ground pepper
16 thin slices prosciutto (Italian bacon; about 4 ounces)

Preparation
Stir rosemary, herbes de Provence, and oil in a small bowl. Rub all over pork; season with salt and pepper. Wrap prosciutto slices around pork and tie at 2″ intervals with kitchen twine to hold together. DO AHEAD: Can be made 1 day ahead. Cover and chill.

To make life easier, I spread out a length of wax paper, cut five piece of twine, and laid them out like railroad tracks.  I laid out the prosciutto in an area that I thought might match the length of the pork loin, plus double the width.  I placed the herbed meat on top of the prosciuttio, then brought the string up and tied it, which wrapped the prosciutto into place.  We flipped them over when we placed them in a lidded container, which we then put into the refrigerator overnight.

Spray a broiler pan with cooking spray (don’t forget the bottom of the pan that catches the drippings), place the pork loin on top.  Bake at 400 degrees for about 30 minutes, or until an instant-read thermometer inserted into the middle of each loin registers 145 F.  Tent and let it rest for 10 minutes.

Transfer tenderloins to a cutting board, slice thinly and serve with plum chutney, or cranberry sauce.

NOTE: If using a charcoal grill, build a medium-hot fire; push coals over to 1 side of grill. If using a gas grill, heat all but 1 burner to high. Grill tenderloins over hot part of grill, turning frequently, until a crisp brown crust forms on all sides, 8-10 minutes. Move tenderloins to cooler part of grill to gently cook through; cover and cook until an instant-read thermometer inserted into the middle of each loin registers 145°F, 15-20 minutes longer.

Cranberry Curd Pie

I first saw this on the New York Times website, then saw it again on the Bon Appetit website, then about a bajillion other bot-driven websites (all looking the same, all “authored” by a single-named woman, who promised hearth and home and happiness while inundating the viewer with ads-ads-ads).  What is it with these robot websites??

I read about 90% of the comments on the NYTimes recipe site pertaining to this recipe, and have incorporated my changes below.  This pie is gluten-free because I wanted to make it for a woman at my church who can’t eat gluten, and has not had a dessert at a church dinner in a millenia.  This is my holiday gift to her, and to you.  First, the recipe, then the photos (reverse of the usual).

Cranberry Curd Pie

Almond Crust
2 cups almond meal
1/4 teaspoon salt
1/2 cup sugar
Place in medium bowl, stir to mix (or use food processor).

Cut in 6 Tablespoons of softened butter, until crumbs are fine, and you can gather the dough together in your hands.  If too dry, add 1-2 Tablespoons water, a bit at a time.  Press dough evenly into a 10-inch tart pan with removeable bottom; use half the dough for the sides and half for the bottom.  Prick all over with a fork.  Tear off a piece of aluminum foil the size of the tart pan, and butter the dull side.  Press onto your tart butter-side down; freeze for at least 30 minutes.  This can be made a couple of days ahead.  Just make sure the aluminum foil seals the tart well. (photos below)

To bake, preheat the oven to 350 degrees.  Place the chilled tart shell with the foil into the oven and bake about 10 minutes. Remove from oven, and carefully take off the foil.  Finish baking for another 5 minutes.  Cool.

Cranberry Curd Filling
12 ounces cranberries, washed and picked over (almost 2 cups)
1 cup sugar
Peel of one orange, removed with a vegetable peeler, in strips (then rip into about 2″ pieces)
Juice of one orange, or 1/2 cup freshly squeezed orange juice
2 eggs plus 2 egg yolks
1-1/2 Teaspoons cornstarch
4 ounces (1/2 stick) butter, softened

Put cranberries, sugar, orange juice and peel in a saucepan over medium heat.  Simmer until cranberries have popped and softened, and liquid has diminished, about 10 – 15 minutes.  Remove orange peels.  Using an immersion blender, blend the mixture until berries are not noticeable in the pan.

Set a medium mesh sieve over a bowl, and spoon the cranberry mixture into the sieve, pressing it into the bowl. (See note below about what remains in the sieve.)

Wash the pan (or get another).  Break in the two eggs, then add in the two egg yolks.  Stir to break up yolks.  Stir in 1-1/2 teaspoons (1/2 Tablespoon) cornstarch until blended.  You may see some white bumps; ignore.

Spoon cranberry puree into the yolk mixture.  Set over low heat, and constantly whisking/stirring, bring mixture to a temperature of between 140 and 160.  The commenters noted that when properly cooked, the curd should coat a spoon.  This took me about 15 minutes.  I did keep it constantly stirring, but I wasn’t beating it.  I didn’t want to incorporate any air into the mixture and disrupt the anticipated color.

Remove from heat, and stir in the butter a bit at a time, whisking well in between each addition.  Again, don’t incorporate air in your mixing.  Let cool to room temperature (mine was a little warmer), and pour into the prepared pie shell.  Bake at 350 for 10 minutes, in order to set the curd.  Cool on a rack.  Store at room temperature for up to 2 days.

Sugared Cranberries for topping

Boil together 3/4 cup sugar and 1/2 cup water until mixture is at a full boil and looks clear.  If you have time, let the syrup cool.
Wash and pick out your best handful of berries (3/4 to 1 cup), and stir into the syrup, making sure they are well coated.  Remove to a fine rack (or into a strainer).

Sprinkle some sugar onto a square of waxed paper, and sprinkle some more over the top.  Then roll the berries in the sugar.  If they are well-drained, you won’t get clumps of sugar, but a nice, even coating.  Let cool and dry, then decorate the top.  I meant to clip some mint sprigs to place at the center berries; you might want to consider this.

Cooks Notes:

After all was said and done, I had about 1/2 cup left of the cranberry mash in my sieve from making the curd.  This went nicely with a slice of Cranberry-Orange Bread that I had in the freezer, as it’s like a jam. Store in the refrigerator.

If using the almond crust, best eaten on the day you make it.
Day One: it was perfection.
Day Two: crust was really soft, but curd was still good.

Alternate crust: Sweet Tart Dough (more like a shortbread cookie)

Curd can made be ahead.  Cover curd with plastic wrap (pressing it against the surface of the curd) and refrigerate up to one week.

Now the photos!

Roasted Root Vegetables (for Christmas Dinner)

vegetables before roasting

Roasted Root Vegetables

from the kitchen of Wendy Crockett

12 – 13 cups red potatoes chunks (4 lbs.)
6 cups sliced carrots (2 lbs.)
8 cups chopped onions (4 medium – about 2 lbs.)
2 ½ tsp. salt
1 ½ tsp. ground black pepper
2 tsp. dried thyme
2 tsp. dried oregano leaves
2 tsp. dried marjoram leaves
2/3 cup olive oil
2 Tbsp. melted butter

Cut up the vegetables (and photo, above):

  • Scrub potatoes.  Leave skins on but cut off any bad spots. Slice each potato in half lengthwise. Slice each half lengthwise again and slice once crossways.  (If a potato is unusually large or small, adjust cuts accordingly.) In other words, you’ll end up with 8 chunks per average size potato.
  • Peel carrots.  Trim small end on the diagonal.  Cut each carrot on the diagonal about 1 1/2” long and about ¾” wide. (Do not include the top end.)
  • Peel onions.  Cut each in half lengthwise.  Cut each half lengthwise two or three times so that the cuts are about 1” apart.  Cut these pieces across into about 1” pieces.  Don’t worry.  These will all cook down.

Place all of the vegetables in a large bowl and toss together along with melted butter,  olive oil and seasonings.

Meanwhile, place two large rimmed baking sheets in oven and preheat to 450F.  When oven is ready, remove baking sheets and spread half of vegetable mixture onto each one. (NOTE: If the vegetables are too crowded, they will steam, not roast.  Please give them room.)

Use a pancake turner or wide spatula to turn vegetables over and mix around about every 15 minutes for about an hour until nicely browned.  Switch the top pan to the lower rack and the bottom pan to the lower rack about midway to promote even browning.  Some of the onion pieces may get quite dark.  Don’t worry about.  It adds flavor and an earthy look.

Cover the pans with foil or combine the batches into one container to deliver to the church kitchen by 5:45 p.m..  From there we will combine all of the contributions into roaster ovens to keep warm. Please take your own pans to your car to take home to wash.

Thank you!

Brussels Sprouts with Hazelnuts

1 ½ – 2 pounds brussels sprouts
¼ cup olive oil
¾ teaspoon sea salt
¼ teaspoon (or 10 grinds) black pepper
2 tablespoons maple syrup
½ cup toasted hazelnuts, coarsely chopped

Preparation
Preheat the oven to 375 degrees.
To prepare the brussels sprouts, remove any yellow or brown outer leaves, cut off the stems and cut in half.
In a large bowl, toss the brussels sprouts, olive oil, salt and pepper together. Once all of the brussels sprouts are coated in oil, spread them into a 9-by-13-inch (or larger) baking dish or sheet tray to roast. Note: You may want to line your sheet tray with foil for easy cleanup because the caramelizing process leaves a sticky residue.
After 15 minutes, stir the brussels sprouts with a spatula or large spoon to even out the browning. After 30 minutes, stir in the maple syrup. Continue to roast the brussels sprouts for about 15 more minutes, or until they are fork tender (about 45 minutes total roasting time).  Toss the roasted brussels sprouts with the hazelnuts and devour!

NOTE: If your sprouts are on the smallish side, they may need less time overall.  Cook only until fork tender.

To toast hazelnuts, place in pan over low heat, tossing or stirring frequently so they don’t burn.  They should let off a fragrance when they are toasted, in probably no more than 5 minutes total time.