Cauliflower Soup with Sweet Corn

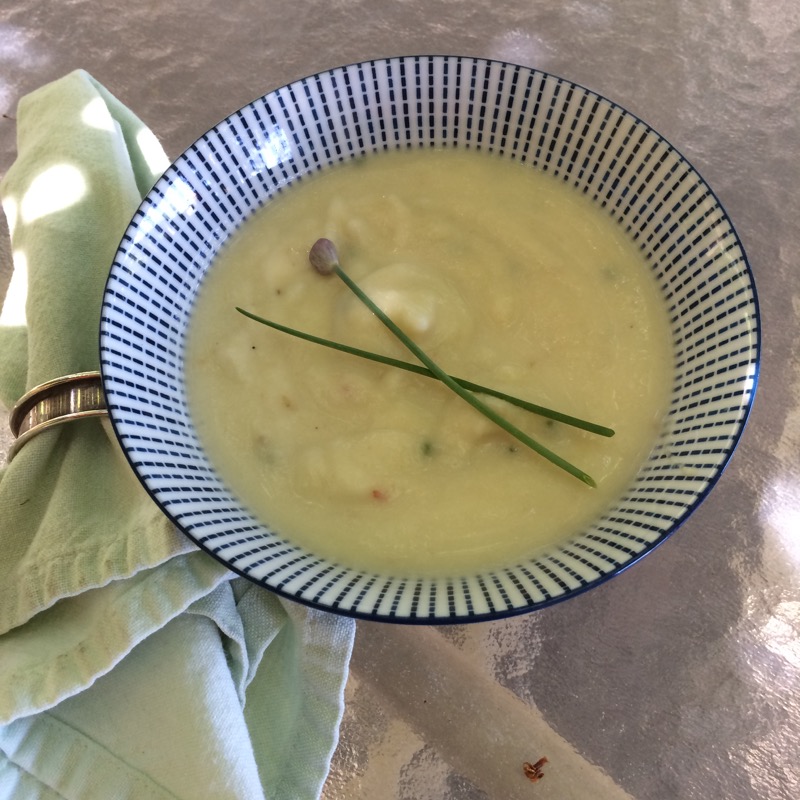
This is a variation of a soup from my cookbook Bowl Food, as I sort just opened the refrigerator and morphed my ingredients into a meal.  The variables you’ll need to keep track of (as they relate directly to each other) is the amount of broth you use is in relationship to the amount of cauliflower you use.  I cook the leek and garlic, then add the chopped up cauliflower.  I then add broth so it’s just covering the vegetables.  You be the judge.

1 Tablespoon oil
2 leeks, white and light green parts only, chopped
2 cloves garlic
1 potato, chopped (can add a cooked. chopped, potato later in the soup, if that’s what you have in your larder: that’s what I did)
6 cups chicken stock or canned broth (3 cans)
1/2 cup cream
1 Tablespoon lemon juice
pinch of red pepper flakes
2 Tablespoons chopped fresh chives
1 -1/2 cups sweet white frozen corn

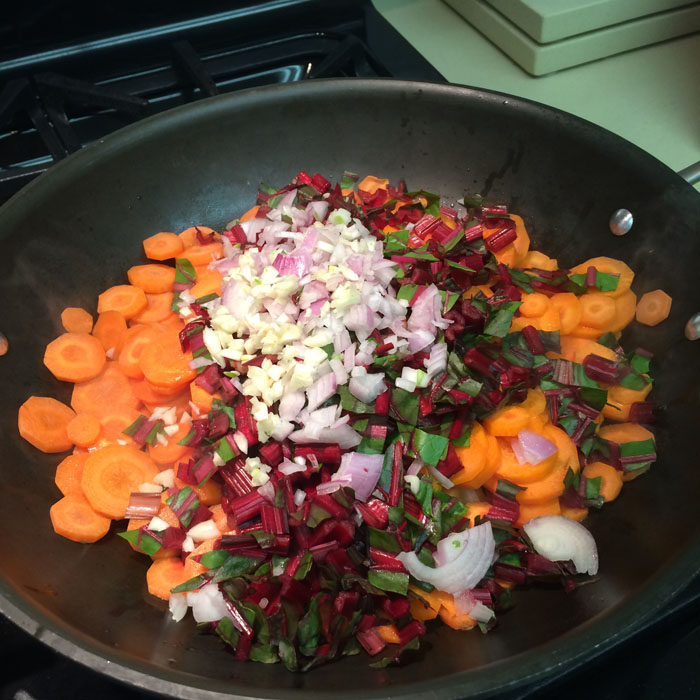
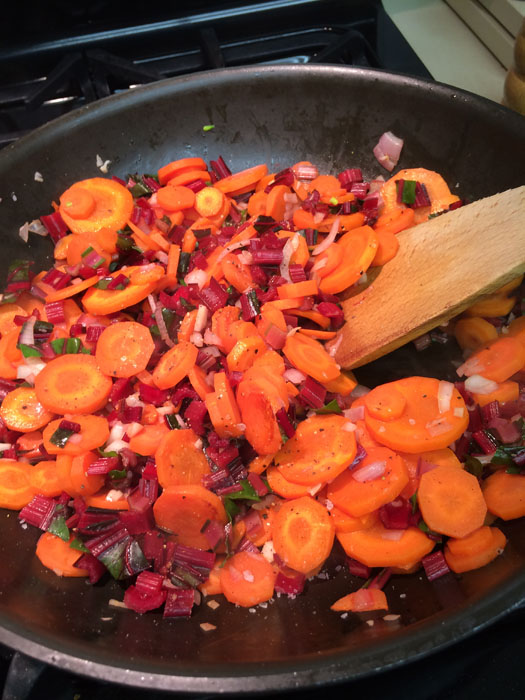
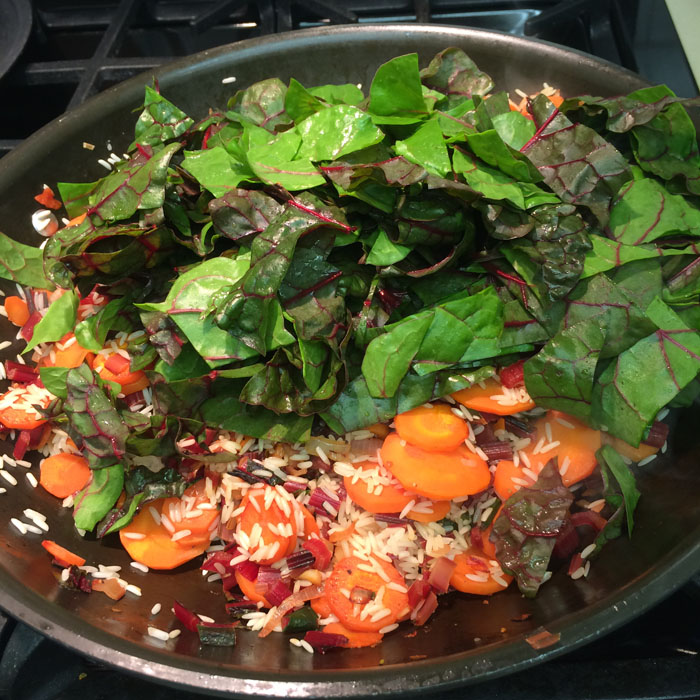
Heat the oil in a large pot, large enough to hold all ingredients.  Add the leek and garlic, and cook over medium heat until the leek is soft, but not brown (about 6-8 minutes).  Increase the heat to high and add cauliflower, potato, chicken stock and bring just to a boil.  Reduce the heat and simmer, covered, for 20 minutes or until the cauliflower and potato have softened.

Turn off heat.  Using a stick blender (or, alternatively, cool the soup and use a blender or food processor), puree the soup until smooth.  Add the cream, lemon, red pepper flakes, chives and frozen corn.  Place over heat until all ingredients are warmed, about 2-3 minutes.  Sometimes the heat of the soup will suffice.

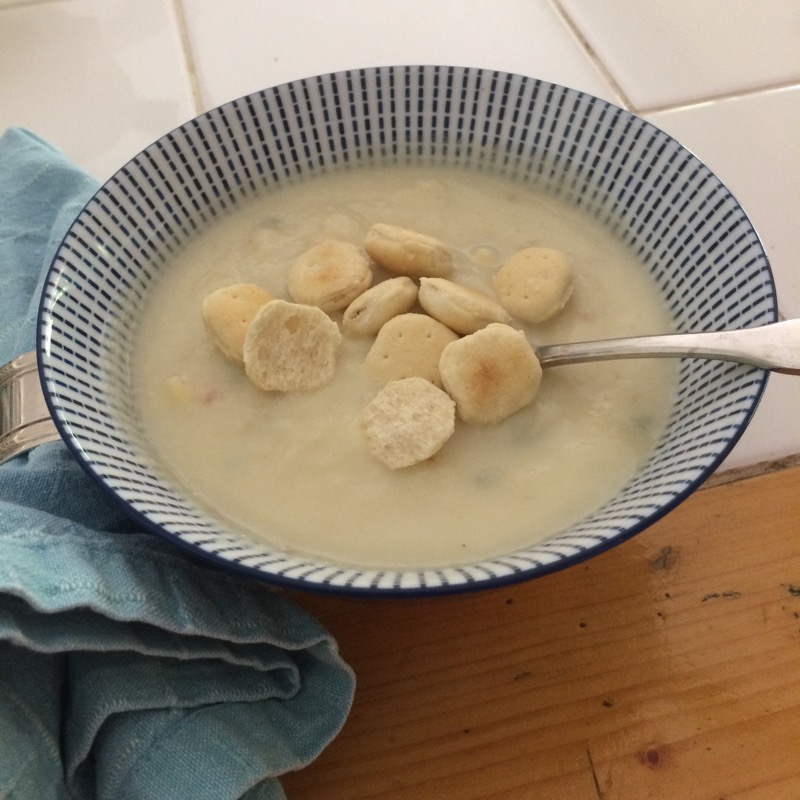
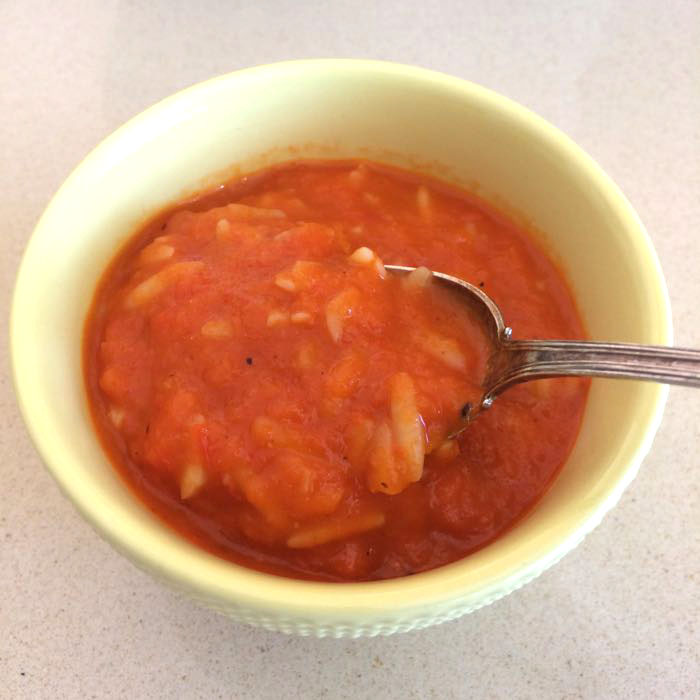
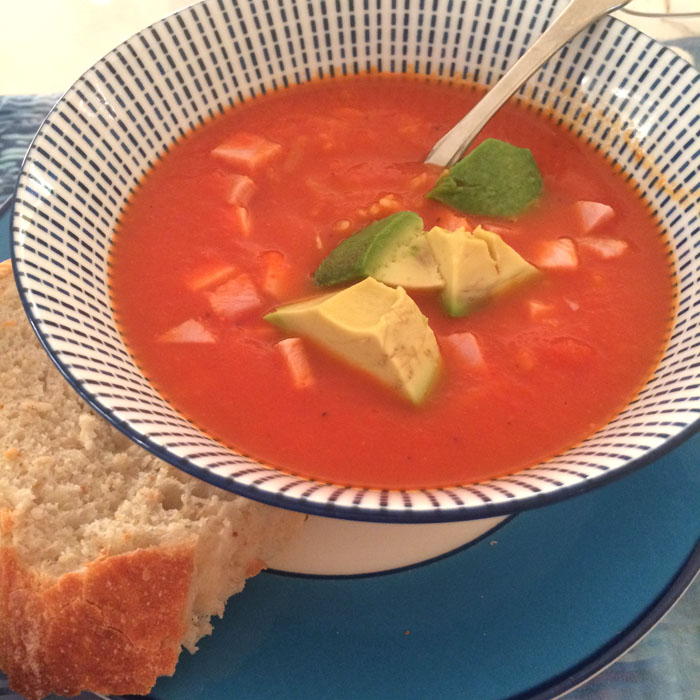
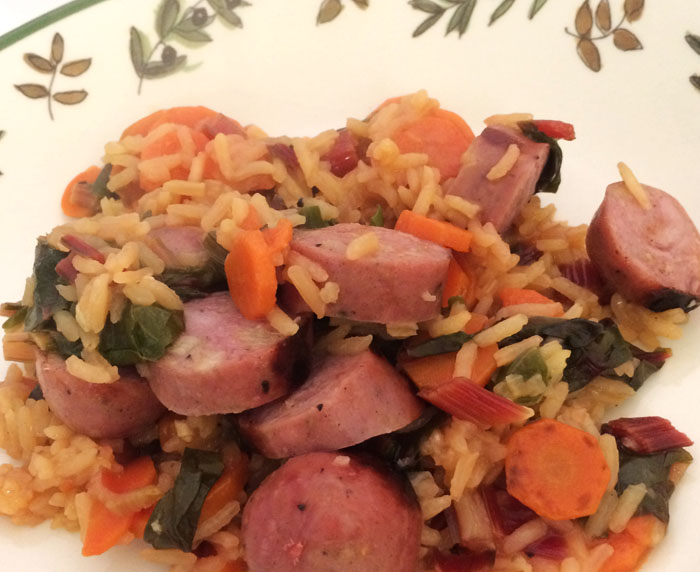
Cauliflower Soup, served with Oyster crackers

Serve with Mary’s Retreat (homemade) Bread, or Oyster crackers, or homemade croutons, or crostini.

Serves 6-8.

Red Pepper and Orzo Soup

OrzoRdPepperSoup_1

Think of this as a snappier version of tomato rice soup; the amount of pasta used here is just enough to temper the peppers’ bite.  I have modified this recipe from one I found in the Washington Post.

roasting red peppers_1

before

roasting red peppers_2

after 15-20 minutes under broiler’s high heat

roasting red peppers_3

all wrapped up to steam for a while

Serve with a loaf of Mary’s Retreat Bread.

Servings: Tested size: 3-4 servings; makes 3 1/2 to 4 cups

Ingredients
1 medium shallot
1 clove garlic
5-6 red roasted peppers (directions below) ***
2 teaspoons olive oil, plus more for optional garnish
3-1/2 to 4 cups chicken broth (you get to determine the texture: soupy or thick)
1/2 cup dried orzo pastaIMG_3739

Spices for Soup_1 Spices for Soup_2
Spices to Taste:
wave of Arizona Dreaming, Sate, Smoked Paprika and [optional] a pinch of lemon-salt (use a shake of Kosher salt and 1 tsp. lemon rind, as substitute)
pinch of crushed red pepper flakes (also called “chili” flakes)

NOTE: Arizona Dreaming is my new go-to spice.  Get yourself a jar.

Directions
Peel and coarsely chop the shallot and garlic. Prepare the red peppers by broiling the seeded, washed halves for 15 minutes under high broiler heat on a prepared pan (line with tin foil).  Wrap the whole pan in foil, and let the peppers cool while they continue to steam and melt into goodness, about 30 minutes. Alternatively, you could put them into a covered bowl, and go that route.  Peel off the blackened skins and discard.

Heat half of the oil in a medium saucepan over medium heat. Once the oil shimmers, stir in the shallot and garlic. Cook for 3 or 4 minutes, until just softened.

Add the red peppers and broth; if your peppers weren’t soft after the broiling stage, let them cook a bit more in the hot broth until tender.  Using a stick blender, puree the peppers/broth until smooth. Add the spices listed above.

Bring to a boil over medium-high heat, then stir in the orzo. Cook for 7 to 9 minutes or until the orzo is tender and more visible in the pot, stirring often to keep it from sticking to the bottom. Add more broth, if needed. Taste, and adjust seasonings as needed, using spices listed above.  You can also add a Tablespoon of lemon juice to pop things up, if needed.

Red Pepper Orzo Soup_2


Also good with slices of avocado, if you like that sort of thing, or a really good sandwich.  We also added cubes of cooked ham, a carryover from another meal.

Other garnishes possible:
2 tablespoons pine nuts, for garnish
1 tablespoon grated pecorino Romano cheese
1 cup baby spinach
few leaves fresh basil

***COOK’S NOTE: To make this quickly, use two jars of roasted red peppers from Trader Joe’s instead of roasting up your own peppers.  Drain, then use in the recipe instead of the home-done peppers.

Braised Chard, Carrots and Rice with Brats

Braised Chard, Carrots and Rice_1When you have lots of chard in your garden, or it’s on sale at the green grocer’s, it’s time to make this dish.  If you don’t add the brats and use water instead of the broth, it’s vegetarian, but we like to use Apple-Chicken sausage (we buy it at Costco) and add it to this dish.  The original recipe came from Mark Bittman, but I’ve made some modifications.

Braised Chard, Carrots and Rice_5 Braised Chard, Carrots and Rice_4 Braised Chard, Carrots and Rice_3Ingredients
1 pound (or one large handful) chard, washed and trimmed
1/3 cup extra virgin olive oil
5-6 carrots, peeled, and either sliced, or roughly chopped
1 shallot, peeled and minced
2 cloves garlic, chopped
salt and pepper (this needs more than you think)
2/3 cup jasmine rice
2 cups chicken broth
Aidell’s Apple and Chicken Sausage, 5 links
juice of one lemon

Directions
Cut the stems out of the chard leaves. Line up the stems (they look like pink celery) and slice them across the bunch, then cut the leaves into wide ribbons. Keep separate.

Put all but a tablespoon of the oil in a large skillet over medium heat. When hot, add the garlic, shallot, carrots and chopped chard stems, sprinkle with salt and pepper, and cook about 15 minutes, stirring occasionally.

When chard/carrots are tender, add chard leaves, more salt and pepper, the rice, and chicken broth. Cover and simmer for about 20-30 minutes, or until water is absorbed (you may have to lower the heat). Add water if needed, until rice is cooked. The mixture will be moist, but not too soupy.

Braised Chard, Carrots and Rice_6While those cook, place the sausage links into a non-stick pan, and over a low heat, cook until they are plump and slightly brown in places on the outside.

To finish the dish, add the juice of one lemon and a circle of olive oil, and if necessary, some more salt and pepper.  Slice the sausage/brats and pile on top of the rice/chard mixture. Braised Chard, Carrots and Rice_2

Zucchini Pasta

IMG_5831

This dish came about because we had too much zucchini in our garden.  Well — instead of too much — a bounteous harvest of zucchini.  I found this recipe on the New York Times website, and followed it pretty much to the letter.

Ingredients
2 pounds zucchini
2 tablespoons extra virgin olive oil
Salt and freshly ground pepper

¼
cup freshly grated Parmesan, for serving (more to taste)
¼ cup (approximately) light cream
IMG_5826
Wash several zucchini from the garden; pat dry.  Slice off lengthwise ribbons of zucchini, using a vegetable peeler.  Peel off several ribbons from one side, then turn the zucchini and peel off more ribbons. Continue to turn and peel off ribbons until you get to the seeds at the core of the zucchini. Discard the core. You can also do this on a mandolin, adjusted to a very thin slice.
IMG_5829
Heat 1 Tablespoon of the oil in a large non-stick pan, over medium-high heat, and when it is hot, add about half of the zucchini ribbons, salt and pepper.  Toss and cook, keeping the zucchini in motion until it is just soft and barely transluscent, but not browned (about 2-3 minutes).  Set aside, and cook the second batch.IMG_5830Put both batches back in the pan, and pour over a little bit of cream, then add the grated cheese, again tossing lightly over medium heat.  Adjust salt and add freshly ground pepper to taste, and transfer to a serving dish.We topped ours with a fresh bruschetta-type tomato sauce.

Quickled Vegetables

Salad with QuicklesOnce, when we were in Halifax, Nova Scotia, we ate at a restaurant that had “quickles” as part of their salad course (above).  Quickles?  Vegetables that are quickly pickled, came the answer.

And then last summer Smitten Kitchen ran a post about making pickled vegetables, which I tried, and which we loved.  We would mound them up on summer sandwiches, changing the sandwich from ho-hum to wow! this is great!

Pickled Vegetables Quickles2

Here’s my first jar of quickled vegetables.  I have since bought fancier jars at the local Container Store, with nifty snap-on lids.  I love how these look, all layered up with color.

Pickled Vegetable Sandwich Slaw with Mustard Seeds

 Pickling Mixture

1 cup distilled white vinegar
4 tablespoons sugar
2 tablespoons Kosher salt
2 tablespoons yellow mustard seeds
1 cup cold water

Slaw mixture: 4 to 5 cups mixed slivered or julienned* firm, raw vegetables (see above for vegetable suggestions, below for slicing tips)

Heat vinegar, sugar, salt and mustard seeds to a simmer in a small, non-reactive pot over moderate heat, stirring only until sugar and salt dissolve. Stir in water, which should bring the mixture’s temperature down significantly. Let cool to lukewarm.

Divide vegetables between jars. (I used two 3/4 liter jars.) Pour vinegar mixture over vegetables and refrigerate until needed. You’ll find the vegetables to be lightly pickled within an hour, and deliciously pickled within a day. They will get slightly more pickled as they sit, but the change shouldn’t be too dramatic from the 24 hour level.  Keep the vegetables submerged in the brine for a longer shelf life (about 3-4 weeks).

*Smitten Kitchen used a mixture of radishes, red, orange and yellow bell peppers, carrots, fresh sugar snaps, ruffly cabbage and kirby cucumbers, but you can use any firm, crunchy vegetable you think would pickle well here. She noted that the red radishes changed everything to pink, so you may want to try a Japanese Daikon radish (it’s white).

This pickling idea must be the “new” thing, as now Sur La Table has a class in pickling.  Their display looks like more traditional pickling, with a soaking time and a canner/processesing time.  The recipe above is quick, easy and delicious.

mandoline

I did use a mandoline to help cut my vegetables as well as this tool, which looks like a reverse slotted vegetable peeler (shown below). Protect your fingers at all times!

Julienne Peeler

Fennel and Blood Orange Salad

Fennel Blood Orange Salad

I found this on Smitten Kitchen, who found it on the New York Times.  When I went looking for my typed file today, I found that it had been published in 2002.  I can’t believe it took me that long to finally try it and put it up here on the blog.  Well, don’t you wait that long.  It’s easy and quick and has miles and miles of flavor.

FENNEL AND BLOOD ORANGE SALAD
By Kurt Gutenbrunner
Published: January 23, 2002
Time: 30 minutes

1/4 cup very coarsely chopped walnuts
1 teaspoon walnut oil
1 medium-large fennel bulb, leaves and stems trimmed off
Salt and freshly ground black pepper
Juice of 1 lemon
2 large blood oranges
1 tablespoon paper-thin shallot slices
10 mint leaves
2 tablespoons extra virgin olive oil
1 teaspoon lime zest

1. Place walnuts in dry skillet and cook over medium heat, stirring, to toast. Toss with walnut oil, and set aside.

2. Slice about 1/2 inch from bottom of fennel and discard. Slice fennel very fine on mandoline, starting with flat bottom side. Put in a bowl. Season with salt and pepper, and add lemon juice.Fennel Blood Orange Salad_1

3. Trim all peel and pith from oranges. Holding peeled fruit over bowl containing fennel, use sharp knife to cut sections from membrane. Let them drop into bowl. Squeeze remaining membrane over bowl to add remainder of juice. Discard membrane.  (This is how it looks before tossing it with everything else.)

4. Add shallots, mint leaves, olive oil and reserved walnuts. Toss gently. Sprinkle on lime zest, and serve perhaps as a first course with smoked salmon or as a side dish with grilled fish..

Yield: 3 servings.


Roasted Sugar Snap Pea Pods

I was reading an article about this new restaurant in Los Angeles that has a giant wood-burning oven as its centerpiece.  The menu is based on things that can be cooked in there and one thing they mentioned was roasted sugar snap pea pods.  I bought a bag the next time I was at Costco, then lacking a giant wood-burning oven in my kitchen–or my home, for that matter–I searched for a recipe online that could be done in my oven.  It’s simple.

Preheat the oven to 450 degrees.  Wash the sugar snap pea pods, and “de-string” them if they need it, by snapping off one end with a paring knife and pulling the long “string” away from the “backbone” of the pea pod.  I was lucky.  Mine were the stringless type (they do sell some like this).

Toss with a few tablespoons of good olive oil, some thyme, salt and pepper.  At the last minute I stripped some rosemary leaves off a sprig or two, snipped them into small pieces and tossed those in as well.  Spread out onto a cookie sheet. . . or two–don’t crowd them.  Roast for about 10 minutes (mine took 13) or until they just begin to brown.

The pods soften up, but still have a little bit of texture, and the peas sweeten up inside.  We’ve been snacking on the ALL day, and have tried them with some Trader Joe’s regular hummus as a dip.  Quick, easy.

Twice-Cooked, Once-Forked Roasted Potatoes

Weird title, but I can’t remember what Bon Appetit’s title is, but it does have “forked” in it somewhere.  You can see the fork tines, above, which helps create this wonderfully crispy-on-the-outside, tender-on-the-inside texture.  I followed their recipe for the most part, except I added some rosemary leaves to the potatoes when I put them in the oven.  We had potatoes with rosemary in Italy one Christmas, so I have added it ever since to my roasting potatoes.

We had these last night for our Christmas Dinner (a bit early, as we are going traveling for the holidays) and we both agreed they were good enough to put into rotation in our regular meals.  They didn’t take that much work either.  Mine were done in about 45 minutes.  Try to time them so you can serve them hot, without having covered them with any tin foil, as I think that would make the outsides soft.  It’s the texture that is so wonderful.

Twice-Cooked, Once-Forked Roasted Potatoes, adapted from Bon Appetit

6 pounds small Yukon Gold potatoes (1 1/2″–2″-diameter), peeled  [NOTE: I couldn’t remember which kind of potatoes to buy, so I ended up buying red (boiling) potatoes; they worked out just fine)
1 tablespoon salt plus more [They call for kosher, but Trader Joe’s has been out for a while, so I used my sea salt grinder.]
1/2 cup olive oil

Preheat oven to 425°. Working in 2 batches ( about 5 potatoes each batch), cook potatoes in a large pot of boiling salted water for 3 minutes. Using a slotted spoon, transfer potatoes to a rimmed baking sheet [Note: I put a rack on my baking sheet and put the potatoes on there]. When cool enough to handle, firmly scrape the tines of a fork up and down potatoes, creating a rough, grooved surface.

Pour oil onto another rimmed baking sheet; bake (to heat oil) for 5 minutes. Add potatoes; turn to coat. At this point, if you are using fresh rosemary, sprinkle about 1-2 Tablespoons leaves over all, sloshing the rosemary around with the potatoes and olive oil–that amount is about one 9″ twig, if you are cutting it off your landscaping plants out front.  Season with 1 tablespoon salt [I used a few grinds of the salt grinder]. Roast, turning 3 times during cooking and occasionally basting with oil, until browned and tender, 60–70 minutes.

Stuffed Pumpkin

I first heard about this on NPR, when Dorie Greenspan was interviewed for a fall baking dish and also to promote her new book of Around my French Table.  Which I promptly put in my Amazon cart and which I now possess.  But because she encourages you to make this recipe your own, mine is nothing like hers except you start with a hollowed-out pumpkin and somewhere along the line you fill it will good things, put it in a 350 degree over for 90 minutes to two hours.  So I bought a sugar pumpkin at Trader Joe’s one day, and since we were having company for Halloween Night (the  trick-or-treaters in our neighborhood all grew up and went to college), I decided to try this.  Mine is stuffed with a small pasta blend (from Trader Joe’s), mushrooms and some Jimmy Dean’s sage sausage.  I roasted it with the lid on for 90 minutes, and it was done.  It makes a great presentation.

Start with the way Dorie starts: cut the lid off a pumpkin and hollow it out, scraping the flesh slightly to get rid of the stringy bits.  Sprinkle the inside cavity with salt, pepper and nutmeg.  I found it easier to grind the salt and pepper onto my cutting board, then pinch by pinch, sprinkle it around the inside cavity (the nutmeg went on from the spice bottle, no trouble).  Set aside.

In a medium size pot, brown the sausage well.  Turn off the heat, set aside.

Wash and cut about 3/4 pound crimini mushrooms into chunks.  In 1 Tablespoon butter, sautee half of the mushrooms in a saucepan (you’ll use this saucepan later for the pasta cooking); don’t crowd.  As they get done, dump them into the sausage, stir to mix.

When mushrooms are done, in about 1 Tablespoon olive oil, cook until slightly soft: 1 shallot, chopped and 1 large (2 small, or 3 weensy) cloves of garlic.  Stir in 1 and 1/4 cups of Harvest Grains Blend** mix (about 1/2 of the package), then add in 1 can of reduced salt Swanson’s chicken broth.  Cook until al dente–it will continue to cook in the pumpkin.  Add this slightly soupy mix to the sausage and mushrooms; stir to mix.

Spoon into your pumpkin, and don’t pack it down.  Just loosely spoon it in.  Set the pumpkin on a cookie sheet that has been lined with a sheet of parchment (or a Silpat) and bake at 350 for 90 minutes to 2 hours.  Check at 90 minutes.  The tip of knife blade should go in easily.  If the mixture is too soupy (mine wasn’t, but Dorie’s was) leave the lid off for the last few minutes.

Serve with freshly grated cheese, to be added atop the melange.  We served it by slicing it into wedges, then scooping out the mushroom/sausage mixture into a shallow bowl, topped with the cheese.  Encourage your guests to mix the cooked pumpkin with the rest–delicious.

I decided to try this again tonight, to see if we still liked it.  We did.  It’s perfect for a fall supper, and since a) today’s the last day in November–made it under the wire for fall, and b) we’re supposed to get a ten-year wind event tonight.  The house is creaking and moaning, and it feels like a Winnie-the-Pooh blustery day.

**Harvest Grain Blend: Could substitute a mix of pearl couscous, red quinoa, orzo and miniscule baby garbanzo beans.  At least that’s what the package says is in there.

Three-Potato Gratin

This recipe was originally published in Bon Appetit in November of 2006, but of course, I’ve made some changes (which are in the recipe below).  This is so good and so perfect that people will fight over the leftovers.  I’ve never had any Thanksgiving Day recipe like that.

Ingredients
3 pounds mixed russet potatoes and sweet potatoes, peeled and very thinly sliced
[I used 3 sweet potatoes, 2 russet potatoes, and 1 yam & the color was gorgeous!]

Butter for baking dish and foil

1 1/2 cups heavy whipping cream
1/2 cup chicken broth
1 tablespoon chopped sage
1 minced garlic clove
1 teaspoon kosher salt
ground black pepper
1 cup grated Gruyère cheese (or mild Swiss cheese)

Preparation

Layer potatoes in a buttered 11×7-inch baking dish, alternating the type of potato on each layer.

Combine heavy whipping cream, chicken broth, chopped sage, garlic, and salt; pour over potatoes. Sprinkle with pepper. Cover with buttered foil; bake at 425°F for 35-45 minutes. Sprinkle with Gruyère cheese. Bake uncovered until brown and bubbling, about 25 minutes. Let rest before serving.

I put this in the microwave for about 15 minutes first, in order to heat up the liquids and get a jump-start on the baking.

Here it is in all its cheesy, rich goodness.