Creamy Chocolate Fudge

One year I was in charge of the Universe.  Just kidding.  But I was in charge of a Christmas event at church which included a video broadcast and Those In Charge wanted a big turnout.  So I hit on the idea of singing Christmas Carols before, then having a giant cookie feast afterward.  I think desserts is always a category where church-goers excel.

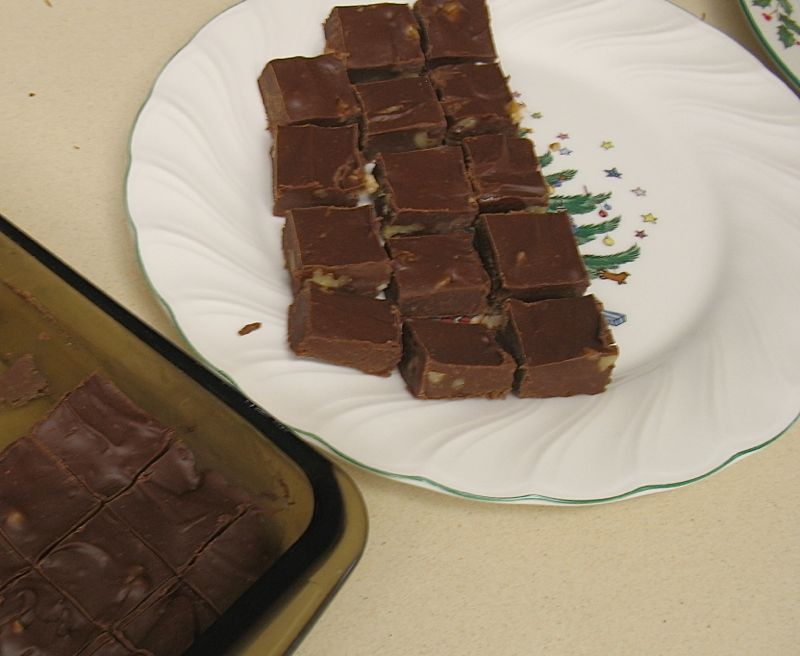
The tables were covered with all different plates and kinds of cookies, and then this one tin of fudge. I slipped a piece into my mouth.  Mmmm. It wasn’t the least bit sugary or dry.  It was creamy with the right amount of crunch from walnuts.  Manna, I thought.  I watched as the hoards of children hit the first table, piling up cookies in their napkins in spite of my best-practiced Withering Glance, the swarm getting closer and closer to this Bit of Heavenly fudge.  Just as the leading edge hit my section, I snatched up the tin.  “No,” I said.  “This is just for the adults.”  I then walked around offering a piece at a time to the grown-ups, trying to locate the owner and maker of this perfection.  I found her, and she sent me the recipe.  So, Monique–if you’re reading this blog–many thanks!

Creamy Chocolate Fudge

1 jar (7 ounces) of marshmallow creme
1  1/2 cups sugar
2/3 cup undiluted evaporated milk
1/4 cup butter or margarine
1/4 teaspoon salt
1 package (11 1/2 ounce) milk chocolate chips (~2 cups)
1 package (6 oz.) semi-sweet chocolate chips (~1 cup)
(Note: I have reversed the proportions of the chips on occasions for a slightly less-sweet fudge.  It works fine.)
1 cup chopped walnuts
1 teaspoon vanilla extract

In a large saucepan over medium heat, combine marshmallow creme, sugar, evaporated milk, butter and salt; bring to a full rolling boil, stirring constantly.  BOIL FOR 45 SECONDS ONLY!!  Otherwise it will be too grainy.  Remove from heat and stir in chips until melted, stirring vigorously.  Add vanilla and nuts and pour into buttered 9 x 13″ pan.  Cool 2 hours or until firm.

Christmas Caramels

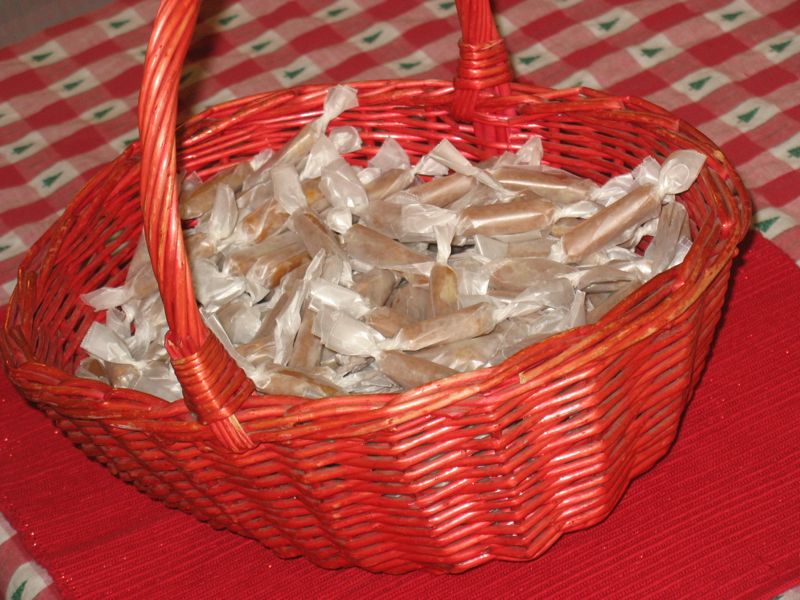
When I was nineteen several young women in my acquaintance were married and at each of their weddings was  large basket of wrapped, homemade caramels.  More than a few found their way into my purse for the drive home.  A older woman in our church, Mrs. Woodruff, made them.  She was our orthodontist’s mother, interestingly.

Right after Thanksgiving one year I called her up and asked her if she would teach me to make them.  I drove up to her house, bringing the butter, whipping cream and other ingredients with me.  The first thing she did was open up the cream and dump it all over the sugar. “Whoops,” she said.  She shook her head.  “That’s not right.”  She put the pan in her pantry and said, “That’ll be for something else later on,” and we started again.  I think of that now as I’m approaching her age.  Just say “Whoops,” when a kitchen mistake is made, and move on.

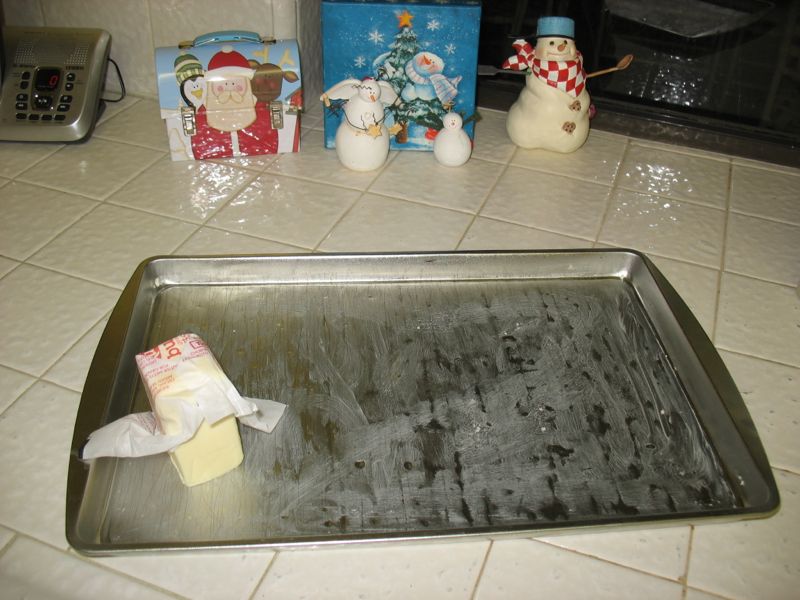
The trickiest thing about these caramels is finding the correct pan.  You need those cheapy pans from your local store–nothing fancy.  They’re a little smaller than the typical baker’s half-sheet that I normally use.  Known as a jelly-roll pan, it’s nice and shiny, and when it gets old, rusty and too full of cutting lines, toss it and start again.

Here’s the recipe, step by step.  The version without pictures is at the bottom of this post.

Caramels

2 cups granulated sugar
1/2 pint whipping cream
1/2 cup evaporated milk (1 small –5 oz.–can)
1 small bottle clear Karo corn syrup (2 cups)
1 cube of real butter
1 1/2 cups chopped walnuts
1 buttered jelly roll pan
1/2 teaspoon vanilla extract
 

First step: butter the pan.  With real butter.

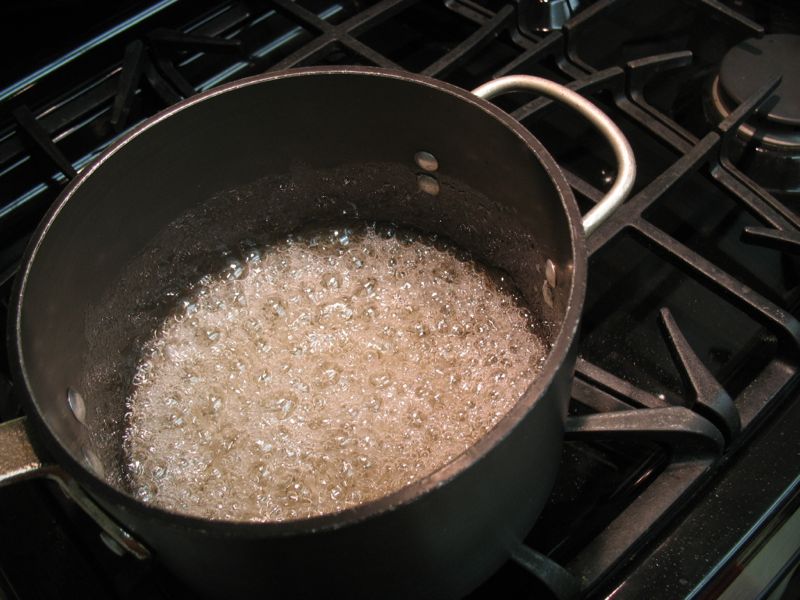
Combine the sugar and corn syrup. Cook until full boil and it turns a creamy color.

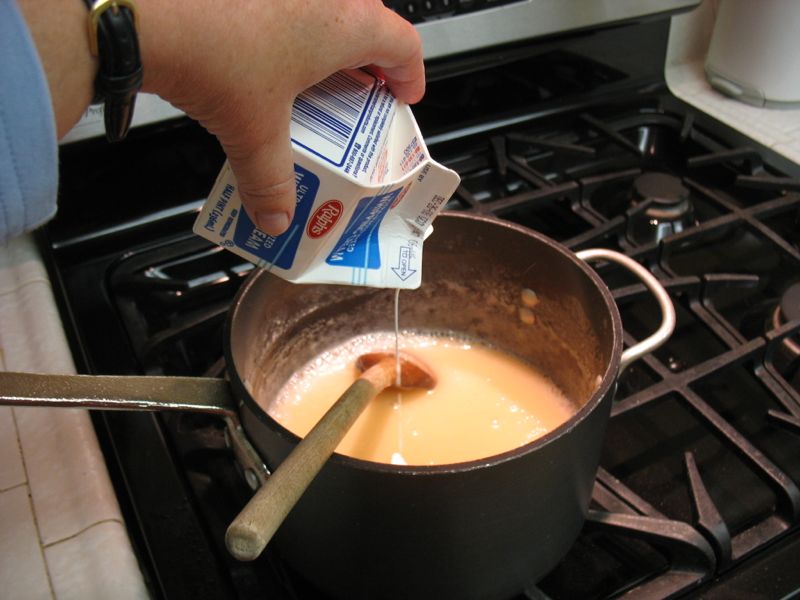
Add cream and evaporated milk (it will foam up; be careful, but keep stirring).

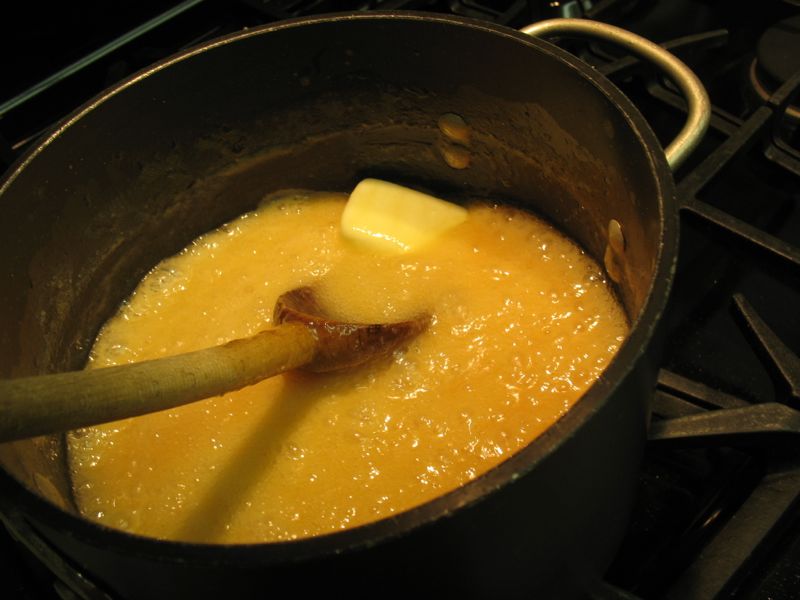
Bring to a boil, then add butter.  Normally most people would know what adding butter looks like, but this picture is for my friend Judy, who loves lots of photos in her recipe steps.

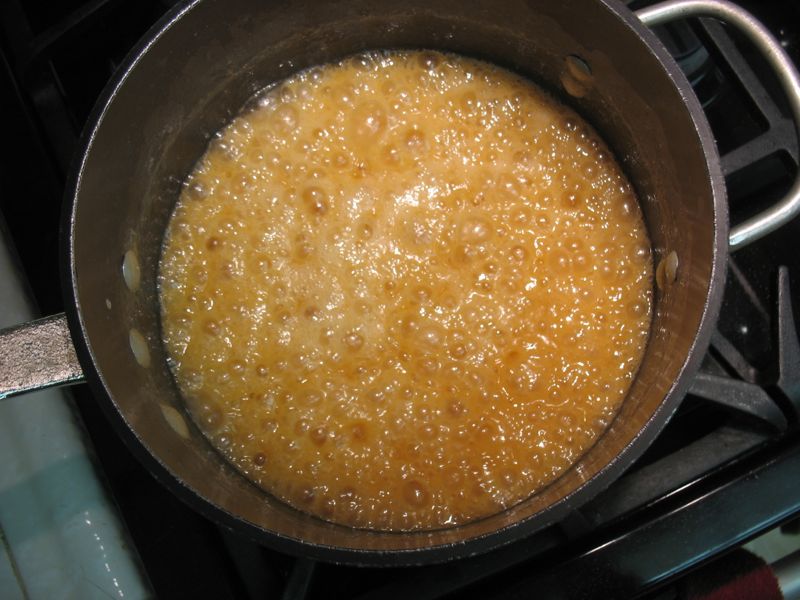
Is it done yet?  No.  If you yank them too early, they’ll be mushy-too-soft caramels. Like your neighbor’s.

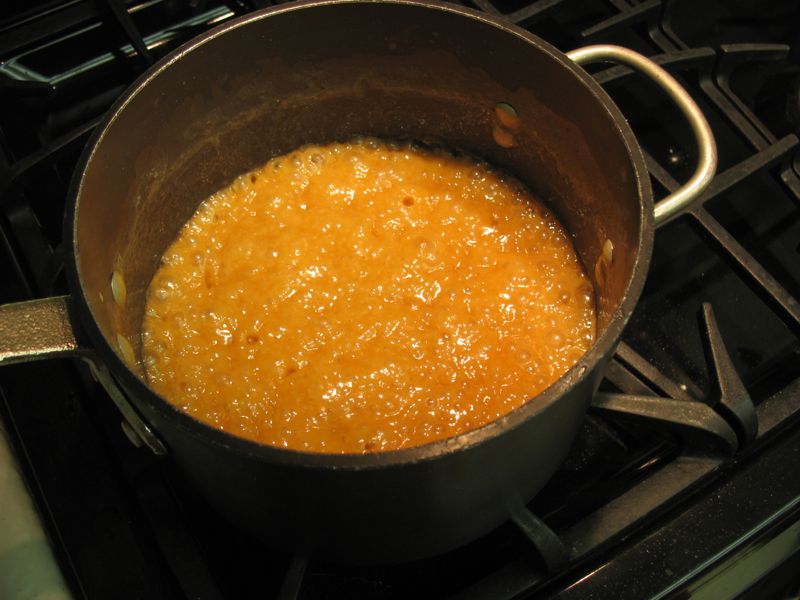
Now it’s done.  Color is a good cue, but really it’s the caramel-into-the-glass-of-water test that really is the determinant.

Cook until caramel hardness (3/4 to 1 hour) keeping it at a low boil the whole time, and stirring occasionally.  We test our caramel with the old-fashioned water-in-a-glass method.    Drizzle a bit of the caramel into the water, feeling it into a ball, and seeing if it’s the texture of a caramel.  (It doesn’t hurt to pop this sample into your mouth to see.)  Don’t get the water ice cold, or you can’t figure it out. With practice, you’ll know exactly when its ready.

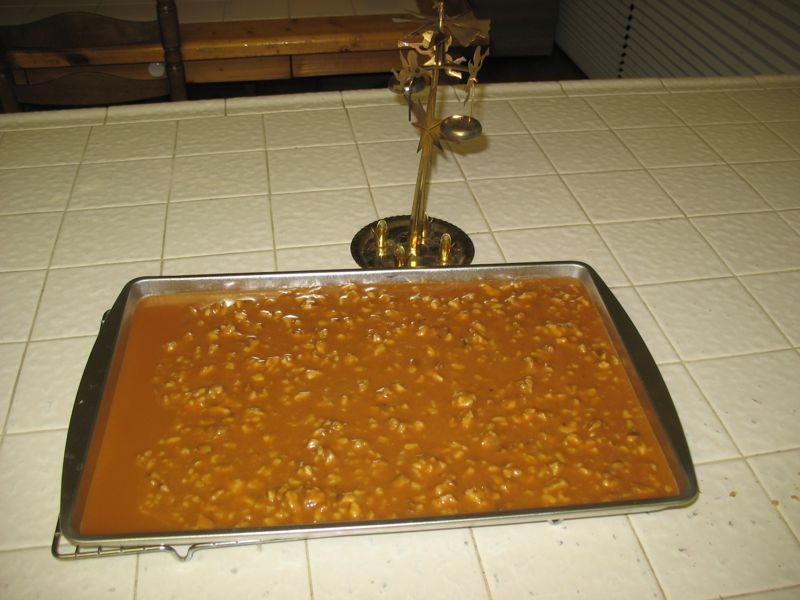
Remove from heat, then stir in nuts and vanilla and pour into the pan.  I always pour a little bit out on one end to give to those who don’t like nuts (I place a spoon underneath the opposite edge of the pan to keep it tilted), then after adding the nuts to the main caramel batch, I pour the rest in (and remove the spoon from underneath).  Let sit 24 hours, covered with a sheet of wax paper.

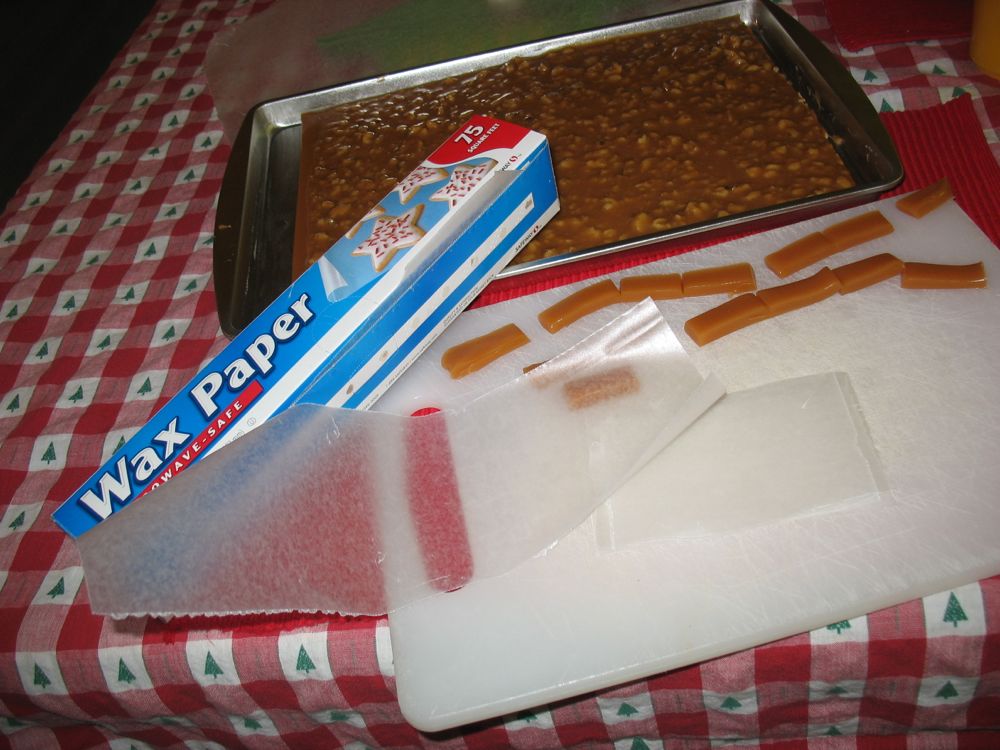
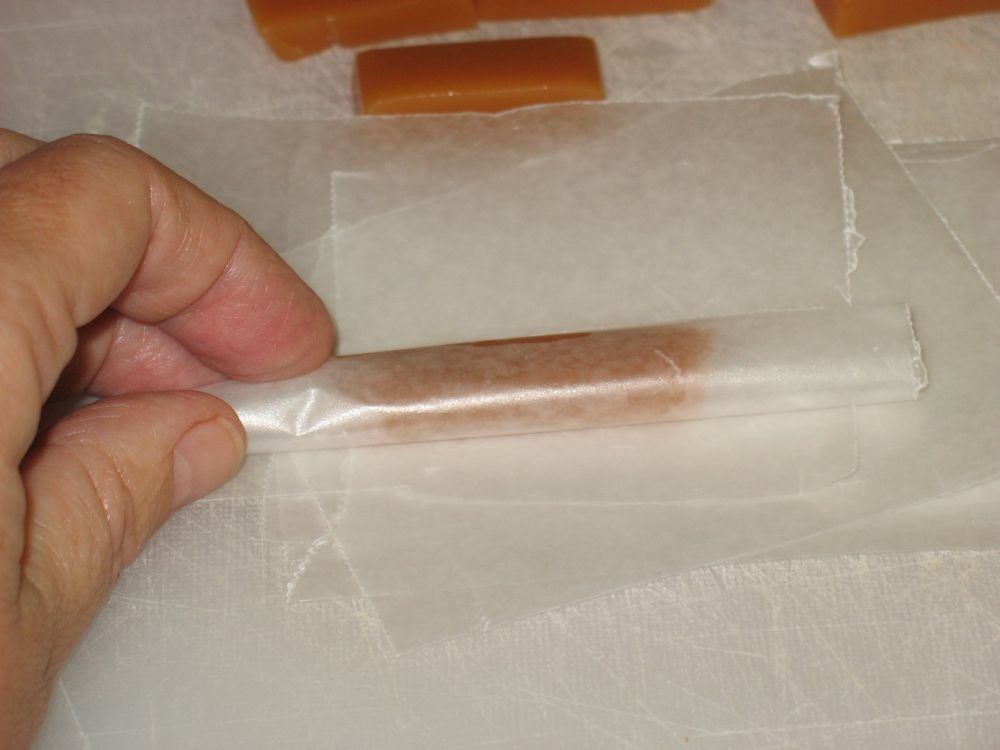
Cut pieces of wax paper, by ripping a three-inch strip off of the roll, then slicing into into half, then half again.

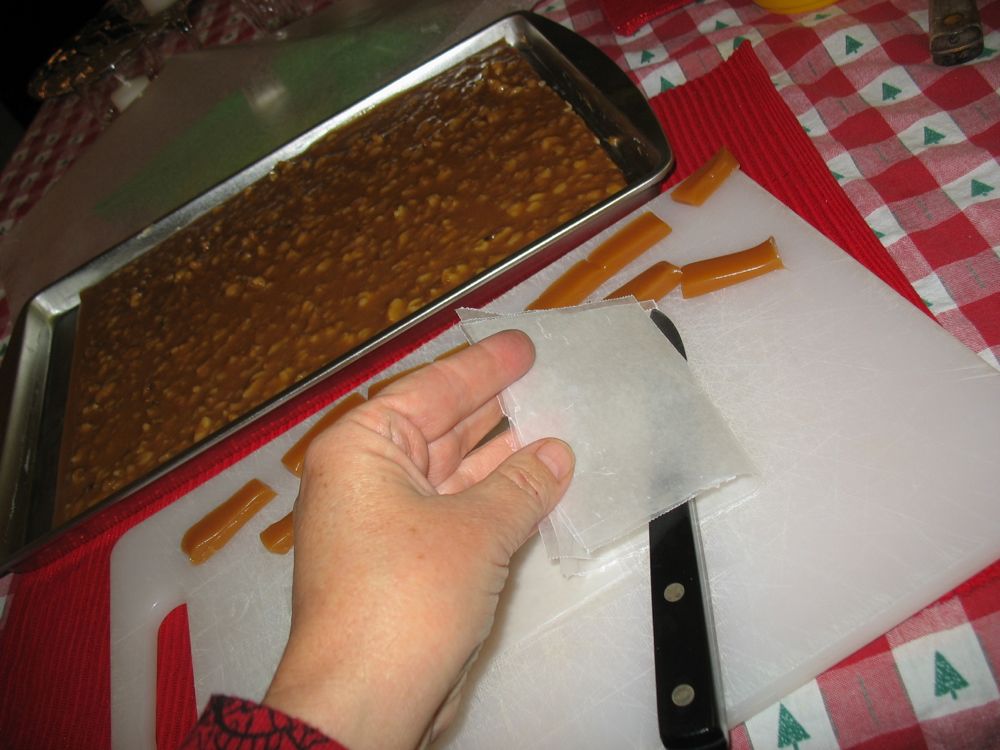
I do about 6 little strips at a time, making 24 little squares of wax paper.

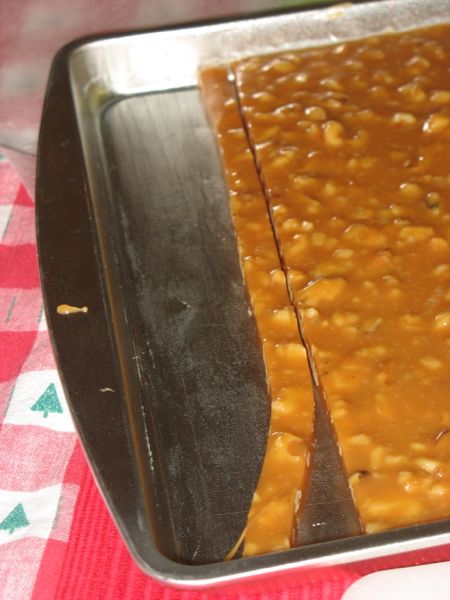
Cut across the short end of the pan making a long strip about 3/8″ wide.  No wider.

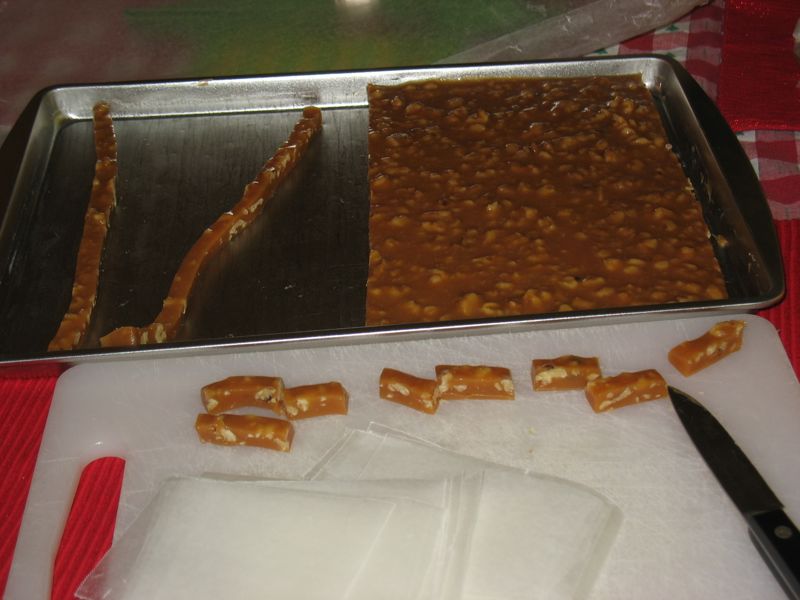
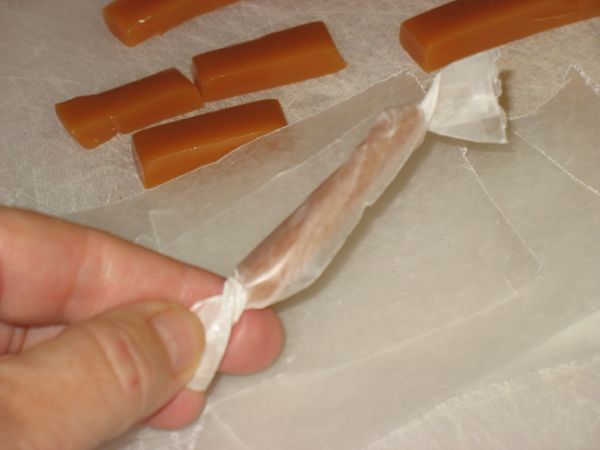
Cut this into about 7 equal pieces and wrap in squares of wax paper.  (Mine are usually longer and skinnier than this photo shows.)

They keep for a season, if they last that long.

Merry Christmas!

************************

Caramels  Yield: 2 1/2 pounds

2 cups granulated sugar
1/2 pint whipping cream
1/2 cup evaporated milk (1 small –5 oz.–can)
1 small bottle clear Karo corn syrup (2 cups)
1 cube of real butter
1 1/2 cups chopped walnuts
1 buttered jelly roll pan
1/2 teaspoon vanilla extract

Combine the sugar and corn syrup.  Cook until full boil and it turns a creamy color.  Add cream and evaporated milk (it will foam up; be careful, but keep stirring). Bring to a boil, then add butter.  Cook until caramel hardness (3/4 to 1 hour) keeping it at a low boil the whole time, and stirring occasionally.  We test our caramel with the old-fashioned water-in-a-glass method.  Don’t get the water too cold, or you can’t figure it out.  Drizzle a bit of the caramel into the water, feeling it into a ball, and seeing if it’s the texture of a caramel.  (It doesn’t hurt to pop this sample into your mouth to see.)  With practice, you’ll know exactly when its ready.  Remove from stir in nuts and vanilla and pout into the pan.  I always pour a little bit on one end to give to those who don’t like nuts, then after adding the nuts, I pour the rest in.  Let sit 24 hours, covered with a sheet of wax paper.

Cut across the short end of the pan making a long strip about 3/8″ wide.  No wider.  Cut this into about 7 equal pieces and wrap in squares of wax paper.  It keeps for a season, if it lasts that long.

Turkey Gravy

Another inexact science.  If you want exact, Google it.

Generally it goes like this.  Start with the giblets: in a medium saucepan, place the celery florets, half of an onion studded with a couple of cloves, a carrot, scrubbed and broken into a couple of pieces, the giblets (we always added the liver, but some say it gives a bitter taste), the neck and cover with water.  Simmer gently for 45-60 minutes or until the neck meat is tender and done.  Reserve the giblets and neck, strain the liquid into a container.  I chop up the liver, the neck meat and add to my stuffing.  The cooking liquid is for the gravy.

Turkey drippings are really fatty, and you don’t need all of them otherwise you’ll be making VATS of gravy.  So drain off all but about 1/2 cup.  I save the rest just in case I want it. I place the turkey pan, with its drippings on a couple of burners, and start scraping and stirring while adding an equivalent amount of flour to the pan, start with about 1/2 cup.  Stir, stir, mixing it in and letting this roux cook and brown (but not too fast–don’t have the heat too high).  When all the flour is incorporated, start adding the giblet brew first, 1/2 cup at a time, mixing it in, adding more, and when you run out of that and if the gravy is still too thick, add chicken broth.

If you over-added and it’s soupy, don’t despair.  Put 1/2 cup cold water into a Tupperware-style container, add 3-4 tablespoons cornstarch, and shake well.  Add this a little at a time until you see the mixture thicken up.  Note: some use flour in that water mix, but mine always is lumpy and then I have to strain it, which is doable.  I just prefer the ease of the cornstarch.

Salt and pepper to taste and get someone to help you tilt the pan to pour it into the gravy boat.

Note: It’s optional to cut up the giblets and add it to the stuffing.

Roast Turkey

It took me many years to figure out how to roast a turkey.  For as long as I could, we went to Mom’s house, where she had it down.  But the time came.  At first I’d follow the directions on the wrapper of the turkey, the plastic saved from year to year in the gadget drawer in the kitchen.  Later I turned to my go-to cookbook: The Joy of Cooking.  I guess I should say something poetic about the food, the holiday, the company, the gathering, but this post is just about turkey, not the event.

Basics: Purchase a FRESH turkey a few days before Thanksgiving, keeping it refridgerated.  (Some recommend brining, and if I every try it, I’ll post that, but not today).  My favorite stuffing–yes, I still stuff the bird–is Pepperidge Farm in the blue box: Herbed Seasoned Bread Stuffing.  Buy a head of celery, a pound of butter, onion (white or yellow), chicken broth, and make sure you have a large enough pan (with a rack, hopefully) to roast your bird.

Set a rack or a clean towel (or scrub the sink) in the kitchen sink and put the turkey in there: remove the bird from the wrapping, dig the giblets out of the neck area (save them), check the cavity to make sure you got all the treasures out of there, then rinse the bird thoroughly in cool water several times.  Do not let it soak. Drain.  Pat it dry with paper towels, inside and out and set aside–it’s okay to set it in the roasting pan you’ll use.

Put on the music to keep you company–no one else will.  Preheat to the oven to 450 degrees F.

Chop about 4-5 stalks of celery, saving the leaves for the giblet brew (more on that later) and 1 large onion.  Place a cube of butter in a large pan, and add these vegetables to the pan, sauteeing them until golden.  Add the amount of chicken broth you need to this mix (see the back of the bag for proportions), bring to a simmer.  Rip open the bag of stuffing and place in a large bowl.  Pour the hot vegetable mix over the dry stuffing, toss to mix well.  (Since you haven’t had breakfast yet, this is really good breakfast food for the cook–slightly crunchy and warm.)

Maneuver the turkey around and stuff the neck area, making sure not to pack it in–it needs room to expand–then skewer the flap closed.  (Skewers are sold in grocery stores right now and they look like giant corsage pins.)  Maneuver the turkey around again, gently, and set it on it’s end and spoon the stuffing into the large cavity, again loosely, but enough.  Get a crust of bread and place over the opening, then wangle the legs back into their wire holders, if the turkey comes that way.  If it doesn’t, skewer the skin closed, then tie the legs over the opening with some kitchen twine.

I tuck the wings back under the turkey, then set the whole thing in the rack.  Since you’ve stuffed it, you need to quickly get it into the oven (for food safety reasons).

Two ways to do this:  One way is to put the turkey upside down so that the drippings saturate the breast area throughout the cooking time. Invert the bird the last 20 minutes of cooking to brown the breasts.  I’ve done it both ways and if you are diligent about basting the bird every 20-30 minutes, you should have a moist bird if you place it breast side up in the rack.  Either way, as soon as you put it in the 450-degree oven, reduce the heat at once to 350 degrees.

When you baste, put the pan on top of the stove so you don’t let all the heat escape from your oven.  I usually start by stroking the bird all over with a cube of real butter, then after that I use the pan drippings, tilting it so I can get at it with my spoon.  I’ve used the turkey basters and they’re okay, but I got tired of the spitting (you’ll find out) and the cleaning, so now I just use a spoon.

The USDA has charts for roasting fresh turkey (thawed frozen ones take about 50% longer). I think turkeys take even less time than these charst; sometimes they’ll have a roasting chart printed on your wrapper.  Some say allow 20 minutes per pound in smaller birds and 15 minutes per pound for the larger tom turkey, adding 5 minutes per pound for stuffed birds. However you figure it, just know that it’s inexact and that it will always be done when you least expect it–usually too early.

Meanwhile in a medium saucepan, place the celery florets, half of an onion studded with a couple of cloves, a carrot, scrubbed and broken into a couple of pieces, the giblets (we always added the liver, but some say it gives a bitter taste), the neck and cover with water.  Simmer gently for 45-60 minutes or until the neck meat is tender and done.  Reserve the giblets and neck, strain the liquid into a container.  I chop up the liver, the neck meat and add to my stuffing.  The cooking liquid is for the gravy.

Back to the turkey: toward the end, as it gets browner and browner, you can shield some parts with tin foil (like the tips of the legs, or even the breast).  Some say it’s done when they jiggle the drumstick to see if the hip joint is loose.  Others prick the skin of the thigh to see if the juices run clear.  The legs and thighs will generally always take longer than the breast–this is when you use foil if you have to. I use a meat thermometer to check for doneness–about 165-170 degrees (according to the USDA), taking care that the tip is not in contact with the bone when I check.

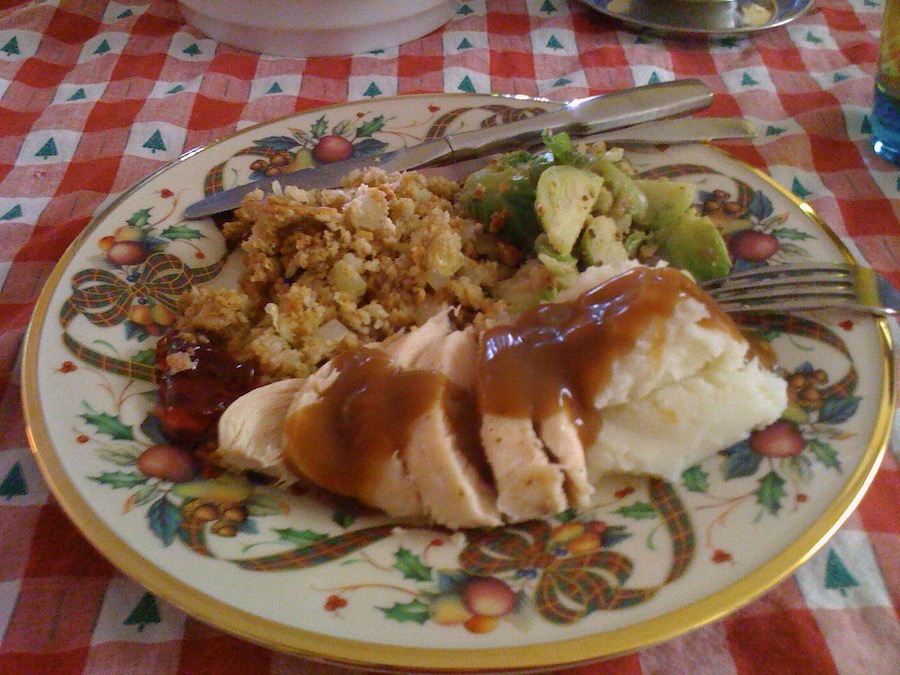
Remove Mr. Turkey from the oven, and IMMEDIATELY remove the stuffing from both cavities into an oven proof dish.  I usually mix the stuffing from the bird with the extra stuffing, the chopped bits from the above giblet brew, cover it and keep it warm in the oven.  You can add canned chicken broth if it looks dry. Then tent the turkey and let it rest for a few minutes.

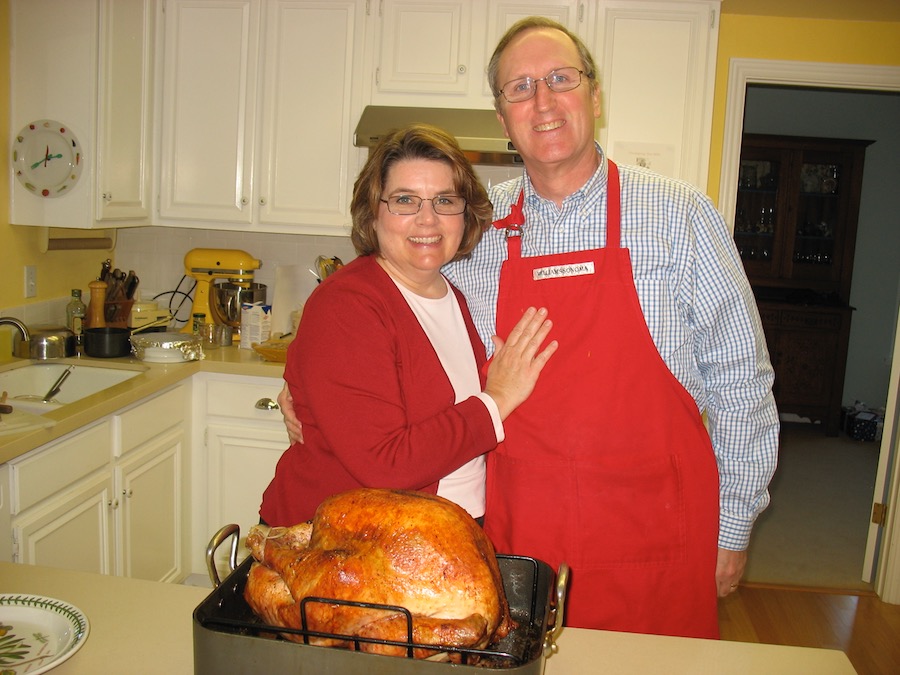
Then dress up the husband in the apron (or whoever is carving it), hand him the knife and fork and let him at it.  Happy Turkey!
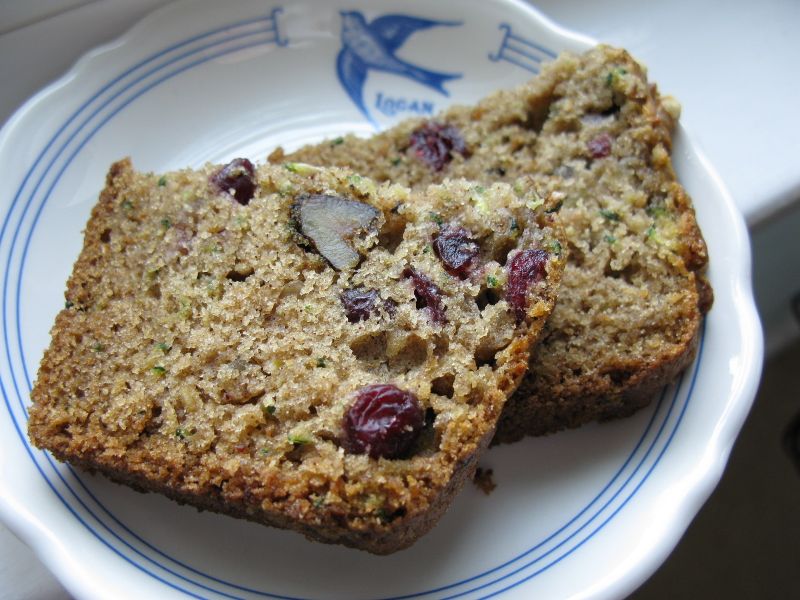
Elizabeth’s Zucchini-Whole Wheat Bread

Zucchini Cranberry Walnut Bread

I had been making that same old zucchini bread recipe that we all have: vats of oil, overly sweet, soggy.  I wanted to find a new recipe that used whole wheat flour, so one day I did some internet searching and found five.  I began with one and modified it so much that I now call it my own, rich with nuts and cranberries.  I never moved on to the other four, satisfied with this one.  When I took my friend Judy a slice or two, she gave it a thumb’s up.  She never lies, so it must be good.

About the flour: measuring the zucchini is never a science, more of a hit-and-miss.  Because of this, the amount of flour you’ll add in is also less of a science.    I have added up to the full 4 cups at some times.  If your bread is too wet, it will be soggy when cooked. If you add too much flour, your bread will be a brick.  I realize this assumes some experience in making fruit breads; just do your best.

Elizabeth’s Zucchini-Whole Wheat Bread

Yield: two loaves
3 eggs
2 cups sugar
1 Tablespoon vanilla
approximately 4 1/2 cups shredded zucchini
1 cup butter, melted
1 Tablespoon baking soda
1/4 teaspoon salt
3/4 teaspoon nutmeg
1 Tablespoon cinnamon
1 and 1/2 cups unbleached white whole wheat flour, from King Arthur (can also use whole wheat flour)
2 1/2  to 3 cups white flour (first add in 2 and 1/2 cups, then add more if your bread is too wet)
1 and 1/2 cups chopped walnuts
1 and 1/2 cups dried cranberries

Optional: zest and juice of 1 lemon (about 3 Tbls)

Preheat the oven to 350 and grease two loaf tins.

In a large bowl, mix together the eggs, sugar and vanilla until well-blended.  Mix in the shredded zucchini, then the melted butter, and the lemon juice and zest (if you are using it). Stir together the whole wheat flour, spices, salt and baking soda and add to the zucchini mixture.  Check to see if your bread is too wet.  Depending on the size of my eggs (I use either large or extra-large) or how moist your zucchini is, you may need all of the flour listed.  You don’t want it flopping around in the bowl, but you don’t want it too dry, either.  (Perhaps it should be the liquidity of a fresh icy milkshake? if you’ve never made bread before; I’m just guessing here.)  Fold in the nuts and cranberries.  (If yours are in the freezer like mine are, because you bought the giant bag from a Big Box store, then un-glob them before adding.)

Pour into the two loaf pans and bake for 10 minutes.  Then lower the temperature to 325 and bake for 55-60 minutes longer, or until a wooden toothpick inserted into the center comes out clean.  (If you are like me, one may have to cook longer than the other one.)  Cool in pans for 10 minutes, loosen edges with spatula and turn out onto wire racks to cool thoroughly, if you make it that long.

On all my fruit breads, I slice a thin layer off of each end, then cut the rest into slices.  I wrap them 4 slices at a time in waxed paper, then place them in a zipper plastic bag to store.  I also place three walnuts halves on top before baking, not only to indicate that they have nuts in them, but also because we love to eat nuts in our fruit breads.

Updated July 2013

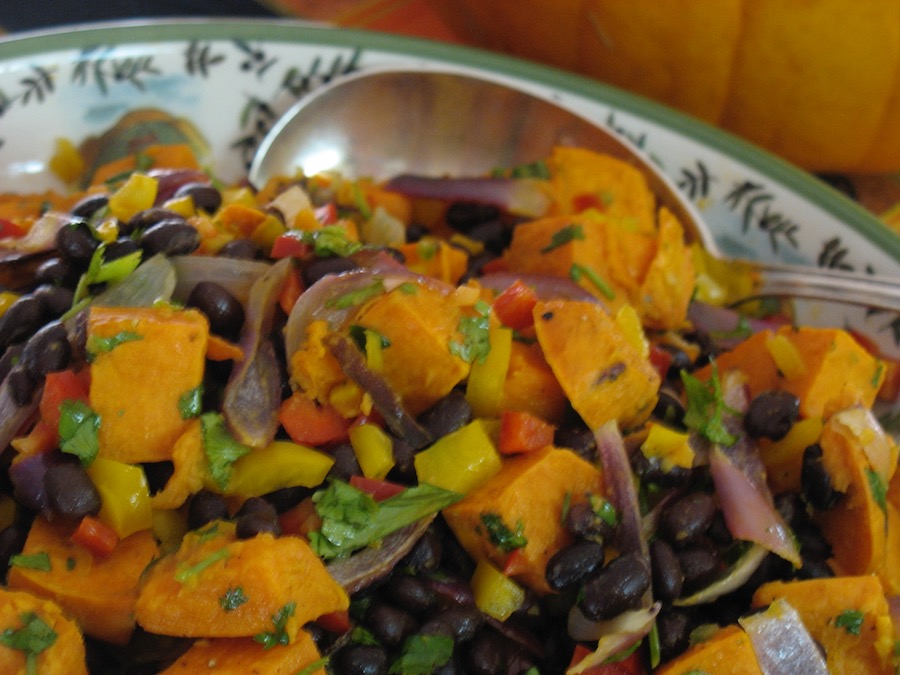
Roasted Sweet Potatoes with Black Beans and Chili Dressing

This has to be the most beautiful fall dish I have ever made.  The combination of red onions, black beans, bits of yellow and red sweet peppers and that golden roasted sweet potato is just about the most amazing looking thing you’ll ever cook.  And it can also make your tummy rumble.  You’ve been warned. Even my husband with the cast iron stomach refused to eat it for the third time for that reason.

But boy, is it beautiful and it retains its color, even when you make too much and have to eat it for a third time (or not).

Roasted Sweet Potato Salad with Black Beans and Chili Dressing

by Mark Bittman, published in the New York Times

Time: 45 minutes

4 medium sweet potatoes (about 1 1/2 pounds–that’s two large potatoes), peeled and cut into 1-inch chunks
1 large onion, preferably red, chopped
1/2 cup extra virgin olive oil
Salt and freshly ground black pepper
1 to 2 tablespoons minced fresh jalapeño chili
1 clove garlic, peeled
Juice of 2 limes
2 cups cooked black beans, drained (canned are fine)
1 red or yellow bell pepper, seeded and finely diced
1 cup chopped fresh cilantro (opt)

1. Heat oven to 400 degrees. Put sweet potatoes and onions on a large baking sheet, drizzle with 2 tablespoons oil, toss to coat and spread out in a single layer. Sprinkle with salt and pepper. Roast, turning occasionally, until potatoes begin to brown on corners and are just tender inside, 30 to 40 minutes. Remove from oven; keep on pan until ready to mix with dressing.

2. Put chilies in a blender or mini food processor along with garlic, lime juice, remaining olive oil and a sprinkle of salt and pepper. Process until blended.

3. Put warm vegetables in a large bowl with beans and bell pepper; toss with dressing and cilantro. Taste and adjust seasoning if necessary. Serve warm or at room temperature, or refrigerate for up to a day.

Yield: 4 servings.

Pear-Almond Tart

First you make the tart shell, and I love her advice to freeze it first.  Then the almond cream.  Let me just say: Blanched almonds? Converting regular almonds to blanched involves dunking them in boiling water for 60 seconds (no more), then rinsing them in cold water.  Then the skins can be pinched off, using thumb and forefinger.  (Videos can be found online, or you can just purchased blanched almonds).

SWEET TART DOUGH (Adapted from Dorie Greenspan’s book BAKING FROM MY HOME TO YOURS)

1 1/2 cups all-purpose flour
1/2 cup confectioners’ sugar
1/4 teaspoon salt
1 stick plus 1 tablespoon (4 1/2 ounces) very cold (or frozen) unsalted butter, cut into small pieces
1 large egg yolk

To make the dough:  Put the flour, confectioners’ sugar and salt in the work bowl of a food processor and pulse a couple of times to combine.  Scatter the pieces of butter over the dry ingredients and pulse until the butter is cut in coarsely – the pieces will be the size of oatmeal flakes and pea-size pieces and that’s just fine.  Stir the egg, just to break it up, and add it a little at a time, pulsing after each addition.  When the egg is in, process in long pulses – about 10 seconds each – until the dough, which will look granular soon after the egg is added, forms clumps and curds.  Just before your reaches this clumpy stage, the sound of the machine working the dough will change – heads up.  Turn the dough out onto a work surface.

Very lightly and sparingly – make that very, very lightly and sparingly – knead the dough just to incorporate any dry ingredients that might have escaped mixing.

If you want to press the dough into a tart pan, now is the time to do it.

If you want to chill the dough and roll it out later (doable, but fussier than pressing), gather the dough into a ball (you might have to use a little more pressure than you used to mix in dry bits, because you do want the ball to be just this side of cohesive), flatten it into a disk, wrap it well and chill it for at least 2 hours or for up to 1 day.

To make a press-in crust:  Butter the tart pan and press the dough evenly along the bottom and up the sides of the pan.  Don’t be stingy – you want a crust with a little heft because you want to be able to both taste and feel it.  Also, don’t be too heavy-handed – you want to press the crust in so that the pieces cling to one another and knit together when baked, but you don’t want to press so hard that the crust loses its crumbly shortbreadish texture.  Freeze the crust for at least 30 minutes, preferably longer, before baking.

To partially bake the crust:  Center a rack in the oven and preheat the oven to 375 degrees F.  Butter the shiny side of a piece of aluminum foil and fit the foil tightly against the crust.  Bake the crust 25 minutes, then carefully remove the foil.  If the crust has puffed, press it down gently with the back of a spoon.  Bake for another 3 to 5 minutes, then transfer the crust to a cooling rack; keep it in its pan.

FRENCH PEAR TART (with my modifications) Makes 6 servings

3 medium pears, firm but ripe

For the almond cream:
6 tablespoons unsalted butter, at room temperature
2/3 cup sugar
3/4 cup ground blanched almonds
2 teaspoons all-purpose flour
1 teaspoon cornstarch
1 large egg
1 teaspoon pure vanilla extract

1 partially-baked 9-inch tart shell, made with Sweet Tart Dough (see above), at room temperature

Confectioners’ sugar for dusting, or apple jelly for glazing

To make the almond cream:  Put the butter and sugar in the workbowl of a food processor and process until the mixture is smooth and satiny.  Add the ground almonds and continue to process until well blended.  Add the flour and cornstarch, process, and then add the egg.  Process for about 15 seconds more, or until the almond cream is homogeneous.  Add the rum or vanilla and process just to blend.  If you prefer, you can make the cream in a mixer fitted with the whisk attachment or in a bowl with a rubber spatula.  In either case, the ingredients are added in the same order.  Scrape the almond cream into a container and either use it immediately or refrigerate it until firm, about 2 hours. (I had mine in the fridge for about 1 hour–worked fine.)

Getting ready to bake:  Center a rack in the oven and preheat the oven to 350 degrees F.  Have a lined baking sheet at the ready.  Peel the pears, cut them in half from blossom to stem and core them; rub them with lemon juice.  Then put them on some paper towels and pat them dry – really dry – so that their liquid won’t keep the almond cream from baking.

Fill the baked crust with the almond cream, spreading it evenly.

Thinly slice each pear half crosswise, lift each half on a spatula, press down on the pear to fan it slightly and place it, wide-end toward the edge of the crust, over the almond cream.  The halves will form spokes. (I only used five halves, using the other for a little cook’s snack.)

Put the crust on the lined baking sheet, slide the sheet into the oven and bake the tart 50 to 60 minutes, or until the almond cream puffs up around the pears and browns.  Transfer the tart to a rack to cool to just warm or to room temperature before unmolding.

Right before serving, dust the tart with confectioners’ sugar.

Her notes about storing:  You can make the almond cream up to 2 days ahead and keep it closely covered in the refrigerator, or you can wrap it airtight and freeze it for up to 2 months; defrost before using.  However, once you’ve baked the tart, you should be prepared to enjoy it that same day.

Scallops & Sauteed Spinach with Hoisin Sauce

When I bought the Gourmet Cookbooks at Costco last year (moment of silence, please,  for the closing of Gourmet Magazine) a free one-year’s subscription came to Bon Appétit, the sister publication to Gourmet.  I don’t know if I’ll re-up, but I have to say it’s been a year’s adventure of recipes and cooking.  One issue in particular, the April 2009 issue, I used most of the recipes.  And this recipe, by Molly Stevens,  was one of them.  I remembered it again, because while looking for something to cook up for the Anniversary of Our First Date (some 21  years ago, which my husband refers to as our “semi-anniversary,” since he feels its not a one of the biggies) I found some scallops in the deep freeze, remembered the box of spinach in the fridge and the hoisin sauce in the cupboard.  Score!

I always cut the scallops through the middle to make them thinner, and to make us believe we have more (you can never have too many scallops in your life). They also cook in a flash that way. I use about 1 and 1/2 bags of spinach (approx 5 oz. each), but the same amount of scallions, etc for that step.  Since we don’t drink, I substitute apple juice for the mirin and the last substitution I make is for the chili sesame oil: sesame oil plus a couple of drops of tobasco (one can have too many jars in the fridge of specialized ingredients, I think).

Yield: Makes 6 servings

1/4 cup hoisin sauce
2 tablespoons unseasoned rice vinegar
1/4 teaspoon hot chili sesame oil
6 tablespoons (3/4 stick) butter, divided
1/4 cup chopped shallot (about 1 large)
1 tablespoon plus 1 teaspoon minced peeled fresh ginger
4 garlic cloves, minced, divided
1 serrano chile, seeded, minced, divided (I used jalapeno–a little more mild)
4 5-ounce bags baby spinach
Coarse kosher salt (sea salt works fine)
2 pounds sea scallops, side muscles removed
1 tablespoon peanut oil or vegetable oil
3/4 cup finely chopped spring onions or green onions (white and pale green parts only)
1/4 cup mirin (sweet Japanese rice wine)*

Whisk first 3 ingredients in small bowl to blend and reserve.

Melt 2 tablespoons butter in heavy large skillet over medium heat. Add shallot, 1 tablespoon ginger (I grate frozen peeled ginger instead of chopping it), 2 minced garlic cloves, and half of minced chile. Sauté until shallot is soft, about 2 minutes. Increase heat to medium-high and add 1 bag spinach. Stir until beginning to wilt. Add remaining spinach, 1 bag at a time, stirring between additions until just wilted. Season with coarse salt and pepper. Keep warm.

Sprinkle scallops with coarse salt and pepper. Melt 1 tablespoon butter with peanut oil in heavy large nonstick skillet over medium-high heat. Cook scallops until brown on both sides and just opaque in center, about 2 minutes per side. Transfer scallops to plate; tent with foil.

Add 1 tablespoon butter, spring onions, remaining 1 teaspoon minced ginger, 2 minced garlic cloves, and remaining half of minced chile to skillet. Sauté until onions begin to soften, 1 to 2 minutes. Add mirin and simmer until reduced to glaze, 1 to 2 minutes. Whisk in hoisin mixture. Reduce heat to medium-low. Whisk in 2 tablespoons butter. Season to taste with salt and pepper.

Divide spinach among plates. Top with scallops, dividing equally. Spoon sauce over and serve.

Pasta with Roasted Cauliflower, Take Two

I had originally cooked up this recipe (from Simply Recipes) with bacon, so had written it up the way I cooked it.  I have to admit we were underwhelmed by this recipe, but did like it.  Just before I left on my trip to Florence, Italy I was cleaning out the fridge and saw a head of cauliflower.  Now that I knew I could, I did–I roasted it and threw it in the freezer.

Fast forward to last night, when I was tired, the fridge is too full of stuff and I need a meal.  I had picked up some prosciutto (which I didn’t have before) and decided to give this another go.  Wow.  What a difference.  The only changes I made were to roast the defrosted (already roasted) cauliflower for only 10 minutes, along with the tomatoes (using the sweet sugar cherry toms that I had) and to change out the pasta for a similar shaped type.  I chopped the prosciutto with the garlic and fresh sage from my garden (the only thing that seems to have survived this heat!), mixed it in when the recipe said.  My husband loved it, and so did I.

This picture is from try Take Three, this time with the spinach added in.  Manna.

Pasta with Roasted Cauliflower and Prosciutto

Ingredients

1/2 medium cauliflower, cored and broken up into 3/4-inch florets (4+ cups)
1 pint cherry tomatoes
Olive oil
Salt
Freshly ground black pepper
1 and 1/2 teaspoons dried sage
4 large cloves garlic
4 ounces of prosciutto
8 ounces orecchiette pasta
5 ounces baby arugula or spinach, cleaned and coarsely chopped
1 cup grated Parmesan cheese

Method

1 Preheat oven to 425°F. Lay out cauliflower and tomatoes in a roasting pan, coat with olive oil and sprinkle with salt and pepper. Roast until just lightly browned and cooked through, about 15 minutes.

2 Bring a large pot of salted water to a boil (1 teaspoon salt for every quart of water).

3 While water is heating, pulse garlic, sage, and prosciutto together in a food processor until coarsely chopped. Once cauliflower has browned lightly, remove from oven, toss cauliflower with garlic prosciutto mixture, and return to oven to cook for 5-7 minutes more.

4 Boil pasta uncovered (rolling boil) for 9-10 minutes until firm, but done (al dente). Reserve one cup of pasta liquid. Drain water from pot. Add cauliflower, arugula (or spinach), and Parmesan to the pasta. Stir in enough cooking water to moisten (I added about 1/2 cup). Add salt and pepper to taste.

Serves 4.

Yogurt

While I couldn’t seriously join the Hippies (I disagreed with too much of what they were saying and I liked wearing my bra) this cultural movement had an influence on our kitchens.  One tenet was the back-to-the-land idea, of beating The Man at his own game by making or raising or growing your own vegetables.  My contribution was learning to cook, as well as making some items from scratch, one of them being yogurt.  I realize that while I attribute this impulse to the Hippies, it could have just as easily come from Sunset Magazine, with its pictures of women wearing triangular head scarves, fringe and multiple rings.  Many of my recipes hail from that magazine.

I used to make this up (it makes a lot), store it in the fridge and use it all week long, scooping out the yogurt for breakfast and after-school snacks.

Yogurt

Heat to 150 degrees:

12 1/3 cups milk

2 cans (14 oz) sweetened condensed milk

Soften 3 packages unflavored gelatin in a small amount of the warmed milk.  Add this to the warmed milk, then cool to 120 degrees, stirring often. Add a small amount of the warmed milk to 5 Tablespoons unflavored yogurt (with active cultures–Dannon works well–read the labels), then pour the yogurt mixtures back into the milk mixture and stir well.

Pour the milk mixture into four clean large canning jars (1 quart size).  Lid them, then place all in a large pan and fill the pan up to their rims with 120 degree water. (I used my water bath canner–don’t let the bottles float–stop adding water if they start to wiggle around too much.)  Wrap this all in blanket and leave for 12 hours on the counter, undisturbed.  Remove from water and place in the refrigerator until chilled.