Mom’s Mint Surprise Cookies

IMG_1882

I don’t know where my mother got this recipe, or if she invented it herself, but it’s a cookie I always associate with her and with holiday baking. When I baked up a batch and brought them as a gift to each child at her 75th birthday party, all of us children nodding a knowing smile.

As a child I loved them warm, right out of the oven, or set in the sun on cooler day to warm the mint chocolate surprise waiting inside the spiced cookie.  I liked nibbling the edges of the cookie, freeing me to separate the two halves like those sandwich cookies, and lick off the chocolatey goodness before finishing up the cookie.  However you choose to eat them, they are a winner.

IMG_1871

You’ll need these: Trader Joe’s UFO’s Mint Chocolate Wafers.  Better get two bags because the wafers seem to disappear quickly.

UPDATE: I went in to Trader Joe’s yesterday (December 2013), and they no longer make, nor carry these.  I’m leaving this post up anyway, as it is a good childhood recipe, and maybe someone, somewhere, will make these again!

UPDATE, APRIL 2014: I found some Dark Chocolate Mint Wafers at Kitchen Krafts.  I’ll try them out and see if they work okay.

Barbara Sessions’ Mint Surprise Cookies

2/3 cup shortening
2/3 cup butter
1 cup brown sugar
1 cup white sugar
1/4 cup honey
2 eggs
1/2 cup whole wheat flour
3  1/2 to 4 cups white flour
2 tsp. each: salt, soda, cinnamon, cloves, ginger
12 oz. bag Trader Joe’s UFO’s Mint Chocolate Wafers

Cream shortening, butter, sugars and honey.  Add eggs, beating well after addition.  Mix together whole wheat flour, 1/2 cup white flour and spices.  Blend and add to creamy mixture.  Add the rest of the flour, depening on the size of eggs you used. Chill.

IMG_1872

Wrap one Tablspoon dough around one chocolate mint wafer.

IMG_1876

Bake 375 degrees F for 10-12 minutes.  Let cool on rack, if you can stand to wait.  They freeze well.

IMG_1883

Sugar Cookies

Sugar Cookies

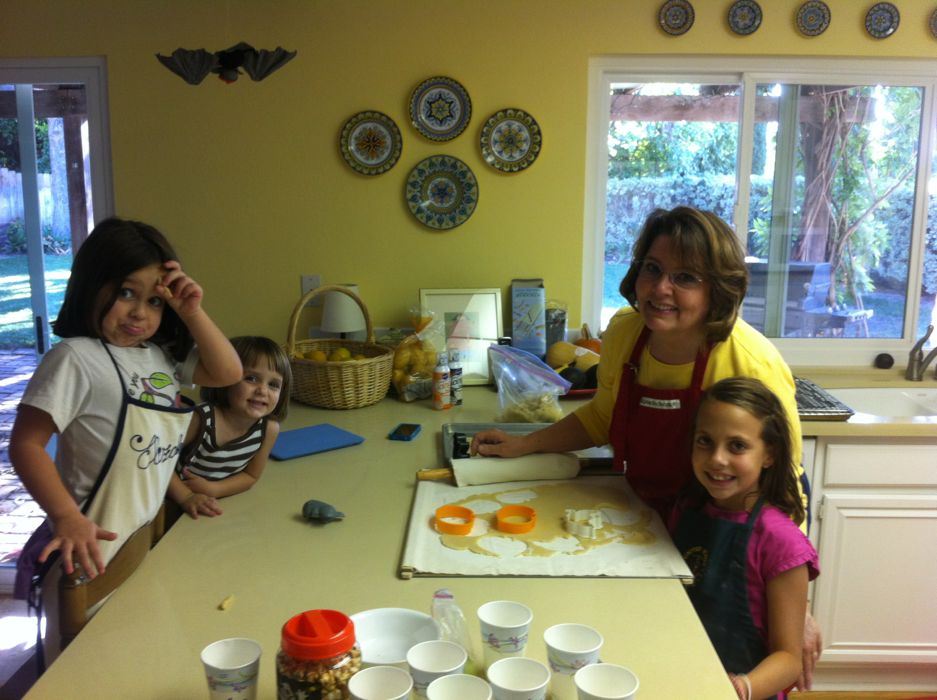
This recipe is for plain old sugar cookies.  The kind that you roll out and cut with shapes, while your granddaughters (and you) try to sneak the dough.  I first made this recipe about 40 years ago while in high school, when we had to bake giant football-shaped cookies for the football players, a fund-raiser hosted by Girls for Gunn.  I was in leadership that year, so took over my mother’s kitchen making 8″ cookie footballs, decorating them with icing, cutting cardboard to fit and stretching plastic wrap over them to deliver on the morning of Homecoming. I have made it multiples of times since, first with my own children and now with my grandchildren.

You can make it ahead and store it in the refridgerator; it may need a few minutes to warm up a bit before you can roll and shape them.  These cookies are good with a shake of sugar over them just before putting them into the oven, or, if you leave them plain, decorated with frosting and sparkles/candycorn/M&Ms, or what have you.  These granddaughters were fascinated by the physics of placing candy corn on the uncooked cookies, then watching the corn melt into strange and unusual formations while in the oven.

Elizabeth Eastmond’s Sugar Cookies           

3 cups sifted (or stirred) flour
1 cup sugar
1 and 1/2 teaspoons baking powder
1/2 teaspoon salt
1 cup soft butter (don’t use margarine)
1 egg, slightly beaten
3 Tablespoons cream
1 teaspoon vanilla extract

400° F oven  Yield: approximately 72 cookies

Sift flour, sugar baking powder, salt into mixing bowl.  Using electric mixer (or pastry blender) cut in butter until particles are fine.  Add egg, cream and vanilla extract.  Blend thoroughly.  Gather dough into ball.  Chill, if desired, for easier handling.

Roll out on floured surface 1/2 at a time to a thickness of 1/8 to 1/4 inch.  (The thinner the cookie, the crispier.  The thicker the cookies, the softer they will be.)  Cut into desired shapes; place on ungreased cookie sheet. {If you don’t plan to frost them, sprinkle them with granulated sugar before baking.} Bake 400°F for 5-8 minutes or until golden.

Reindeer Christmas Cookies

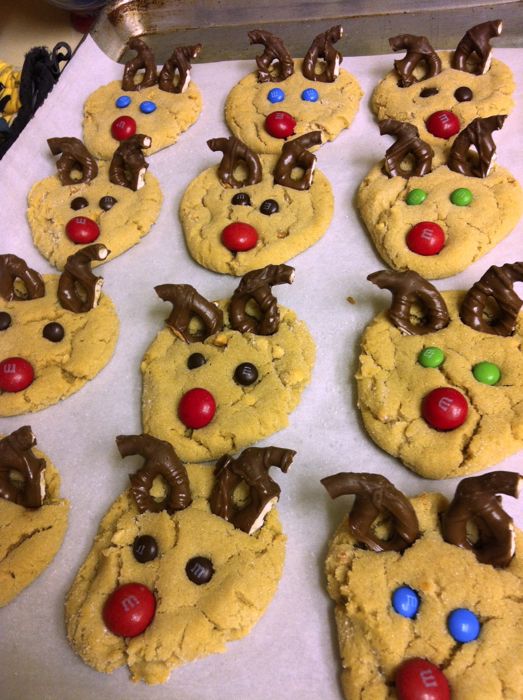
My daughter informed me that these are all over Pinterest, but I found them by following a series of links to *this* page, where I swear this cook has photoshopped her cookies to look that good.  Or maybe she’s just a better baker than I am, or maybe it’s because I substituted a cube of butter for some of that shortening — thinking it would taste better — but forgot how soft it makes cookies.  So note to self: don’t swap out the shortening.  Now, prep your stuff.

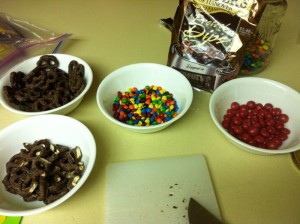
I couldn’t find baby chocolate-dipped pretzels, so if you think I was going to dip them all, you don’t know me very well.  Spend your time where it counts, and improvise the rest.  So I cut all my sort-of-mini pretzels in half.  Antlers are kind of hoary looking, aren’t they?

I purchased minty white chocolate M&Ms for the nose.  They come in a package with red and white.  We ate all the white ones, while saving the red ones for this project.  I had also purchased mini M&Ms for the eyes.  We decided we liked brown and blue, and that the reindeer with the green eyes looked like Zombie Reindeer (so that would be for a different holiday).

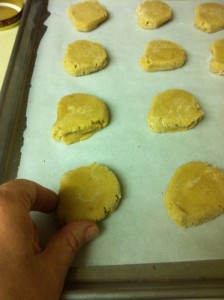
Make up a double batch of the dough in the Christmas Kiss cookies. Roll them into 1-inch balls, but I have to admit that I used my cookie scooper, which I think is 1 and 1/2 inches. Place a couple of scoops of sugar in a large plastic baggie, drop in the balls of cookie dough, and shake lightly to coat them with sugar (so much easier than rolling them around in a dish).

Flatten them slightly with the bottom of a glass, then pinch their “nose” slightly, to get that elongated shape.  Bake for 8 to 10 minutes, then remove from the oven.  QUICKLY set in a matching pair of antlers, then do the nose, then the eyes last.  Or get someone to help you: my husband did all the antlers while I was throwing on noses and eyeballs.

Let cool on the cookie sheet.  When mostly cool, transfer to a rack.

NOTE: you can see I used parchment paper on this batch.  You can buy it in rolls from the grocery store or (now) from Costco.  If you don’t use parchment paper, the world won’t end.  However, you may want to transfer your cookies to the cooling rack when they are still sort of warm, instead waiting until they are really cool.

Christmas Kiss Cookies

Cream together:

1/2 cup peanut butter
1/2 cup shortening
1/2 cup white sugar
1/2 cup brown sugar.

Add:

1 egg
2 Tablespoons milk
1 teaspoon vanilla extract (not flavoring, use extract!).

Mix together then add to creamed mixture:

1 3/4 cup flour  (I use 3/4 cup whole wheat flour, and 1 cup white flour)
1 teaspoon baking soda
1/2 teaspoon salt

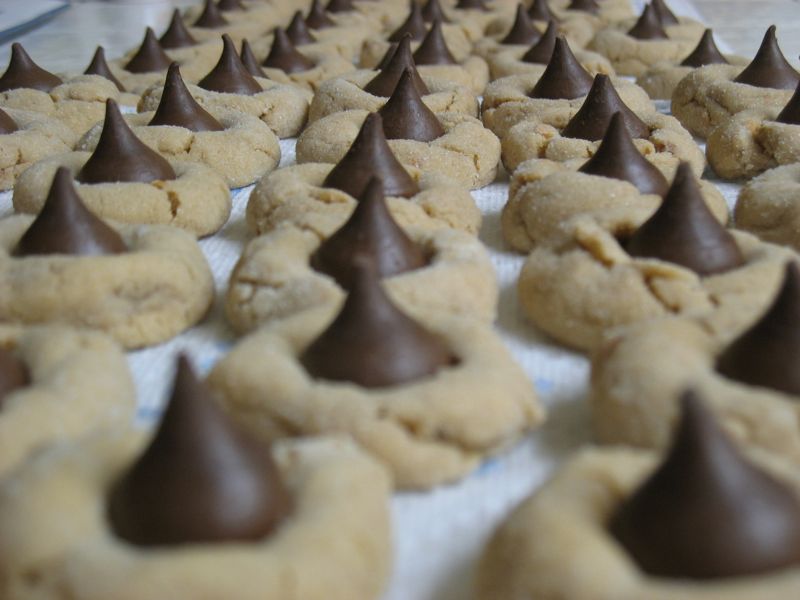
Form into balls about 1 inch in diameter, roll in granulated (white) sugar.  Bake in 350 oven for about 8-10 minutes or until set.  Take out of oven and immediately press a chocolate kiss into center.  Remove to wire rack  to cool.  Kisses will get soft as they take on the heat of the cookies, but will firm up again as the cookies cool.

Cranberry, White Chocolate Chip and Oatmeal Cookies

I found this on the web, and decided to try it out for my monthly treat for the ladies at church.  That’s usually never a good idea, but it turned out fine.  I do think, though, that these could benefit from a little something or other to make them pop: maybe a touch of cinnamon?  nutmeg?  If you figure it out, leave a comment and let me know.

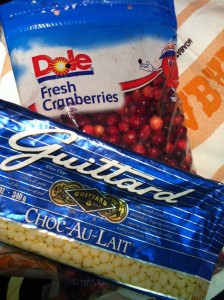
I had just purchased a huge bag of fresh cranberries and wanted to bake something using them.  I found scads of recipes on the web using dried cranberries, but few with fresh cranberries.  I adapted one to make these cookies.

I think these bake up best when the dough is cold, so if you are going to have everything at room temperature, please leave time to chill the dough before baking.

1 cup cold butter, or barely softened
1 1/2 cups granulated sugar
2 large eggs
1 teaspoon vanilla extract
rind of one orange, grated (about 1 Tablespoon)
1 1/2 cups old-fashioned oatmeal
1/2 cup whole wheat flour
1 1/2 cups white flour
1 teaspoon baking powder
1/2 teaspoon salt
1/4 teaspoon baking soda
1 cup coarsely chopped walnuts
1 bag (12 oz) white (or vanilla) chocolate chips
1 1/2 cups fresh cranberries, washed & picked over, then coarsely chopped

Preheat oven to 375 degree F.

Measure out cranberries, then place in a wire mesh strainer and rinse, picking out the wrinkled or barely ripe berries.  Place in a food processor and pulse one or two times, or until coarsely chopped.  If you don’t have a food processor, it can be done by using a heavy knife, but it is tricky.  Be of good courage.

In a mixing bowl, cream butter and sugar until it is light, about 5 minutes.  Add eggs, one at a time, beating well after each addition.  Add in vanilla extract and orange rind.  Mix well, then add in oatmeal.  In a separate bowl, stir together the flours, baking powder, salt and baking soda.  Add to the butter mixture until blended, but don’t overbeat.  Add chopped fresh cranberries, walnuts, and white chocolate chips, stirring well to incorporate throughout.

Drop by large tablespoonfuls onto parchment-covered cookie sheet about 2 inches apart; cookies will be about the size of a small plum.  (I put the cookie sheet in the refrigerator at this point to chill before baking, but if you chilled the dough after mixing, you should be fine.)

Bake for 19 minutes, or until edges are lightly brown.  Let set 1 minute outside of the oven, then drag the parchment sheet with cookies on it, onto a rack to let them cool.  Yield: about 24 large (3″) cookies.

Cook’s Note:  Parchment paper can be purchased at any grocery store. I noticed that Costco carried it last time I was there.  One recipe said you could just grease the pan, but be vigilant during baking so the cookies don’t burn.

Cranberry-Cherry Pinwheels

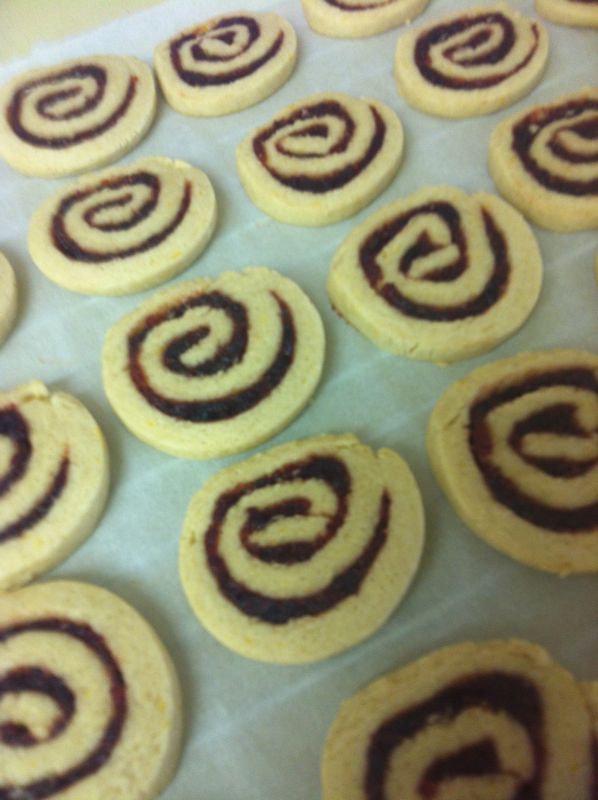
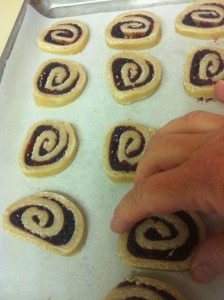
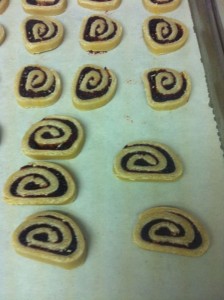
A few years ago I bought this sliver of a book, Joy of Cooking Christmas Cookies, and thumbed through it to find a cookie or two to try.  I placed little pieces of torn paper as bookmarks–which the book still has.  But I don’t need one for this page, as I’ve made it so much, it opens by itself exactly here.  I like these cookies because you can make them ahead of time and store them in the freezer.  Some slicing and a quick bake and they’re ready to go.  They are also one of the few things on the holiday table that is lower in fat, but they still have a delicious flavor with the sweet-tangy cherry-cranberry filling and the dough with its grated orange zest. There are a few steps to this recipe, but it’s not difficult.

Filling
Combine in a medium saucepan:
1 and 1/2 cups dried cranberries ( 6 ounces)
1 jar (10 ounces) cherry preserves
1/4 cup water
1/2 teaspoon ground cinnamon

Simmer, stirring frequently, for 5-8 minutes, or until the mixture is soft and most liquid is absorbed.  Transfer to a food processor and process until smooth.  Cover and refrigerate until cool.  Filling may be stored up to 48 hours.  Let return to room temperature and stire well before using.

Dough
Using a wire whisk, thoroughly stir together and set aside:
3 and 1/3 cups all-purpose flour (16.75 ounces)
3/4 teaspoon baking powder
1/8 teaspoon baking soda
1/2 teaspoon ground cinnamon

Using an electric mixer, beat together until very well blended:
1/4 cup butter, softened (2 oz.)
3 tablespoons corn or canola oil
1 and 1/4 cups sugar (8.75 oz.)
3 large egg whites
2 tablespoons milk
2 teaspoons vanilla extract
1-1/2 teaspoons grated orange peel (about 1 small orange)

Beat in half of the dry ingredients until just incorporated, then stir in the remainder until well blended.

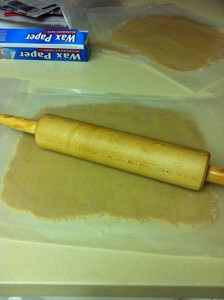
Divide the dough in half.  Form each half into a rough oblong shape about 6 inches long.  Center each log on a 12-inch-long sheet of wax paper.  Cover with a second 12-inch-long sheet of wax paper.  Press, then roll each log into an even 11-inch square, occasionally checking the underside of the dough and smooth out any creases.  Patch the dough as necessary to make the sides relatively straight.

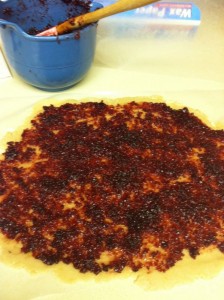
Working with one square of dough at a time, peel away and discard the top sheet of wax paper.  Spread half of the filling evening over the entire surface of the dough; the filling layer will be thin.

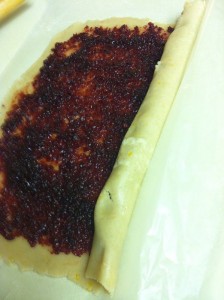
Using the second sheet of wax paper, roll up the pinwheel, by easing the dough onto itself; use the paper to assist you.

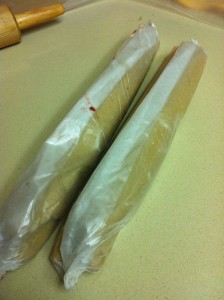
Wrap the roll in wax paper (I use the existing sheet), and twist the ends to prevent unrolling.  Place on a tray or cookie sheet.  Repeat with the remaining dough.  Freeze for at least 2 and 1/2 hours or until the rolls are firm enough to be cut neatly.  (If you wish to bake them much later, place the rolls in a plastic bag for up to a month.)

Preheat the oven to 375 degrees F.  Line a cookie sheet with a sheet of parchment paper.  Cut the rolls crosswise into scant 1/4″ slices.  Place them on the prepared cookie sheets, spacing them about 1 1/2 inches apart.  Try as I might, my cookies are always misshapen, so I kind of squeeze them into shape at this point.   Bake in the upper third of the oven for 10-12 minutes, or until the edges are browned and the tops are VERY lightly colored.  One of the attractions for this cookie is that they are pale with that brilliantly colored red filling.

Drag the entire sheet of parchment paper from your baking sheet to a cooling rack, and let them cool.  Store, airtight, for 10 days, or freeze for up to one month.  I promise you no one will complain that yours are as lopsided as mine.

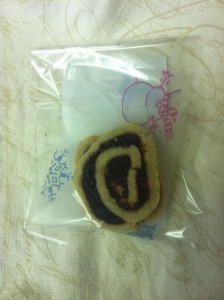
I made them up into favors for my lesson to the church ladies at Christmastime.  Here’s the front, and then the back.

Some time ago I had purchased 8 1/2 by 11- inch sheets of “sticker” paper.  I print out what I want to say, cut them into shape then peel and stick them on the treat bags.  The filling is kind of sticky sometimes, so I sandwiched a piece of fancy wax paper between the two cookies.

Orange Dinner Rolls

Thanksgiving Day at our house this year was a quiet affair with all the children scattered to different places, my husband and I decided to have a quiet meal at home.  So that allows me to try a couple of new things, without the pressure of deadlines and wondering if the company will like it.
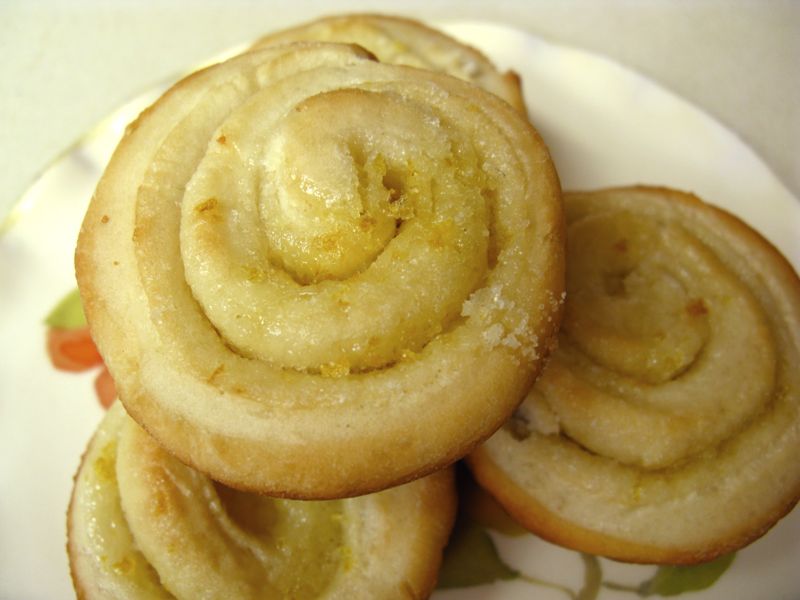
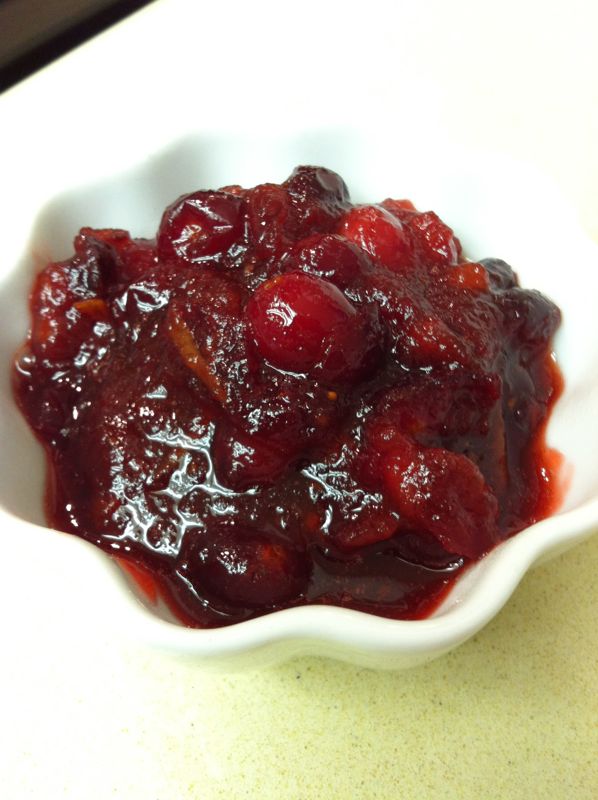
I have already written about the cranberry sauce, but here’s the other new thing I tried: orange dinner rolls.  I’d heard a couple of people say they were having them for their turkey-dinner, and then when I was cleaning out looking for that cranberry sauce recipe I thought I’d lost, I found a clipping of one of those “restaurant request” columns and it featured this recipe.  The restaurant was the Morrison Lodge in Oregon on the Rogue River, and the SOS columnist for the LATimes noted that the recipe “originated with Elaine Hanton, who, with her husband B. A., purchased the lodge in 1964.”

I’d nearly forgotten to make these, in the rush of side dishes and turkey. So with an hour to go, I zipped through the mixing of the dough, rolled them out and shaped them and let them rise on the stove, next to the warm air.  Since it only makes 24, it’s a quick mix, quick shape into muffin tins and they came out of the oven just as the turkey was being sliced.  Good timing.  Good rolls!

Total time: About 1 hour, plus rising time for the dough
Servings: Makes 2 dozen rolls
Note: Adapted from Morrison’s Rogue River Lodge

Ingredients for Dough
1 cup lukewarm water
1 packet active-dry yeast (2-1/4 teaspoon yeast)
3 1/4 cups (13.8 ounces) flour, divided, plus additional for kneading
2 1/2 tablespoons sugar
2 1/2 tablespoons shortening, at room temperature
1 egg, at room temperature
1 teaspoon salt

In each cup of a 12-muffin tin pan, place about 1/2 teaspoon melted butter, then swish up around the sides with a pastry brush.

1. In a large bowl, or in the bowl of a stand mixer, combine the water, yeast and one-half cup flour, stirring to dissolve. Set aside just until the yeast is activated (the mixture will begin to bubble), 5 minutes.

2. While the yeast is activating, combine the remaining flour, salt, and 2 1/2 tablespoons sugar in a separate bowl.

3. With a fork (if working by hand), or using a dough hook, work half of the flour/sugar mixture into the activated yeast, then add the shortening and egg until combined. Slowly add in the remaining flour/sugar mixture (the mixture will at first be stringy, then very sticky as the flour is absorbed). Stir in the salt.

4. Move the dough to a floured surface. With floured hands, gently knead the dough (it will be sticky at first) about 5 minutes, adding flour as needed just to keep the dough from sticking to your fingers or the kneading surface. The finished dough will be tender, soft and slightly tacky. [Cook’s Note: I added a bit more flour and just used my mixer for another minute or two, remembering to keep the mixing brief.]

Ingredients and Process for Shaping the Rolls

4-5 tablespoons melted butter
1/3 cup granulated sugar
3/4 teaspoon finely grated orange zest (1 orange)

5. In a small bowl, combine the remaining one-third cup sugar with the orange zest. Using 1-2 Tablespoons of melted butter and a pastry brush, stroke the butter liberally inside 2 muffin tins, coating the wells thoroughly.  There should not be puddles of butter–just coverage.

6. On a well-floured surface, roll the dough into a rectangle measuring 24 inches by 10 inches.

7. Brush the dough with 3  Tablespoons of melted butter, then sprinkle over the orange-sugar mixture.

8. Roll the rectangle lengthwise into a tight tube (as when rolling cinnamon rolls). Cut the tube into 24 (1-inch) slices, using thread if possible (the thread will slice more easily and cleanly than a knife). If you use a knife to cut the slices, roll the tube one-quarter turn after each slice to keep the tube round; otherwise, it will flatten from all the slicing.

9. Place each of the slices into the prepared muffin tin (the tins must be well-greased or the finished rolls will stick to the bottom). Cover loosely and set aside until the rolls double in size.

10. Bake the muffin trays one at a time, until the rolls are puffed and golden brown, about 8 to 10 minutes. Rotate the trays halfway through for even baking.

11. Cool the rolls slightly, then unmold. Serve warm.  I always tip up the rolls in their tins even if I’m not going to use them immediately as this allows the steam to escape and you won’t have soggy rolls.

Each roll: 126 calories; 2 grams protein; 22 grams carbohydrates; 1 gram fiber; 3 grams fat; 1 gram saturated fat; 13 mg. cholesterol; 10 grams sugar; 101 mg. sodium.

Cranberry Sauce Duo

We went back and forth this year on whether or not to go out to a restaurant or stay home and cook.  Out?  In?  And since all our children were taken care of and I heard it was going to rain, In was what won in the end.  I went looking for my mother’s most recent cranberry sauce recipe–tore apart all my stashes of clipped, stained, printed-out papers but couldn’t find it.  I went to Epicurious and searched.  Then I realized I probably had it on my computer.  Duh.

So here are two cranberry sauce recipes.  The first is from Epicurious, dated 2000. It’s a bit tart, but with the addition of ginger and the pepper, has a good tang to it. The second came from my mother and I don’t know where she got it from.

Cranberry Relish, from Epicurious

2 oranges
1 cup sugar
2 teaspoons lemon juice
2 teaspoons fresh ginger, cut in fine julienne
1 bag (12 ounces) fresh or frozen cranberries
1/2 teaspoon freshly ground white pepper

Preparation
1. Peel 1 orange and cut the zest (orange part only) into a very fine julienne, as thin as possible; set aside. Squeeze both oranges for juice; set aside.

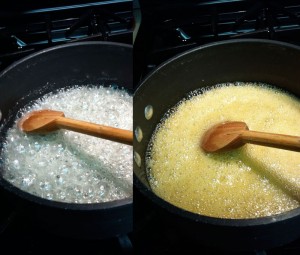
2. Combine sugar and lemon juice in a small sauté pan. Heat up slowly and continue cooking until the sugar begins to caramelize. If necessary, wash down the sides of the pan by brushing with a little water to keep the sugar from burning.

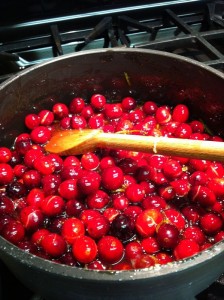
3. When the sugar is caramel colored, add the julienned ginger and orange zest. Cook for about 1 minute, then add the cranberries, orange juice and pepper. Continue to cook on medium-high heat, stirring frequently, for about 5 minutes or until the cranberries are slightly broken but not mushy (frozen cranberries will take about 7 minutes). Remove from the heat and let cool.

Cook’s Notes: I like my berry sauce a little soft, so I cooked it a little longer than they said.  I also tasted it and added about 2 Tablespoons sugar as it was a bit mouth-puckery too tart for me.  I think my oranges were smaller so everything was more intense.  I also grated my fresh ginger, as I keep it in the freezer and there was no way it could have been julienned.

Mom’s Cranberry Sauce, 2006

Cook 12 oz bag fresh cranberries in 1 cup water until skins pop open.  Add 2 cups sugar, scant cup chopped golden raisens, 1 chopped Granny Smith apple, zest and juice of 1 lemon, zest and juice of 1 orange.  Cook 15 minutes or until slightly thickened.  Add 1/2 cup chopped walnuts.

(The best yet, she says.)

Pear, Cranberry and Gingersnap Crumble

I regularly haunt Smitten Kitchen’s website as she cooks food that I can make, with only a few photos here and there, which makes it an easy read. (I don’t particularly object to a raft of photos, as they are helpful when a new technique is being presented, but occasionally they can get out of hand.)  But I’d have to say it’s her combination of ingredients that are the usual standouts.  She just has a way with food.  Summer Strawberry Cake is one of hers, too, and if you haven’t made that this summer, then you’ve really missed out.

Anyway, here’s a fall treat, made beautiful with three kinds of pears and cranberries and an interesting crumble on top, made from gingersnap cookies.  I bought a box in the grocery store and on first glance, I thought I’d bought a box of brown thin hockey pucks.  I snapped them (with some effort) into fourths then whirled the 16-18 cookies in my food processor to make the crumbs (although a ziploc bag and a swift firm hand with a kitchen mallet would also do the trick).  Amazingly, with the suggested addition of the ginger and pepper, those hideous store-bought cookies turned out okay atop the steaming, juicy pears and cranberries.

Adapated from Smitten Kitchen, who adapted it from Sweet Melissa Patisserie

Crumble
1 cup (125 grams) all-purpose flour
1/4 cup (50 grams) granulated sugar
3 tablespoons (37 grams) packed dark or light brown sugar
1 cup gingersnap crumbs (4 ounces or 113 grams or about 16 storebought cookies)
1/8 teaspoon ground ginger
1/8 teaspoon table salt
Pinch of white pepper, especially if your gingersnaps aren’t particularly snappish
1/4 cup (1/2 stick  or 113 grams) butter, melted and cooled

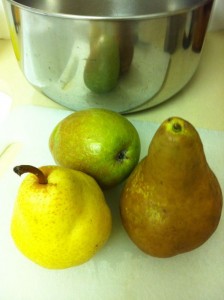
Beauty shot of the pears.
From left to right: Bartlett (yellowish), Anjou, and Bosc.
The Anjou and Bosc are a little crisper than the Bartlett, but cook up well.

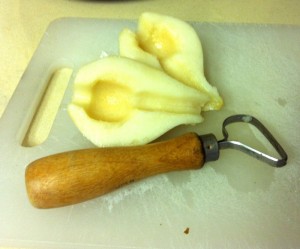
And here’s my trick for coring pears: a clay tool from an art supply store.

Filling
2 pounds (about 4 to 5) large ripe pears (I used combination of Anjou, Bartlett and Bosc) peeled, halved, cored and sliced 1/4 inch thick
1 1/2 cups (6 ounces or 170 grams) fresh cranberries
1 tablespoon (15 ml) lemon juice
1/2 teaspoon finely grated lemon zest
1/2 teaspoon vanilla extract
1/2 cup (100 grams) granulated sugar
2 tablespoons (14 grams) cornstarch

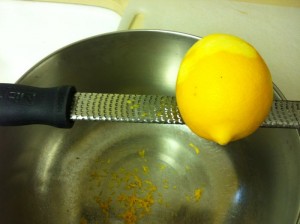
Do you have one of these microplanes for zesting?  I figure I used about 1/2 of the lemon for this recipe.  You can freeze the remainder, wrapped up in a square of wax paper, then into a ziploc baggie.  Label it, please, before you stick it in your freezer. (You’ll thank me later.)

Preheat the oven to 350°F.

Stir together the flour, granulated sugar, brown sugar, gingersnap crumbs, ginger and salt. Stir in the melted butter until large crumbs form.

In a large bowl, mix the pears, cranberries, lemon juice, lemon zest and vanilla. In a small bowl, whisk the sugar and cornstarch together then toss it with the fruit mixture.

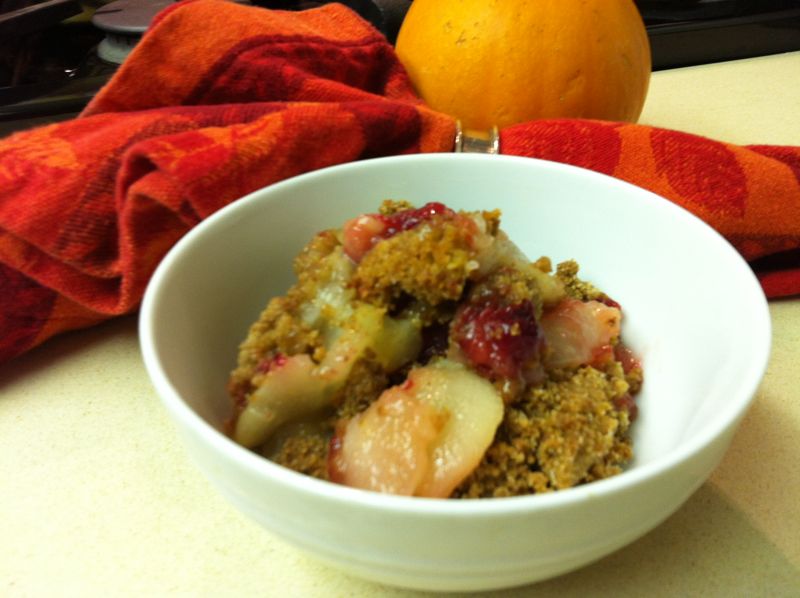
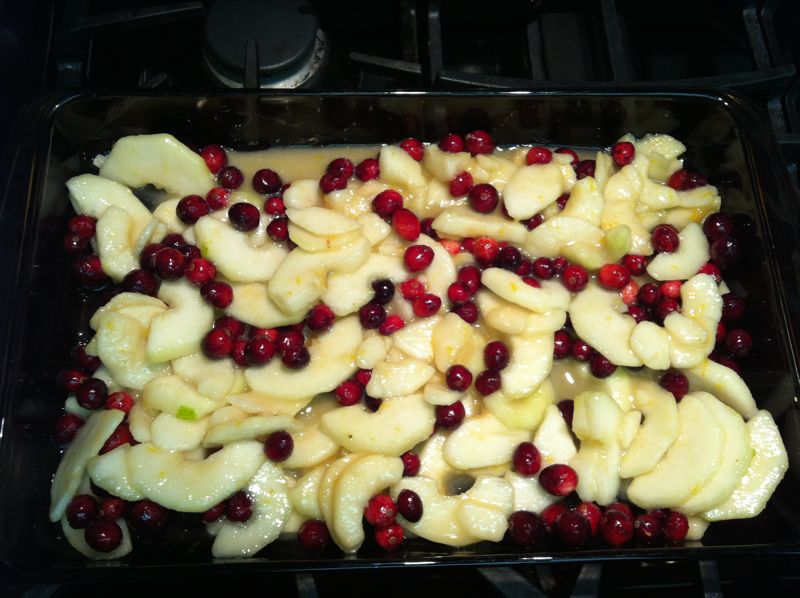
I just had to show you a picture of this before I sprinkled on the gingersnap topping.  Positively holiday-ish! I made this, doubled, for serving to the ladies in church.  Aside from the time taken to peel the pears, it’s a quick and easy recipe.

In a 1 1/2 to 2 quart baking dish, layer in the pear-cranberry mixture, then sprinkle the gingersnap crumble over the fruit. Set the crumble on a foil-lined baking sheet (if you are worried about it  bubbling over—I baked mine in a 9×13 pan and had no troubles) and bake it for about 45 minutes, until the crumble is a shade darker and you see juices bubbling through the crumbs. Let cool a little bit, then enjoy.

Cook’s Notes: The original recipe called for 1/2 cup [unsalted) butter in the gingersnap crumb topping; if you use that amount then the crumble will probably stay crisper an extra day.  Ours became softer the second day, but the flavor was still amazing—I wonder if it is the combination of the three pears together?  (The original merely asked for Anjou.)

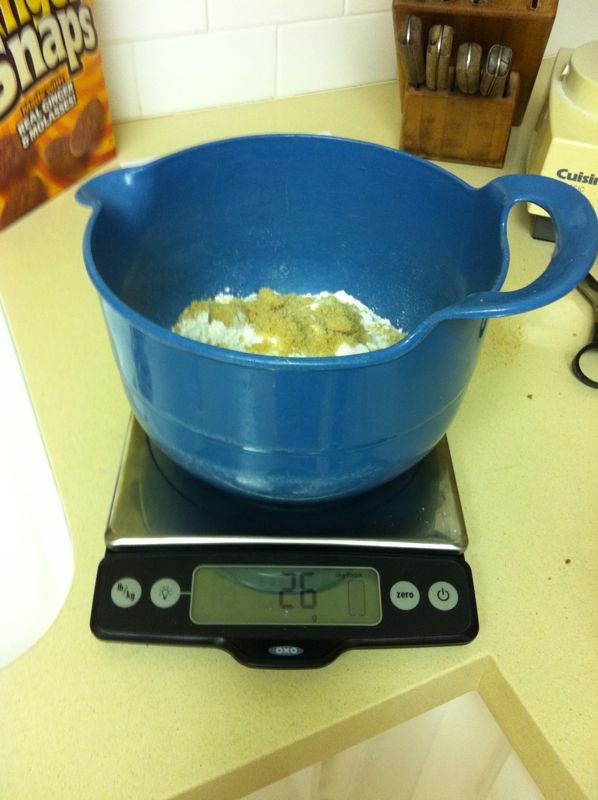
And what am I doing in the photo above?  Weighing the ingredients.  You’ve noticed that all of her ingredients have a weight listed next to them.  She predicts that this will be the wave of the future, similar to what they do it in Europe. I decided to try it.  I placed the bowl on, zero-ed it out, then added each ingredient, zero-ing out after each.  I can change to kilograms from ounces on my scale; I suggest if you are going to try this, you look for that feature as well.  Instead of multiple cups and bowls, it’s just one-bowl-mixing for the dry ingredients.  Nice.

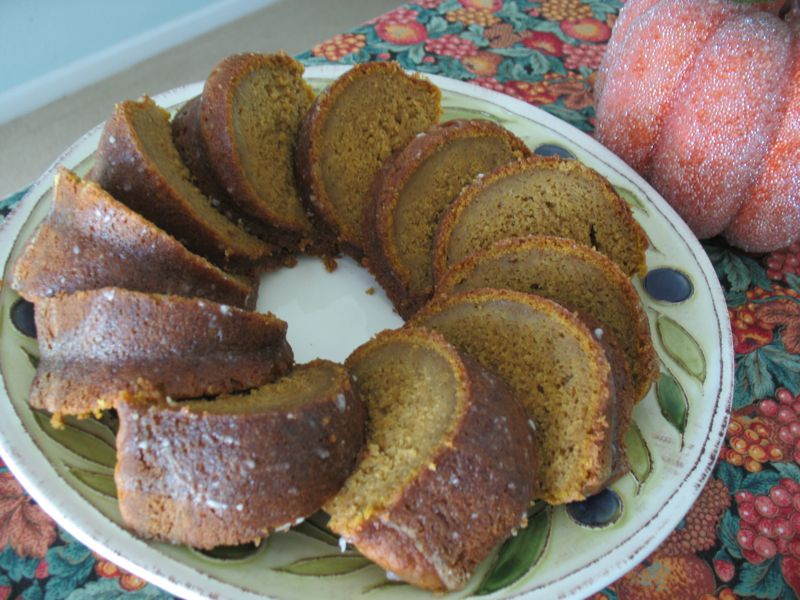
Pumpkin Spice Bundt Cake with Buttermilk Icing

I found this on the web, by a librarian who was having her own personal Bundt Cake Pan challenge: a new cake a day made in her much, un-used bundt pan.  I think I happened on her post right on this day, downloaded the recipe, which originally came from Gourmet Magazine in November 2005.  It is a very moist cake, mild on the spices and it is good for fall baking, leaving a delicous aroma of pumpkin in the air.

For cake
1 1/2 sticks (3/4 cup) unsalted butter, softened, plus additional for greasing bundt pan
2 1/4 – 2 1/2 cups all-purpose flour, plus additional for dusting pan
2 teaspoons baking powder
1 teaspoon baking soda
1 teaspoon cinnamon
3/4 teaspoon ground allspice
1/2 teaspoon salt
1 1/4 cups canned solid-pack pumpkin (from a 15-ounce can; not pie filling)
3/4 cup well-shaken buttermilk
1 teaspoon vanilla
1 1/4 cups granulated sugar
3 large eggs
For icing
2 tablespoons plus 2 teaspoons well-shaken buttermilk
1 1/2 cups confectioners sugar
Special equipment: a 10-inch nonstick bundt pan (3 quart)

Preparation

Make cake:
Put oven rack in middle position and preheat oven to 350°F. Butter bundt pan generously, then dust with flour, knocking out excess.

Whisk together flour (2 1/4 cups), baking powder, baking soda, cinnamon, allspice, and salt in a bowl. Whisk together pumpkin, 3/4 cup buttermilk, and vanilla in another bowl.

Beat butter (1 1/2 sticks) and granulated sugar in a large bowl with an electric mixer at medium-high speed until pale and fluffy, 3 to 5 minutes, then add eggs and beat 1 minute. Reduce speed to low and add flour and pumpkin mixtures alternately in batches, beginning and ending with flour mixture and mixing until batter is just smooth.

Spoon batter into pan, smoothing top, then bake until a wooden pick or skewer inserted in center of cake comes out clean, 45 to 50 minutes. Cool cake in pan on a rack 15 minutes, then invert rack over cake and reinvert cake onto rack. Cool 10 minutes more.

Make icing:
While cake is cooling, whisk together buttermilk and confectioners sugar until smooth. Drizzle icing over warm cake, then cool cake completely. Icing will harden slightly.

Cooks’ note: Cake can be made 3 days ahead and kept in an airtight container at room temperature.  I used the 2 1/4 cups flour it called for, but I believe 2 1/2 cups would be better.  I substituted in 3/4 whole wheat flour for a like amount of the white flour.