Bratten’s (New England-style) Clam Chowder

Bratten’s was the name of a seafood restaurant that began in Salt Lake City, but also had a satellite restaurant in Ogden Utah, where my parents used to go.

My father and mother lived for a time in Boston, New England as it was known and fell in love with their clam chowder; Bratten’s came close to what they remembered.

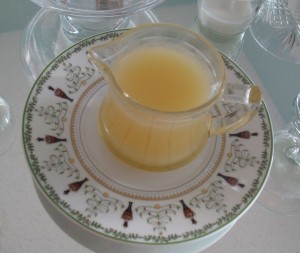
So, somehow I got the recipe (this was before the internet, so maybe from my mother?) and have made it and loved it for many years as it makes a thick chunky soup.  A niece, Lisa, asked if I had a good recipe, for she wanted to serve it on Christmas Eve.  So that’s what prompted this post.  When I get an original picture, I’ll post it, but for now, this one will have to do.

New England clam chowders are white, creamy soups.  If you want the red, tomato-based soup, that’s known as Manhattan-style clam chowder.

Bratten’s New England-style Clam Chowder

2 (6 1/2 ounce cans ) clams, or 1 pound minced clams with juice
1 cup finely chopped onion
1 cup finely diced celery
2 cups diced raw potatoes
1 quart milk
3/4 cup butter
3/4 cup flour
1 1/2 teaspoons salt
2-3 teaspoons red wine vinegar

Drain juice from clams and pour over vegetables (sometimes I have to add another can of clam juice to cover, or just use a little chicken broth or water).  Cook until tender, about 20 minutes.  Make a white sauce with the butter, flour and milk.*  Add undrained vegetables, clams (chopped, if desired) and vinegar and heat thoroughly.  Season with salt and pepper.  Cook’s Note: Don’t let it stand half warm on the stove.  After serving (immediately), stir it often to let it cool down and refrigerate.

*”Make a white sauce?”  Can you tell this is an old recipe?

To make a white sauce, melt the butter in a heavy pan, and add the flour all at once.  Cook, stirring, until this mixture–a roux–seems to become well-blended and cooked.  Add  the milk*, a little at a time, until it’s a creamy mix, then add the rest of the milk.  If the milk is cold, it will stop the cooking–that’s why I like to do it a little at a time.  Besides the Joy of Cooking Cookbook says to do it that way as well.

I always like soups better the next day.  This one is no exception.

When we were in Italy, their traditional Christmas Eve meal is a feast of many different kinds of fish.  This soup would be perfect to add that kind of celebration.  One more tidbit: we always serve this with Oyster Crackers, small round crackers found in the grocery store.  Trader Joe’s has the best ones.

*Note: Now we make our “white sauce” with chicken broth, and add a little cream at the end.

Butternut Crunch Toffee

I found this in our local newspaper, back in the day when newspapers had full-fledged cooking sections.  In the olden days, back when newspapers were read every day around the breakfast/dinner table, there were many pages devoted to Christmas cookies, delectable sweets, ways to manage the Big Day’s meal, and lots of other columns imported from other news services.  I cut it out and tried it.  My husband, whose favorite candy at the time was Almond Roca, declared this recipe A Hit.  I’ve made it just about every Christmas since.  According to the article, it came from Ann Hodgman’s Beat This! Cookbook, published in 1993.  Now you know really how old this clipping is.  I’ve made some changes: the recipe as listed below includes these changes.

1 cup (2 sticks) lightly salted butter
1 cup plus 2 tablespoons granulated sugar
1 tablespoon light corn syrup, dissolved in 2 tablespoons warm water
1 cup whole almonds
1 cup semi-sweet chocolate chips

Scatter the whole almonds over a cookie sheet and place under the broiler until lightly toasted–don’t burn!  Let cool, then chop them up in a food processor.  Scatter half of the almonds over a cookie sheet; reserve the rest for later.  [Note: I’ve always used a cookie sheet, but the recipe calls for a 9 x 13 inch pan.  Pick your poison.]

In a medium heavy saucepan, over medium to medium-low heat, melt the butter.  With a spatula kind of scoot some up on the sides so as to “butter the pan.”  As soon as the butter is melted, stir in the sugar. Continue to stir constantly until the sugar has dissolved and the mixture comes to a rolling boil (a boil that can not be stirred away).  Add the corn-syrup-water mixture and stir well; the mixture will hiss for a few seconds, but that’s all right.

With the pan still on the heat, cover the saucepan and leave it covered for 3 minutes (use a timer).  Then uncover it and stick in a candy thermometer.  Keeping the heat at medium-low, and stirring once in a while, heat the mixture to 300 degrees.  (My sister Christine also uses the paper bag test: she holds up a brown paper sack and when the toffee is that color, it’s time to yank it. *Note: for higher altitudes, for every 1000 feet above sea level, subtract 2 degrees.*)

When the candy finally reaches 300 degrees (it seems to get stuck at 220 and stays there for a long time), remove the candy from the heat immediately and pour it onto the chopped nuts, tilting the pan back and forth to cover it evenly.  The recipe says not to scrape the pan or the candy might crystallize, but I’ve been known to help down the last little ribbon of toffee mixture from the side with my spatula.  Other than that, I obey, and generally don’t scrape the pan.

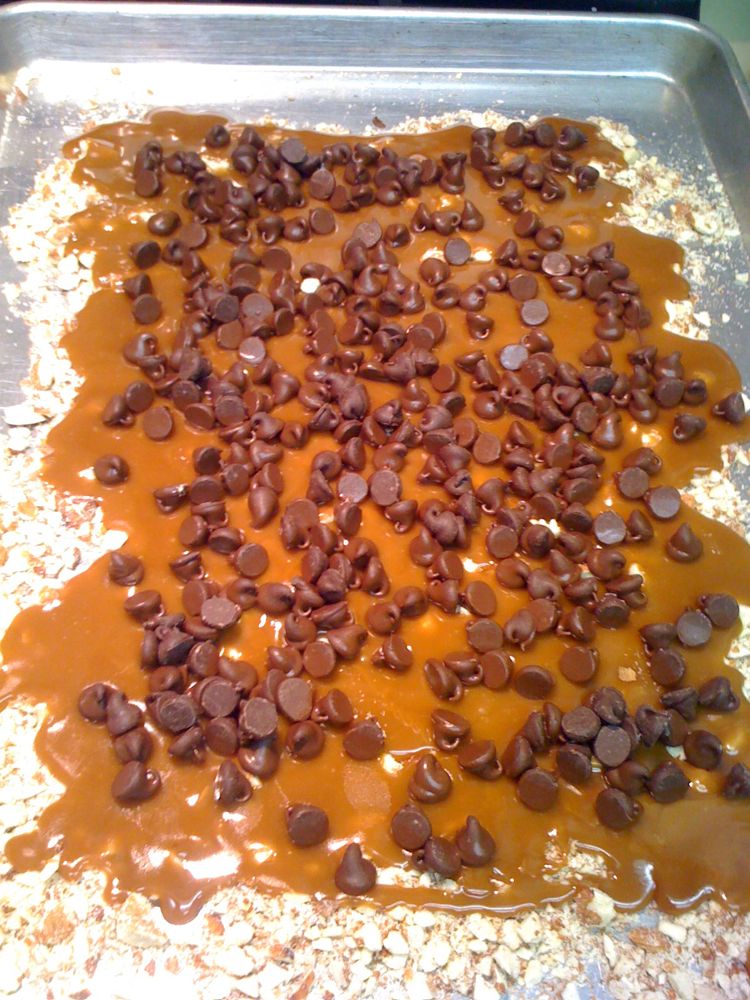
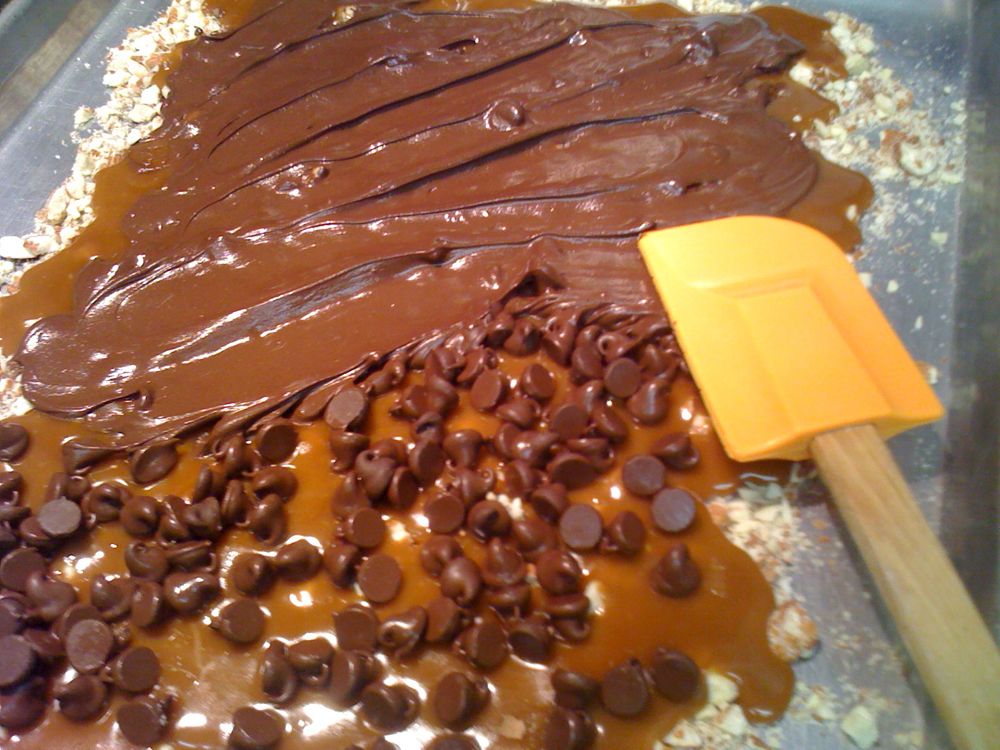
Let it cool for a few minutes, then scatter chocolate chips over the surface (another trick from my sister).  The heat from the cooling toffee will melt the chips.

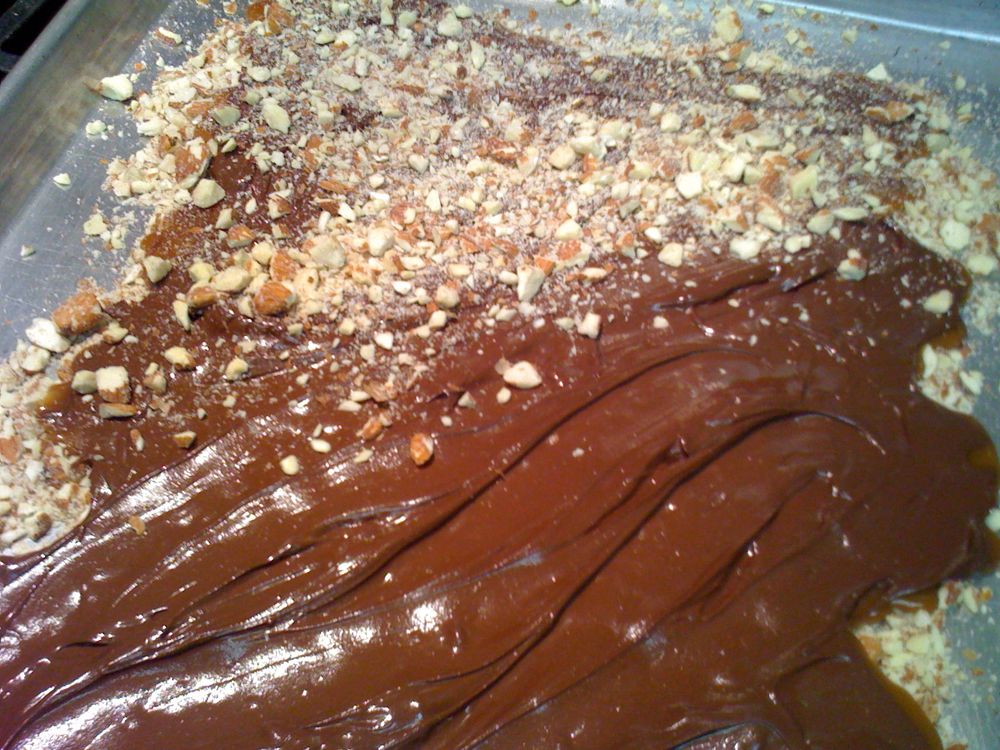
When they are melted, take a spatula and smooth out the chocolate.

Then scatter the remaining chopped almonds over the surface.

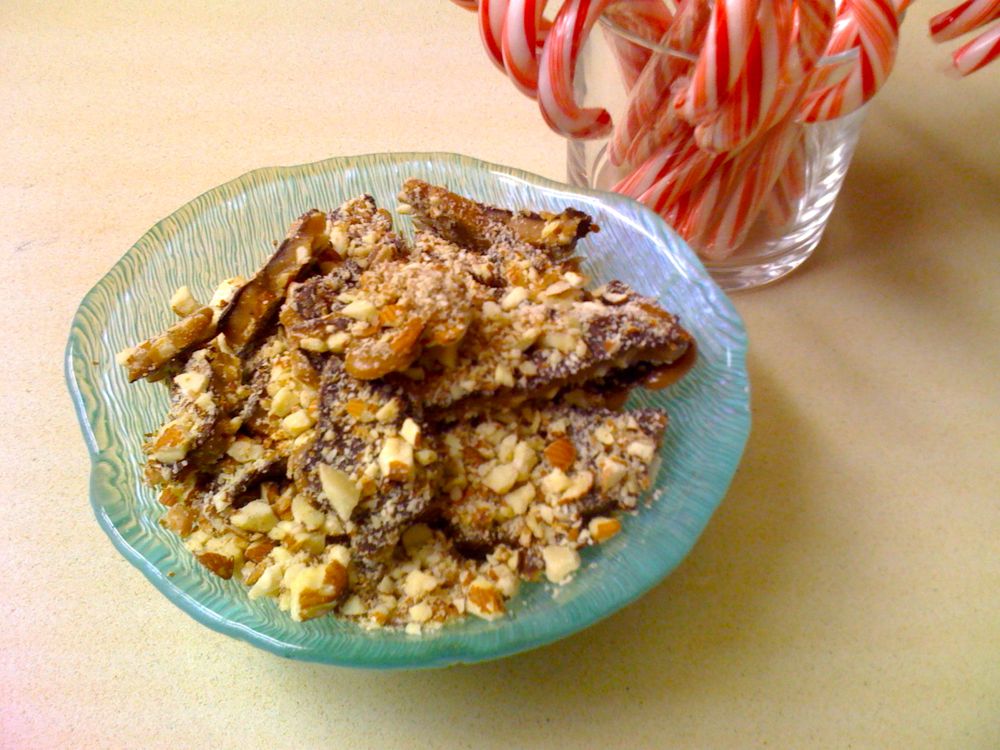
Let it really cool down.  A lot.  When the chocolate is set (about 2 hours or so), break up the toffee into pieces by “stabbing” straight down into the toffee with a paring knife until you hear it break. More stabs equals smaller pieces.  I put it into a dish, then pour the extra bits of nuts and toffee over that.  Makes about 1 pound of candy.

Crostini

I knew I wanted to serve crostini (basically toasted baguette slices) with the Torta, but after cooking solidly for a week, my brain went blank.  So I opened the new Gourmet cookbook (with green titles and cover–lovely, lovely–a sad end to a fine enterprise) and looked up Ruth Reichl’s how-to’s.  Saved.

Dave cut the La Brea bread baguette on an angle to get the nice shape on the slices.  I set them out on a rack, brushed both sides with good-quality olive oil, then salt and peppered them (lightly).  I toasted them lightly under the broiler, keeping an eye on them.

They were magnificent right out of the oven, and I ate them for my lunch.  They were a little less magnificent that night, even a little soggy, after being kept (in a bowl, under plastic wrap) all day.  I think it was the constant rain we had, because the next day Dave and I popped them into the toaster for just a minute, and they were back to magnificent–especially when slathered with the leftover Sun-dried Tomato and Pesto Torta.

To arrange in a bowl, first cover the bottom of the bowl with a single layer of crostini.  Then, layer the slices in a circle around the edges, building up as you go, leaving the middle hollow. It looks very cool, although I have no photos to show  you.


Sun-dried Tomato and Pesto Torta

I made this for the first time last December, and fought with it the whole time.  Part of the problem was that I tried a shortcut, and used pesto from Trader Joe’s.  Mistake.  If you decide to make this, consider it like investing in a plane trip abroad: once you board, there’s no getting off until the plane’s landed.  Stay with it and you’ll be rewarded with lots of compliments.

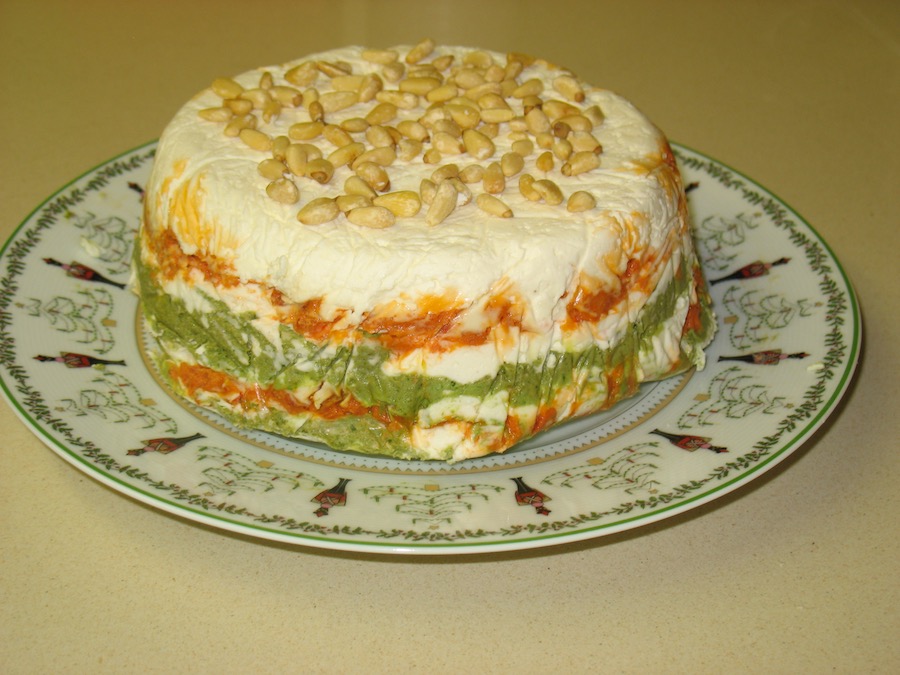
For the presentation, I garnished the top with pine nuts, set it out on my husband’s nutcracker Christmas plate up on a cake pedestal, and served it with crostini. The recipe is originally from Bon Appetit magazine, published in December 1999, and the only modification I made was to cut down on the garlic to two cloves (from the original recipe’s four cloves).  I think it was a good call as it was much better this year.

You can make this up to three days ahead; be sure to start at least one day in advance.

2 garlic cloves
1 1/2 cups (packed) fresh basil leaves
1/4 cup pine nuts
2 tablespoons extra-virgin olive oil
1 teaspoon fresh lemon juice
2 2/3 cups cream cheese, room temperature (about 21 ounces)
1/4 cup freshly grated Parmesan cheese
1 1/3 cups drained oil-packed sun-dried tomatoes (confession: I forgot to drain the oil; it was fine).  I used an 8 oz jar of julienned tomatoes from (where else?) Trader Joe’s.
1/3 cup tomato paste
1/2 cup butter, room temperature
Nonstick vegetable oil spray
Fresh basil sprigs
Toasted pine nuts
Crostini

Finely chop garlic in processor. Add basil, 1/4 cup pine nuts, oil and lemon juice. Process until well blended. Add 1/3 cup cream cheese and 1/4 cup Parmesan cheese. Using on/off turns, process just until blended. Transfer pesto to medium bowl.

Coarsely chop tomatoes in processor. Add tomato paste and process until mixture is almost smooth. Add 1/3 cup cream cheese and blend well.

Using electric mixer, beat 2 cups cream cheese and butter in large bowl until fluffy. Season with salt and pepper.

Spray 6-cup soufflé dish with nonstick spray. Line with plastic wrap, extending plastic over sides. Spread 3/4 cup cream cheese-butter mixture evenly over bottom of prepared dish. Top with half of tomato mixture, then 1/2 cup cream cheese-butter mixture, then half of pesto mixture. Repeat layering with 1/2 cup cream cheese-butter mixture, remaining tomato mixture, 1/2 cup cream cheese-butter mixture and remaining pesto. Top with remaining cream cheese-butter mixture. Cover and chill overnight. (Can be made 3 days ahead. Keep refrigerated.)

Invert torta onto platter. Peel off plastic. Garnish with basil sprigs and toasted pine nuts. Serve with crostini.

Makes 20 servings.

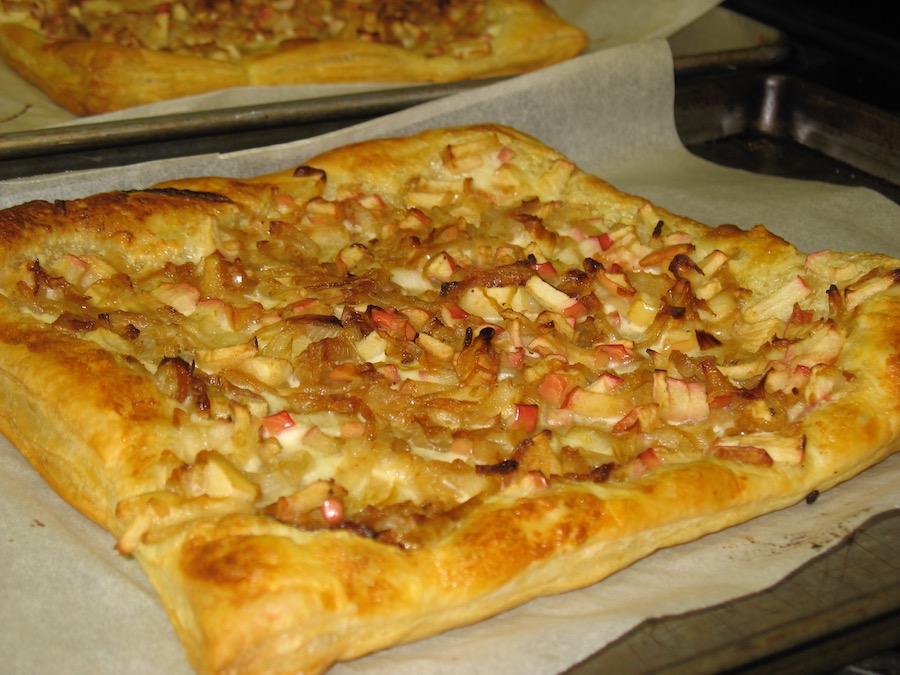
Caramelized Onion & Apple Tart

This was perhaps my favorite new recipe of the night, found online somewhere.  Purchase pre-made puff pastry (Pepperidge Farms is the one in our grocery store), top with crème fraîche, the onion/apple mixture and bake.  I slid them over onto a rack to cool for a minute, then sliced it up into squares.  I plan to make this one often; it’s easy and it went really quickly–both in the making of and into people’s mouths.

Ingredients:

2 tablespoons olive oil
2  and 1/2  medium onions, sliced
2 red apples (such as Braeburn or Gala), cut into very small dice
salt and pepper
2 sheets frozen puff pastry (from a 17.3-ounce package), thawed
1/2 cup crème fraîche (you can substitute sour cream, but check Trader Joe’s for the crème fraîche before you do)

Heat oven to 400º F. Heat the oil in a large skillet over medium-low heat. Add the onions and cook, stirring occasionally, until soft and golden brown, 12 to 15 minutes. Stir in the apples, some salt, a shake of pepper and cook until just tender, 2 minutes.

Place each sheet of pastry on a parchment-lined baking sheet and prick all over with a fork. Spread with the crème fraîche, leaving a one-quarter inch border. Top with the onion mixture and bake until the pastry is crisp and browned, approximately 30 minutes. Cut into pieces before serving.

Elizabeth’s Chili (via my mother)

My mother used to cook up great huge vats of chili on cold winter nights.  In hindsight, as an adult, I’m sure it was a regular-sized pot, but to a child, it seemed bottomless.  This was a good thing, because my mother’s chili was delicious and I loved plopping in oyster crackers, lifting up the spoonful to my mouth in a perfect combination of crunch, heat, and rich meaty-tomato taste.  I hadn’t made it for a while, then our church had a chili cook-off. I brushed off her recipe, modified it, added a few things and cooked it up for the Halloween celebration.

I made it again this past week for my husband’s holiday department party, along with a series of toppings.  It was very popular, surprising me.  The weather that night was cold and rainy–was that it?  Or is it because I’m noticing a huge trend towards all things Retro–and maybe this recipe qualifies.

I do think chili is best the next day.  After you stir the beans in, cool it down, stirring often to release the heat and steam (I always pour half off into another dish to quicken the process).  Store in the refrigerator in a sealed container until the next day; reheat either in crockpot or in microwave.

Ingredients:

2 Tbls. olive oil
1 pound stew meat, trimmed of most (not all) fat, and cut into half-inch (approx.) cubes
1/2 pound Jimmy Dean’s Sage sausage
1 yellow or red bell pepper, seeded and chopped into small dice
1 onion, peeled and chopped coarsely
1 large can Contadina Whole Italian Tomatoes (29 oz.)
1 8 oz can tomato sauce
1/2 cup water (if needed)
1 Tablespoon chili powder
3 whole cloves
salt and pepper
3 small cans red kidney beans

Heat olive oil in large stewpot and brown the stew meat.  Be careful not to crowd it; do in two batches if you need to.  Remove to the side, then brown the sausage, with the onion and pepper.  Add back the stew meat (and any juice).  Chop the canned tomatoes (this is messy–keep scraping it all into the pan as you go, esp. the juices), and plop those in.  Add the tomato sauce, the spices and stir well.  Simmer for 2 hours, adding water if necessary.  Skim the fat as it rises, if desired, or stir back in (don’t tell the Cholesterol Police!) for more flavor.  Add in the drained cans of red kidney beans, add more salt and pepper if needed.  Serve.

Toppings (listed in order of what was most popular):

Shredded cheese

Diced avocado, tossed with some lime juice to preserve the color

Sour Cream

Chopped green onion

Cilantro, chopped

Oyster crackers (hardly touched at all, but this was a West Coast crowd)

Note: Contadina tomatoes really do make a difference.  For an experiment, I bought Hunt’s, the Contadina, and a store brand.  Contadina won out by a mile in terms of color, ripeness and flavor.

Cheesy Sourdough Loaf

I stopped by our favorite little eatery, Jammin’ Bread, to pick up a loaf of their sourdough bread, as it’s flavorful, but not overwhelming, and has a good crust on it.  This is another one of those recipes found online.  It’s best eaten right after it’s brought out of the oven; if not, microwaving the chunks will restore the cheese to its melty consistency.

Preheat the oven to 350 degrees.

Ingredients

1 round loaf of sourdough bread, unsliced
½ yellow onion, cut into thin slivers
½ cup chopped parsley
½ pound of grated jack cheese ( one 8 ounce package)

Grate the cheese onto wax paper, then with your fingers, mix the chopped parsley, onion slivers and cheese together.

Cut bread into diagonal slices, about 1 inch apart, stopping before you cut through the bottom of the loaf.

Cut bread in the opposite direction in the same manner, creating diagonal shaped cubes, taking care not to cut through to the bottom.

Carefully stuff the space in between each cube with cheese mixture.

Wrap in heavy-duty foil and place in the oven for 20 minutes. Leave wrapped until ready to serve, but really, you should serve immediately.

Skewered Vegetables

I’m a party planner by accident, not by trade, and finding recipes mostly consists of opening every cookbook in my house and then looking online for whatever they may have.  If the website’s too complicated, I skip it (no time, of course).  This year for Dave’s department party, I realized we needed some vegetables but was just not up to blanching and arranging vegetables, so I went for these skewered vegetables instead.

Ingredients:

red or white-skinned baby potatoes
heirloom tomatoes (in a variety of colors)
fresh mozzerella cheese
olive oil and salt & pepper

Cook the baby potatoes in boiling salted water until just tender, about 10 minutes, then put into an ice-cube cold water bath.  Pat dry, then quarter (or half them if they are really tiny).

Twisting the skewer, ease the potato on first, skin-side up, then an heirloom tomato (they’re slightly crunchy), a cube of fresh mozzerella (the old packaged kind in your grocery store is not really good for this use–get FRESH), then a sweet grape tomato.  You can skewer more or less items, as you like.  Place on a pan, and lightly drizzle then with olive oil, then salt and pepper.  I arranged them on a platter, and nearly all were eaten.

Pumpkin Spice Bundt Cake with Buttermilk Icing

One day last month when I was trolling through my Google Reader, link led to link led to a site where a librarian for the Los Angeles Library System had determined to make better use of her bundt pan, and so was posting a bundt cake a day.  I found her early in the cycle and never returned, but did harvest this recipe, orginally published in November 2005 in Gourmet Magazine (may it Rest In Peace–and I was just about to subscribe to it, too!).

The other night we had three guests for dinner and I needed a quick dessert.  I whipped this up (yes, it’s really easy, though the mixing of the pumpkin with the buttermilk is unconventional), drizzled the frosting over the top and it was a hit at dinner.  I cut up the extra pieces, gave some away and Dave’s been taking a slice in his lunch all week.

yield: Makes 12 servings

For cake

1 1/2 sticks (3/4 cup) unsalted butter, softened, plus additional for greasing bundt pan
2 1/4 cups all-purpose flour plus additional for dusting pan
2 teaspoons baking powder
1 teaspoon baking soda
1 teaspoon cinnamon
3/4 teaspoon ground allspice
1/2 teaspoon salt
1 1/4 cups canned solid-pack pumpkin (from a 15-ounce can; not pie filling)
3/4 cup well-shaken buttermilk
1 teaspoon vanilla
1 1/4 cups granulated sugar
3 large eggs 

For icing
2 tablespoons plus 2 teaspoons well-shaken buttermilk
1 1/2 cups confectioners sugar

Special equipment: a 10-inch nonstick bundt pan (3 quart)

Preparation

Make cake:
Put oven rack in middle position and preheat oven to 350°F. Grease bundt pan generously, then dust with flour, knocking out excess.

Whisk together flour (2 1/4 cups), baking powder, baking soda, cinnamon, allspice, and salt in a bowl. Whisk together pumpkin, 3/4 cup buttermilk, and vanilla in another bowl.

Beat butter (1 1/2 sticks) and granulated sugar in a large bowl with an electric mixer at medium-high speed until pale and fluffy, 3 to 5 minutes, then add eggs and beat 1 minute. Reduce speed to low and add flour and pumpkin mixtures alternately in batches, beginning and ending with flour mixture and mixing until batter is just smooth.

Spoon batter into pan, smoothing top, then bake until a wooden pick or skewer inserted in center of cake comes out clean, 45 to 50 minutes. Cool cake in pan on a rack 15 minutes, then invert rack over cake and reinvert cake onto rack. Cool 10 minutes more.

Make icing:
While cake is cooling, whisk together buttermilk and confectioners sugar until smooth. Drizzle icing over warm cake, then cool cake completely. Icing will harden slightly.

Cooks’ note: Cake can be made 3 days ahead and kept in an airtight container at room temperature.